What muscles are used by Australian pull-ups?
The largest muscle group that Australian pull-ups are aimed at developing is the back.
Namely:
- Latissimus muscles. This is a large muscle responsible for the width of the back. In sports slang they are called “Wings”. The development of this muscle will give the back a reverse V shape. Depending on the grip we use, we can work different areas of the lats. Namely, the area closer to the spine and further from it. This is discussed in more detail later in the article. This muscle is responsible for bringing the arms to the body.
- Rhomboid major and minor muscles. This is a small muscle mass responsible for the movement of the shoulder blades. And since we definitely need to bring them together at the extreme point of the exercise. This means that these muscles will be involved.
- Trapezoid. Acts as an assistant for the rhomboid muscles. That is, it helps them bring their shoulder blades together.
- Teres major and minor muscles. These muscles are located on the shoulder blade. And together with the broadest, they are responsible for the movement of the shoulder.
You can learn more about the back muscles from the article “ANATOMY OF THE BACK MUSCLES“
Also, in addition to the main ones, there are smaller muscle groups that also receive load. This:
- Posterior bundle of deltoid muscles. Works well when moving the arm back. Especially when the bar is grabbed with a wide grip. Also acts as a shoulder stabilizer.
- Biceps. It works in the final phase, when we bend the arm at the elbow joint. With the correct technique, it plays a secondary role.
Australian pull-ups
And of course, this exercise is not complete without the help of the stabilizer muscles. Such as:
- Abdominal muscles . The spine is stabilized from the front. And prevent it from twisting.
- Spinal extensors together with the gluteal muscles. The spine is stabilized from behind.
- Leg muscles. Quadriceps, hamstrings and calves. Legs are stabilized.
As you can see, the exercise is rightfully called basic. Since several joints are involved. Shoulder and elbows.
Variations of the exercise
Australian exercises can be performed in different styles, which involve focusing on one or another area of the muscles.
With bent knees
By shortening the length of the body, the exercise becomes easier. Bend at the knees will help your upper body complete the exercise by pushing your feet into the floor.
Wide grip
To remove the load from the biceps and increase it on the back muscles, you need to grab the bar with a wide grip. Among other things, this grip can load the triceps, latissimus and rhomboid muscles.
Reverse wide grip
As for the distribution of muscle load, it is practically no different from the previous one, but the advantage of this method is that due to the position of the hands with this grip, the elbows are automatically directed along the line of the body, which further creates a load on the latissimus muscles.
Narrow grip
Using such a grip, the emphasis in the muscles also shifts, but this time the main load goes to the biceps and forearms. It is necessary to understand that to perform the exercise with such a grip, maximum wrist mobility is required.
Neutral grip
For some athletes, performing horizontal pull-ups with a neutral grip will be preferable due to the involvement of the elbow and shoulder joints. For this exercise you need 2 parallel bars. You can also use ordinary bars. You can work on different angles to find the optimal load on your muscles.
With feet resting on an elevated surface
Leg-supported pull-ups
To make the exercise easier, you can raise the bar higher, and to make it more difficult, lower it as low as possible, but in any case, there is a certain limit when the body is almost on the floor, so to avoid this, you can put your feet on an elevated surface. The higher it is, the more difficult the exercise will be.
Variation "archer"
In fact, the exercise implies an analogy with archer push-ups. To do this, you need to take the starting position with a wide grip. Next, you need to move from one hand to the other, straightening your arms in turn. Due to the fact that the exercise is quite difficult, you may have to do it with your legs wide apart the first few times to keep your body straight. After some time, you will be able to perform the exercise with your legs together.
On one hand
Starting position with a narrow grip, but your legs should be wide apart. One hand must be removed from the bar and pressed to the side. The arm on which the load will be applied should be shifted on the bar closer to the center of the body. To perform the exercise, you need to tense all the muscles of the body, and then pull your chest towards the bar. It is very important when performing the exercise to avoid turning the body as much as possible, but small turns are inevitable.
Benefits of this exercise
The advantages of this type of pull-ups include the following:
- Performing horizontal pull-ups is much easier than classic pull-ups. Therefore, they are suitable for both beginners and professionals. And most importantly, girls can do them. This will allow them to strengthen their back muscles.
- This exercise will help increase the number of repetitions in PULL-UPS.
- They can be performed in any environment. At home, on the street or in the gym. The main thing is to find a low horizontal bar or rings. At home, use a low table that can support your weight. In the gym, a Smith machine or squat frame is suitable for these purposes.
- Suitable for people with back injuries. Since there is no load on the spine. Sometimes Australian pull-ups are recommended for athletes to do during the rehabilitation period after injuries.
- Wide variety of grips and techniques. They will help to load the muscles from various angles. Making your training more interesting and intense.
- Doing pull-ups on a low bar makes it easier to feel the work of your back muscles. Therefore, this exercise will help to establish your neuromuscular connection with the area being worked.
As you can see, Australian pull-ups have an impressive number of benefits. And they can benefit not only beginners, but also professional athletes. Although now the gym industry is increasingly moving away from the usual methods of training with free weights. Replacing everything with newfangled exercise machines. Of course, there is nothing wrong with this, but you still shouldn’t forget about pull-ups. After all, it was they who gave expressive form to many famous athletes.
Pull-up while lying on a low bar
Pull-ups from a hanging position lying on a low bar can be used as an independent exercise, or as a lead-in to a more complex traditional type of pull-up. It is necessary to prepare muscles, ligaments and joints for increased load and is suitable even for a beginner. It is also used by experienced athletes as a follow-up exercise for the biceps and back muscles after core training.
Standards for pull-ups on a low bar
Pull-ups while lying down at school | ||||||
| Boys | Class | Girls | ||||
| 5 | 4 | 3 | 5 | 4 | 3 | |
| 12 | 7 | 5 | 1 class | 10 | 5 | 3 |
| 14 | 9 | 7 | 2nd grade | 11 | 7 | 5 |
| 16 | 11 | 9 | 3rd grade | 12 | 8 | 6 |
| 17 | 13 | 11 | 4th grade | 13 | 9 | 7 |
| 19 | 15 | 13 | 5th grade | 15 | 10 | 8 |
| Boys | GTO hanging pull-up/bar 90 cm | Girls | ||||
| 6 | 9 | 15 | 1st stage (6-8 years) | 4 | 6 | 11 |
| 9 | 12 | 20 | Level 2 (9-10 years) | 7 | 9 | 15 |
| 11 | 15 | 23 | Level 3 (11-12 years old) | 9 | 11 | 17 |
| 13 | 17 | 24 | Level 4 (13-15 years old) | 10 | 12 | 18 |
| Level 5 (16-17 years old) | 11 | 13 | 19 | |||
| Men | Women | |||||
| Level 6 (18-24 years old) | 10 | 12 | 18 | |||
| Level 6 (25-29 years old) | 9 | 11 | 17 | |||
| 11 | 14 | 22 | 7th stage (30-34 years old) | 8 | 10 | 16 |
| 10 | 13 | 21 | 7th stage (35-39 years old) | 7 | 9 | 15 |
| 9 | 11 | 20 | 8th stage (40-44 years old) | 6 | 8 | 14 |
| 7 | 10 | 18 | 8th stage (45-49 years old) | 5 | 7 | 12 |
| 4 | 7 | 15 | 9th stage (50-54 years old) | 4 | 6 | 10 |
| 3 | 5 | 12 | 9th stage (55-59 years old) | 3 | 5 | 9 |
What technique is used to perform a hanging pull-up while lying down?
The height of the horizontal bar for this exercise determines the degree of load.
- A beginner should start with a higher horizontal bar, which helps strengthen different muscle groups. Also, at the same time, the execution technique is perfectly developed and the muscles begin to get used to such loads.
- An experienced athlete can train on the bar. When hanging on it, he will be able to almost touch the floor. But the main thing here is to keep the distance from the floor to the back at least 10 cm.
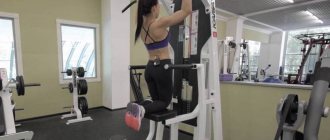
If you train in the gym, then you should choose a Smith machine, on which you can perform different types of exercises: squats, pull-ups, etc. The height of the horizontal bar here can be easily adjusted. The bar of the crossbar should vary between 0.9 - 1.1 m, depending on the level of training of the person, his age and gender.
During the exercise, your legs should be in a straight line with your head and body. The hands should be spread shoulder-width apart, and the heels should be rested on a support no more than 5 cm high.
Actions are carried out in the following order:
- when working out on a special simulator, the bar is placed at the desired level;
- Be as close to the crossbar as possible;
- Sit down, holding the bar;
- Position yourself so that your chin is above the bar;
- Straighten your body, taking a step forward, while leaving your body in a straight line;
- Extend your arms to assume a hanging position;
- Don't ignore your feet. When the position is stable, there is no slipping;
- Bend your elbows and pull yourself up, almost touching your chest to the horizontal bar;
- As you inhale, the arms extend and the body smoothly lowers. You need to constantly monitor your body;
- Do the required number of repetitions.
During training, you need to ensure that your breathing is uniform. When inhaling we go down, when exhaling, therefore, vice versa.
The exercise can be performed in different ways:
- in order for the lower latissimus muscles to receive the load, the hang should be with a reverse grip;
- To do pull-ups on your arms, you need to bend while performing the exercise.
The main thing that distinguishes this type from the standard version is that there is no need to hold the body straight, it is important to bend the pelvis so that it is below the crossbar. This is much easier than the classic pull-up.
What kind of load do the muscles receive?
You will need to participate in this exercise:
- Muscles of the forearms and back;
- Biceps;
- Muscles of the shoulder girdle.
In addition, the lower back and posterior thigh muscles receive stress. To stabilize the lumbar spine (to avoid strong deflection), the abdominal press must also work. This is why preparation should be taken extremely seriously.
Alternatively, horizontal pull-ups are called Australian pull-ups. They help develop different muscle groups. So, for example, the biceps and dorsal muscles, which are called the latissimus, undergo active work. The level of load on a certain group is determined by the grip used by the athlete, as well as the width of the hands:
- when they are widely spaced, the back receives more load, but not the biceps, and, therefore, vice versa;
- for uniform use of muscle groups, an average grip width is required;
- with a wide forward grip, the wings and latissimus muscles are ideally worked, and with a reverse grip, when the crossbar is grasped with the hands from below, the biceps are developed.
In this case, the hands should be in such a position that the palms are turned upward, when the hands are narrowly positioned between each other. To make the exercise in question convenient to perform regardless of the chosen modification, the specific width of the girth must be adjusted by the athlete himself.
Common mistakes
To prevent them, you need to follow the following instructions:
- there should be no jerks, the body should not bend;
- there should be fixations in the starting position for half a second;
- the chin should rise above the bar;
- your arms should bend at the same time.
| 6 | 9 | 15 | 1st stage (6-8 years) | 4 | 6 | 11 |
| 9 | 12 | 20 | Level 2 (9-10 years) | 7 | 9 | 15 |
| 11 | 15 | 23 | Level 3 (11-12 years old) | 9 | 11 | 17 |
| 13 | 17 | 24 | Level 4 (13-15 years old) | 10 | 12 | 18 |
| Level 5 (16-17 years old) | 11 | 13 | 19 | |||
| Men | Women | |||||
| Level 6 (18-24 years old) | 10 | 12 | 18 | |||
| Level 6 (25-29 years old) | 9 | 11 | 17 | |||
| 11 | 14 | 22 | 7th stage (30-34 years old) | 8 | 10 | 16 |
| 10 | 13 | 21 | 7th stage (35-39 years old) | 7 | 9 | 15 |
| 9 | 11 | 20 | 8th stage (40-44 years old) | 6 | 8 | 14 |
| 7 | 10 | 18 | 8th stage (45-49 years old) | 5 | 7 | 12 |
| 4 | 7 | 15 | 9th stage (50-54 years old) | 4 | 6 | 10 |
| 3 | 5 | 12 | 9th stage (55-59 years old) | 3 | 5 | 9 |
Grip width
There are several options for gripping the horizontal bar. These are: wide, medium and narrow. Depending on what grip we choose, the amplitude of movement will change. That is, to shorten or increase. And also the area of influence on the lats.
- Wide. With this grip, the range of movement will be short. And doing pull-ups will become much harder. Therefore, it is better for beginners to save it for later. When the arms are positioned wide, the outer part of the latissimus muscles will receive more load, and the rear deltoids will also be more stressed.
- Average. This is an intermediate grip. Which equally loads the inside and outside of the lats. Therefore, doing pull-ups with this arm position is much easier. But do not forget that with a medium grip, the biceps are more involved in the work. Since the arms will bend more than with a wide one. And of course, the amplitude of movement will increase. This means we can stretch our lats more at the bottom.
- Narrow. This one is enough and allows you to work out the inner part of the lats. That is, the area is closer to the spine. The movement itself will take place in maximum amplitude. But now the biceps will begin to assist quite strongly when lifting the body up. Keep this point in mind when performing pull-ups; narrow is enough.
Find the one where you feel the maximum work of your back muscles. And make it the main one in this exercise. But you shouldn’t stop at just one thing. For beginners, you can progress by changing your hand position. Starting with a medium grip, then narrow and wide. More professional athletes prefer to alternate all 3 in one workout.
Training options
Ways to perform Australian pull-ups:
- with a reverse grip, keeping your hands shoulder-width apart - this way the maximum load is achieved for the broad muscles of the back and biceps;
- with a straight grip, in which the hands are shoulder-width apart - a load for the biceps and upper back muscles;
- straight grip with arms wide apart - training for the trapezius muscles;
- plyometric method, which involves alternating grip changes after each execution;
- training on one arm - suitable exclusively for well-trained athletes whose muscles are sufficiently developed;
- on one arm and leg - a more complex version of the previous method.
Beginner athletes are best suited for exercises performed with a forward and reverse grip. First of all, this applies to those who, with the help of Australian training, want to learn how to do pull-ups in the classical way. In such a situation, performing several approaches 10 times will ensure the development of basic skills in exercises on the bar. A little later, the bar can be lowered a little to begin learning more complex variations of hanging. After all, even experienced athletes often use Australian pull-ups, albeit on a low bar, for additional muscle pumping at the end of the workout.
Type of grip
We can modify pull-ups by more than just grip width. The load will also change depending on how we grab the crossbar from above, below or in parallel.
- Grabs from above (pronated) . That is, we grab the bar as in any classic pull-up from above by the bar. The palms are facing in the direction of the legs. This grip option puts less stress on the biceps, since it is more difficult for us to bend the arm at the elbow. Therefore, the back will be more involved. But despite turning off the biceps with this grip, it is more difficult to move the elbows back. Especially if you use a wide hand position. Therefore, we will not be able to maximally squeeze the latissimus muscles.
- Underhand grip (supinated). On the contrary, it will involve the biceps more strongly. Therefore, it will be easier to perform pull-ups with this grip. But at the same time, we will be able to move our elbows back further, due to which we will achieve maximum contraction of the lats.
- Neutral grip . Of course, we won’t be able to grab the crossbar like that. Therefore, a neutral grip is mainly used when working with rings or TRX loops. This does not greatly affect the efficiency. But it is worth considering that this grip is anatomically more convenient for us. And we can bring our elbows just as far together as with an underhand grip.
I also advise beginners to start with a lighter option, this is enough from below. And then, as you practice, change the position of your hands until you find a more comfortable position for yourself. You should focus on the sensations in the target muscles. Where you feel it most strongly, that grip will be most effective for you.
Leg position
Oddly enough, legs also play an important role in Australian pull-ups. And their position can both simplify the exercise and make it more difficult.
- First level. Legs bent at the knee joint 90°. And they stand on the floor. Thanks to this positioning, part of the weight will be taken by the legs, thereby making it easier for us to complete the given number of pull-ups.
- Average level. The legs are fully straightened and the heels rest on the floor. You will immediately notice how the exercise becomes more difficult.
- Advanced level. The legs are completely straight and lie on a hill. Thanks to this setting, we will take an even more horizontal position. And following the logic of the previous paragraph about body position. We can conclude that the legs will not only not take the weight on themselves, but on the contrary, they themselves will act as an additional burden.
As you can see, Australian pull-ups can be adjusted to suit almost any person. Regardless of gender and level of training.
Execution technique
To begin, take your starting position. To do this we need to find a low horizontal bar. If we work out in the gym and use the Smith machine.
Initial position:
- Set the barbell to the desired height. In the classic version, this is approximately at hip level. The main thing is that while extending our arms, we do not touch the floor with our backs. The same goes for the pull-up option.
- We grab the bar (horizontal bar, loops, rings) with the selected grip. Straighten your arms completely. We have to hang on to them.
- Next, choose a comfortable position for your legs. And we straighten up completely. So that from the heels to the very head our body is stretched like a string. Tighten your pelvis so that it does not sag down.
Performance:
- As you exhale, we begin to pull the chest toward the bar. The movement should occur by bringing the shoulder blades together, and not by bending the arm at the elbow joint.
- At the top point, take a short break. And as you inhale, we begin to lower ourselves down under control.
Watch your movements. When lifted, the horizontal bar should touch the lower part of the pectoral muscles. When lowering down, do not round your back.
Recommendations for implementation
- Your movement should take place in three stages. 1) Pull your shoulders back. 2) We begin to bring the shoulder blades together. 3) Bend your arms at the elbow joint. By doing this exercise, you can feel the work of the latissimus muscles.
- Work at the maximum available amplitude.
- As you do the last two reps, pause at the top for as long as you can. Then start slowly going down. This technique will allow your muscles to work statically. Making them stronger and stronger.
- Constantly use different grips and techniques for constant progression.
- Once you can do 12-15 reps in 4 sets, you can move on to regular pull-ups. If you like this exercise, then you can add weight by placing a weight plate on your chest. Or use a special vest with weighting.
- If you want to work your biceps with this exercise. Then use a reverse grip. And pull not to your chest, but to your forehead.
- Keep your back straight throughout the entire exercise.
- Control your movements, avoiding swaying and lifting due to inertia.
Remember, only the right technique can give you the result you want. Moreover, in the shortest possible time period. Don’t rush to move from one option to another if you feel you’re not ready yet. But you shouldn’t stay in one place. Still, load progression is the basis for muscle growth.
Inclusion in the training program
Australian pull-ups can be safely done at the beginning of training and done 3-5 sets for the maximum number of times. A change in grip is also welcome. To target all areas of the back.
They are also used to learn how to perform classic pull-ups. Or increase the number of repetitions in them. For this purpose, light training is used. That is, we do three approaches without rest, first with a medium grip, then with a wide grip and finally with a narrow grip. Basically, do each approach to failure. In total, perform 3-4 such circles.
As you can see, the Australian pull-up, although little known, is extremely effective. Any athlete can use them. Therefore, at the initial stage, I would recommend that you use them in your training. And when you reach a professional level. Then decide for yourself whether to leave them or it’s time to move to a new level.
Good luck to everyone in your training!
The best training programs with this exercise
Among the training programs that use the “Australian pull-up” exercise, these programs are among the best according to athletes:
Keeping fit
36days
Newbie
Physical preparation for passing the GTO standards 5, 6, and 7 levels (for men)
More details
Muscle gain
12 days
Experienced
SPARTA: workout plan for weight gain
More details
