After surgery for an intervertebral hernia in the cervical spine, I became a group 1 disabled person for life. Both legs and my right arm completely stopped working, my back and abdominal muscles practically didn’t work, problems began with the pelvic organs, bedsores appeared, etc. It seemed that a bell from another world had already rung for me. Realizing the severity of my condition, I began, with titanic persistence, to practically recreate myself.
A patient with any level of spinal damage will be rehabilitated faster if he begins to engage in physical therapy as early as possible. At the same time, the restorative effect directly depends on his conscious participation in treatment, on his willingness to work, gradually moving from easy exercises to more complex ones.
First of all, it is necessary to develop the muscles of the arms: restoring their functions will allow the patient to feel more or less independent from others, which is of great importance. At the first stage, I, lying on my back, revived the muscles of the hands, wrists and forearm with special exercises, developed mobility of the spine in the cervical region, strengthened the neck muscles, and then did exercises for all these muscle groups using a pulley system and dumbbells. I performed the exercises three times a day, the number of approaches was 3-6; in each exercise, with one approach, I did no more than 12 special movements. Two years later, when my hands came back to life, I increased the number of movements.
This complex will be useful for those patients with damage to the cervical spine who have at least partially preserved the conductivity of spinal cord impulses. But I want to warn you: when performing the complex, you must follow the rules of self-control.
1. Exercises for fingers and wrists
1. Join the four fingers of both hands in a lock in front of the chest. The thumbs, pressed with the tips to each other, turn and rotate in both directions. 2. In the same position, rotate your thumbs relative to each other. 3. Unclench your fingers and forcefully clench them into a fist. 4. Fan out your fingers and connect them again. 5. Join your fingers in a lock in front of your chest. Turn the hands in both directions and rotate them relative to the wrist. 6. From the same position, raise and lower the hand and rotate it relative to the wrist. 7. Join your palms. Squeeze them forcefully and rotate them in both directions relative to the wrist. 8. Interlace two fingers at a time and pull them in opposite directions. 9. Take one brush with another. Turn and rotate the 2nd free hand in both directions. 10. Hold a nut (or a small hard ball) between your palms. Make circular movements with your palms, squeezing the nut with effort. 11. Place a foam pad on your palm. Bend your fingers, squeezing it (after the bending force appears in the fingers, the pad is replaced with an expander). 12. Pick up a rubber bat. Slowly turn your hands in opposite directions (palms should not slide over the surface of the bat). 13. Clamp one end of the bit. Use your hand to tilt the free end of the bat in both directions. 14. Touch the rosary with your fingers (you can string an ordinary wooden abacus on a string). 15. Hold two nuts in one palm. Rotate them with your fingers. 16. Connect four fingers in front of the chest in a lock with palms facing out. Stretch your arms forward. 17. Weave and unravel the ends of three ropes with a diameter of 6-8 mm. 18. Press your palm firmly against the surface. Clench your fingers into a fist and straighten them.
2. Exercises for the neck, arms and shoulder girdle
1. Pressing your palm on your forehead, resist it with an oncoming movement of your head. 2. Pressing your palm on your head in the temple area, resist it. 3. Lower your head down, trying to press it to your chest if possible. 4. Place your palms with edges under your chin. Tilt your head, overcoming the resistance of your palms, while simultaneously turning them to a horizontal position. 5. Raise both shoulders simultaneously with the maximum possible amplitude (MVA), hold them in this position for 2 seconds 6. Raise each shoulder alternately with MVA, holding it in this position for 2 seconds. 7. Abduct and abduct the shoulders with MBA. 8. Rotate your shoulders in both directions with MBA. 9. Connect your fingers in front of your chest into a lock. Lower and raise elbows with MBA. 10. Bring your palms and elbows together in front of your chest. Rotate your forearms with MBA. 11. Connect the hands at the back of the head into a lock. Bring your elbows in and out, and then rotate them in both directions with an MBA. 12. Bend your elbows and place your hands on your shoulders. Rotate elbows with MBA. 13. Take in your hands the ends of the rope thrown over the pulley. Raise one arm - the other falls under its own weight. 14. Take in your hands a bracket sliding along the pipe; a weight is attached to the rope on the side of the legs. Move the bracket along the pipe. 15. Take in your hands a bracket that slides along the pipe; a load is attached to the rope on the side of the head. Move the bracket along the pipe. 16. Place your hands in front of your chest into the loop through which the Balkan frame pipe is passed. Lift your torso off the bed. 17. Use brushes to cover the pipe of the Balkan frame. Move your hands back and forth along the pipe. 18. Take the ends of the bat in your hands. Bring your arms in and out, overcoming the elasticity of the rubber bat. 19. Use one hand (and then two hands) to hold a load suspended on a rope. Swing the load sideways with the MBA. 20. Push up the barbell. 21. Climb the steps of the rope ladder with your hands, lifting your torso to the maximum possible angle of elevation. 22. Grasp the back of the bed with your hands. Pull yourself up with your arms. 23. With one hand (and then with both hands), take the end of the rope, the other end of which is tied to the frame. Rotate the free end of the rope with the MBA.
3. Exercises for the arms and shoulder girdle with a block system
For a year and a half, I fanatically performed all possible exercises with my hands while lying in bed. Gradually, my fingers began to move, my hands began to clench more tightly, the pain in my wrist from compressive and tensile loads disappeared, my right hand came to life, and my left one became stronger. The question arose about further strengthening the muscles. A block system or rubber expanders are excellent for this purpose. The pulley system is preferable to resistance bands because it makes it easier to control the load. Exercises with the pulley system can be performed while sitting in a stroller or lying in bed. The size of the load suspended on the rope of the pulley system should be no more than 3 kg. But one important feature must be taken into account: the more time has passed since the spinal injury, the more caution should be exercised when moving on to weight-bearing exercises. It is unacceptable for spinal specialists to work with a load through force, overcoming pain. Due to the imbalance of movements of different muscle groups, spasticity and cramps can occur in any part of the body, which can even lead to joint dislocations. Therefore, exercises at the initial stage should be performed without weights, creating conditions for “complete weightlessness” for the hands.
1. Take a rope in your hand, thrown over a block in front above your head, with a load suspended in front. Holding your arms in front of your chest, bend them at the elbows and straighten them to knee level. 2. I.p. - the same, but the load is suspended from the back. 3. Take a rope in your hand, passed through two pulleys: one located above your head, the other at knee level, both behind your back. The load is hung at the back. Bend your elbows and raise them to chest level, then straighten your arms and raise them up. 4. Two blocks are located above the head on the right and left, weights are suspended on the sides of the body. Make straight arms swings with MBA. 5. Two blocks are located above the head (in front and behind), another one is located below the front. Raise your arms straight from the chest and lower them from the MBA. 6. Two blocks behind the head, weights behind. Counter each, and then with both hands, swing in front of the chest with straight arms with MBA. 7. The blocks are located at shoulder level in front of the chest, weights on the sides. Bend and straighten your arms at the elbows in front of your chest with MBA, then spreading your arms to the sides, then connecting them in front of your chest. 8. Block above your head from behind, weight behind your back. Bend and straighten both arms from the back with MBA. 9. With your hand bent at the elbow, take the end of the rope passed through the pulley located at shoulder level. A weight is suspended from the end of the rope. Lower the forearm from a vertical position to a horizontal one and return it to a vertical one. 10. I. p. - the same, but the block is located above the head. Bend and straighten your arm with MBA. 11. I. p. - as in exercise 6, but the weights and blocks are located in front of the chest. Counter each, and then with both hands, swing in front of the chest with an MBA. 12. I. p. - as in exercise 9, but the block is located on the side of the unloaded hand. Raise the forearm from a horizontal to a vertical position and return to a horizontal position. 13. Place your hands on the pedals of the floor exercise bike. In the absence of a braking device, a load is suspended on one of the pedals. Use your hands to rotate the pedals in both directions. 14. I. p. - as in exercise 7, but the blocks are located at the back at shoulder level. Straighten your arms and bend them in front of your chest. 15. I. p. - as in exercise 7, but the blocks are located in front at shoulder level. Bend and straighten your arms in front of your chest.
4. Exercises for the arms and shoulder girdle with dumbbells
For about a year I performed a set of exercises with the block system. The flexor and extensor muscles of the right arm came to life (although a slight residual tension was still felt in them). I could now cook food, repair shoes, household appliances, draw, and write without much difficulty. At the same time, I began to notice that my right hand could work in tandem with my left, that is, the coordination of hand movements was restored. But it was difficult for me to raise my right arm to shoulder level or move it to the side - due to the weakness of the shoulder muscles. Therefore, a new set of special exercises was required for the right hand to teach it to work with weight. These exercises can be performed either sitting in a stroller or lying in bed, with or without dumbbells in your hands. The weight of dumbbells should not exceed 1 kg. When performing these exercises, almost all the muscles of the arms and shoulder girdle work.
1. Bend your elbows at shoulder level. Raise your arms to the sides and bring them to your chest. 2. Extend your arms forward in front of your chest at shoulder level. Rotate your arms in both directions with MBA. 3. Extend your arms to the sides at shoulder level. Rotate your arms in both directions with MBA. 4. Bend your elbows in front of your chest at shoulder level. Rotate the brushes in both directions with MBA. 5. Lower your arms along your body. With both hands (and then counter) perform swings with straight arms in front of the chest with MBA. 6. Bend your elbows, press your hands to your shoulders. Extend and bend both arms together, and then alternately. 7. Cross your arms in front of your chest at shoulder level. Raise your arms to the sides and return them to the standing position, changing places. 8. Extend your arms forward at shoulder level. Move the brushes in a vertical plane relative to each other. 9. Lower your arms along your body. Both arms together, and then alternately, bend and unbend, pressing the hands to the shoulders. 10. Lower your arms along your body. Both arms are together, and then alternately bend and unbend, pressing your hands to your armpits. 11. Extend your arms forward at shoulder level. Both arms, and then alternately bend and straighten your elbows in front of your chest. 12. Bend your elbows, press your hands to your shoulders. Both arms at the same time, and then alternately spread to the sides and bring the hands back to the shoulders. 13. Lower your arms along your body. Straight arms together, and then alternately do side swings. 14. Lower your arms along your body. Both hands are together, and then alternately bend in front of the chest at the elbows. 15. Hands along the body. Tilt the body to the left - to the right, bending one arm at the elbow.
Ivan Bogodyazh, Candidate of Technical Sciences
https://vsepromedok.xyz/narodnaja-medicina-2/oporno-dvigatelnyj-apparat-2/22835-zapiski-spinalnika-uprazhnenija-dlja-oporno.html
Exercises for disabled people with spinal problems
- Warm up and stretch the neck muscles. Sitting in a stroller, we turn our heads left and right 10 times. The movements are very smooth without jerking. Next, we tilt our heads - we aim for the shoulder 10 times, back and forth 10 times. We finish with semicircular movements, 5 in each direction (if you feel dizzy, reduce the number of movements or leave them altogether).
- Now let's focus on the hands. Rotate your hands, then rotate your forearms, ending with your whole arm. You can add shoulder rotations when your arms are down.
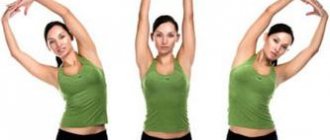
- We intertwine our fingers, turn the interlace inside out and reach for the ceiling with our hands turned out.
- Sitting in the stroller, we lie down so that our chest is on our knees. At this time, we clasp our hands behind our backs and raise them as high as possible - 5-6 times.
- Bend exercises from the “sitting” position to the “chest on the knees, hands behind the back” position. With each bend, we stretch our upper body forward, then you can linger in this state for a few seconds.
- We sit straight. The bent arm is placed behind the back of the head and lowered along the back, aiming as low as possible. Each hand up to 8 times.
- A similar exercise - while sitting in a stroller, raise your bent arm from below your back as high as possible. Also up to 8 times. With enough practice, you can clasp your hands.
- Exercises for stretching the muscles of the upper back - bending . The shoulders are lowered in turn, the fingers of the hand whose shoulder is lowered are on the axis of the wheel. At the same time, we tilt our heads in the opposite direction, as if we want to turn the stroller on its side.
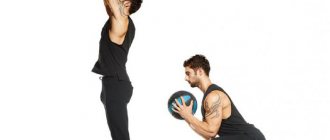
- Exercise with light weight - you need dumbbells of about 2 kg. Take dumbbells and lower them between your legs so that your thumbs point to the floor. Next, we spread our arms diagonally to the sides and raise the dumbbells to shoulder level.
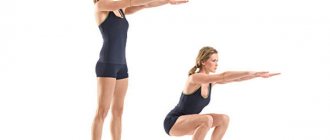
Next, we will consider 3 exercises that are recommended to be performed after warming up (you can use the warm up written above - exercises 1-8). For each exercise, you choose three approaches. Repeat the exercise every 10 times without stopping, and then rest for 30 seconds to 1 minute. Repeat 10 more times, rest again and repeat a third time. In most cases, try to leave 48 hours between workouts to give your muscles and joints complete rest. Stressed tissues take time to recover!
Observation diary
Reason won. My experience in science helped me analyze the specifics of the processes occurring in the human body. I thoroughly understood the intricacies of known rehabilitation techniques and chose only what is applicable to spinal necks. The observation diary that I carefully kept helped a lot. As a result, I was able to develop a new practical method of self-control. It allowed me to monitor the dynamics of changes in well-being, taught me to listen to my body, understand it, analyze the causes of ailments and detect the slightest improvements.
Self-control has made my life much easier. The optimal form of diary for me was filling out tables and drawing graphs every day.
In the table I enter the information that seems essential to me: I record with a cross in the appropriate columns the exercises that I performed (standing, sitting, on all fours, for arms, for legs, etc.), medications and medical procedures.
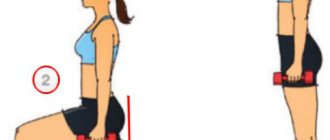
Seated tricep dips
This exercise will strengthen your triceps, chest, and the front of your shoulders. Strengthening these parts of the human body will be especially useful if it is possible to part with a wheelchair.
The exercise is suitable for people with disabilities who have upper body strength.
While sitting, place your hands on the armrests of your wheelchair or other chair. Make sure they are directly under your shoulders. Raise yourself up until your arms are fully extended, and then slowly lower yourself down until you are seated again.
Modification
If you lack arm strength but have strength in your legs, you can use them to help you out a little. But try to let your hands do as much of the work as possible. Start with a small number of repetitions (maybe even 1-2), gradually the muscles will get stronger and you can increase the number of repetitions.
How the Russian mentality interferes with maintaining healthy memory
Our people understand that if you want to achieve something, you must work all your life, improve and work for a long, long time. And gymnastic exercises do not require tension and effort. Therefore, Russians, in principle, doubt that small and uncomplicated movements can give any result. However, you should still pay attention to training.
Light fitness does not require purchasing additional sports equipment and other things. Basically, these classes were compiled for preschoolers, so that they could develop and play without straining. But they are also suitable for people over 50, although sometimes they have funny names.
Knee rises
This is a great way to strengthen your hip flexors—the muscles around your hip that help your hip move—and therefore make it easier to carry, walk, and bend.
The exercise is suitable for disabled people with some control of the lower body.
While sitting, lift one knee up until your foot is a few inches off the ground. Lower slowly and repeat as well. Once you've completed the reps on one leg, repeat on the other.
Modification
If you are struggling to get your foot completely off the floor, you can use your calf muscle to flex your ankle, which will aid the movement. Be careful not to let your calves do all the work.
Development of walking skills for people with disabilities at home - 4″P"
Tips and recommendations for parents and relatives
April 24, 2020
Elena Noble, MPT (translation and editing by Pankaj Kushwaha, Rehab and Medical Ltd. and Natalia Kushwaha, RehabMedical LLC)
Compared to a school or clinic, the home has unique challenges for gait training: less space, time constraints, fewer hands available to get in and out of equipment, and a lack of direct therapeutic services.
We offer several recommendations and directions for conducting successful and productive walking skills training at home.
They are classified into four “Ps”:
- Practice – Practice (Training)
- Purpose – Purpose (Goal)
- Positioning
- Progress - Progress
Practice
The timing of training sessions is an important factor in gait training. Barring medical contraindications, research shows that the more time a person spends in an upright position practicing walking skills, the faster and more thoroughly he/she will progress in their achievements. This does not mean forcing the child to do more than he can bear. You just need to give him, as often as possible, the opportunity to be upright and move around. Movement does not have to be beautiful (correct). It is the constant repetition of the step that makes the difference: practice, practice, practice.
Purpose (Purpose)
It will be even better if we can make the practice of walking training meaningful and develop a movement aimed at achieving specific goals. If you're making an effort to get your child into a gait trainer or walker, find ways to let him know that his movement has value. For example: “Let’s go to the garage and find a rake,” or “would you like to go to the living room and feed the goldfish?” Doing purposeful activities rather than walking for the sake of walking motivates the child, and motivation is the driving force in motor learning and skill formation.
This method can be equally applied to the practice of stationary verticalization (in a standing position). Lock all four wheels of a walking machine and it becomes a modified stander. Your child, for example, can stand at the kitchen table and make dumplings, or stand and watch his favorite TV program.
Children are very smart. They know when walking training is just following a therapeutic recommendation, or is a means to a fun and exciting goal.
Positioning
Correctly positioning your child in a gait trainer will allow him to walk instead of the minimum three meters - thirty-three! Proper positioning is also critical to preventing injuries from pressure or skin chafing during gait training. Below are some basic tips using the example of a walking trainer - the complex modular walker "Rifton Pacer" (or simply "Pacer"). Please remember that these are general guidelines and not specific instructions from your therapist for your child.
A. Height of the gait machine
The height of the top bar of the frame is usually adjusted at the level of the user's hips. Raise the frame a little higher if the user has contractures in the hips or knees to allow gravity to help loosen them before starting a step. If the user sag downwards, do not raise the frame any higher. First try raising the pelvic mount or the MPS saddle, or adjust the forearm mounts to better distribute your body weight (explained below). Raising the machine too high while the user is slack on the supports often results in poor overall positioning and a difficult stride.
B. Position of the forearms
The forearm mounts can be adjusted to accommodate most positioning needs. But the most important thing is to place your hands and elbows close to your body. This stabilizes the torso and shoulder girdle, and also allows the forearms to take part of the weight load and makes it easier to transfer body weight from one foot to another while walking.
When the arms are raised up and extended to the sides, as shown in the figure, this is incorrect, poor positioning. We call this position the "chicken wing". It should be avoided as it puts unnecessary stress on the shoulders and is ineffective. In this position, it is impossible to distribute the body weight evenly across different parts for optimal support and to provide assistance from the forearms in transferring the body weight during movement.
When using a torso mount for a Pacer, the correct placement of the forearm mounts can often be assessed by looking at the position of the torso mount. If the user is slack in the torso binding or the top edge of the torso binding is pressing into their armpits, try moving the forearm bindings closer to the body so the user can use them to better support themselves in an upright position. If this does not help, the torso mount may be set too high, or the Pacer's seat (pelvic mount, or "MPS") may be set too low.
B. Body position with forward bend
This position is useful for a child who has difficulty completing a step. In this position, the step is assisted by gravity, momentum and the “stepping reflex.”
Move the torso mount so that it is positioned slightly forward of the seat (the pelvis mount or “PIB”), moving the user's shoulders forward relative to the hips. You can tilt the torso mount forward by loosening the knobs that secure the horizontal bars to the support post. The user may be able to support some of their body weight by resting on the torso support. To create this position, it is necessary to understand that the seat (pelvic attachment or "MPS"), torso attachments, and forearm attachments can help distribute the weight load evenly so that the user can effectively bear the total body weight. Using these attachments, you can position the user in an optimal forward lean.
Place the forearm attachments further forward, still keeping your elbows close to your body to support the weight. If the user does not need all the attachments, you can still create a forward leaning position using a combination of any two of the three attachments mentioned above.
D. Tips for adjusting Pacer wheels
Pacer wheels can be effectively used to practice walking skills in small spaces at home. Here is a short practical video about the various wheel settings and functions:
If the user tends to reach back or push the walker backwards when walking, try using both the pivot and guide locks on the rear wheels.
For improved control in narrow corridors, use either two rear or two front twist locks. If you need your child to walk in a straight line down a particularly long hallway, you can even turn on all four twist locks. If your child tends to lean to one side or the other, try adjusting the brake function on the opposite rear wheel to help shift the walking control in the right direction.
For more information, please read the article “Five Common Goals of Walking Training and How to Achieve Them.”
Lastly, be sure to check in with your child after each workout, especially if you've made any changes to body position. Damage to the skin can happen quickly, but chafing can also be eliminated quickly with a simple change in body position or adjustment of the machine. If you notice that the skin is damaged, stop exercising and make appropriate adjustments. If this does not help, contact the specialist supervising you.
We recommend watching the video, which discusses possible options for using positioning equipment for different user needs and for different training purposes.
Progress
A great way to encourage progress in learning to walk is to add an element of challenging difficulty . Your child can achieve more than you might expect if you give him the opportunity. This does not mean that children are pushing their limits, but rather finding creative ways to develop their walking skills. This could be as simple as increasing their walking distance by encouraging them to walk faster, or walking up a hill or across a grassy yard. Enabling the brakes on the Pacer's rear two wheels to add resistance is another way to add some extra challenge. Research shows that when intensity (difficulty) is created in walking training, people show improvement in walking.
We want to emphasize that practice and repetition of steps are the most important aspects of gait training . And with constant practice, some days will be better than others. However, in general, remember that gradual improvements and changes in walking skills will occur slowly . Lack of obvious progress can sometimes be discouraging, but it is to be expected.
Keep your goals and dreams at the forefront and your child will surprise and delight you. You and your child are the heroes of today.
Sit and walk
For those who need to practice walking, this exercise is ideal. The benefits are twofold. Sedentary exercise strengthens the legs, and a short walk afterwards serves to train the expected confident walking.
Suitable for disabled people with some control of the lower body.
Start with two chairs spaced some distance apart, but keep them facing each other. While sitting in one of them, do any available seated exercises that strengthen your legs (like the previous one). Then, getting up, go to another chair. Turn around, sit on the second chair, then stand again and return to the first chair.
Modification
The exercise can be done with the help of crutches, a walker, or an assistant until gradual improvements are observed. After which the assistance decreases. You can also change the distance of the chairs.
Perform the exercises prescribed by your rehabilitation therapist regularly to achieve better results. A little persistence and everything will work out!
The importance of fine motor skills for the elderly in old age
This definition means the sum of bodily movements of the body and its systems, on which the achievement of tasks and goals depends, from eating to helping others. If for some reason problems arise, then not only the physical condition worsens when something cannot be done, but also the psycho-emotional one, because everyone will feel defenseless, unnecessary, and useless.
Motor functions determine active speech, so retirees are advised to repeat exercises to recover from a stroke and prevent attention from deteriorating.
The large one is responsible for the phenomenon when a person can feel his body. No one can do without this. Therefore, for a long life, you need to actively support yourself with small activities.
Finger exercises are very helpful for the memory and mind of older people.
Leave a request for selection of a boarding house
for an elderly person with memory loss