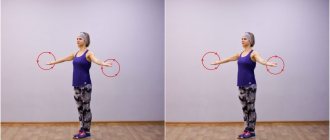
Currently, the fitness industry is developing very intensively. More and more people are trying to get their bodies in good shape. But at the same time they forget about health. “How? After all, physical exercise improves well-being and has a beneficial effect on the body!” – you say. Without a doubt! However, in every activity there are two sides to the coin. And the field of sports or fitness is no exception.
A person who has never been involved in professional sports or, at least, has not led an active lifestyle during the past years, when he comes to the gym, begins to “pull” iron and master more and more new exercise machines. What does this lead to? When your musculoskeletal system is not ready to work even with the weight of your own body, you begin to “hang” another couple of tens of kilograms on it.
Without knowledge of proper exercise technique, you diligently break weight lifting records in the race for the ideal figure. If this is the case, then expect to get injured soon.
How then to train without harm to your health? The best replacement for exercise equipment is rubber loops. These are the ones that will be discussed in this guide.
What are rubber loops?
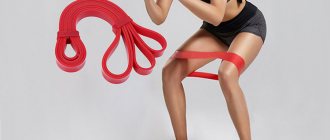
Rubber loops (rubber bands) are a universal, multifunctional piece of equipment that can become for you not only the best replacement for exercise equipment, but will also perfectly complement them. This is a great helper for those who want to increase strength, pump up muscles, lose weight, create a beautiful body or learn how to perform complex gymnastic elements.
If you find yourself on this list, then it’s time to think about purchasing rubber loops. However, besides them, there are other types of projectiles of this type.
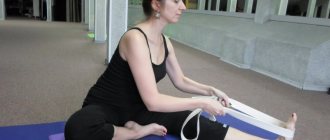
Overview: Elastic Bands, Rubber Bandages, Bandages and Loops
The advantages and disadvantages of each are discussed below.
Bodymaster.ru recommends Training Plans:
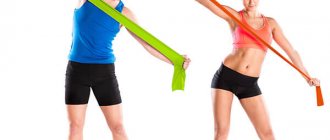
Elastic tape
Pros:
Minuses:
|
Martens rubber bandage
pros
Minuses:
|
Rubber band
Pros:
Minuses:
|
Rubber loops
Pros:
Minuses:
|
DIY trx loops
The design of the simulator is simple, and if you do not have the opportunity to purchase a branded product, you can try making trx loops yourself. The main thing is the presence of high-quality materials, the symmetry of both loops and compliance with the correct dimensions. Here are some tips that, if necessary, will help you make a simulator yourself:
- The recommended width of the loops is 40 mm, length 250 - 300 cm. On one side of each tape you need to make a small strap, inside of which attach a small plastic hook so that the tape can be attached to a carabiner. At the other end, you need to form two more straps: one wider, with a diameter of 25-30 cm, so that you can stick your legs into it, the other narrower - you need to insert a soft rubberized or neoprene handle into it.
- When you make the straps, insert hooks, handles and sew them securely with high-strength threads made of nylon or nylon, otherwise this design will not last long.
- Another tip is to take care to adjust the length of the loop. To do this, you need to buy a metal or plastic buckle, place it in the center at a symmetrical distance and thread a loop through it. This little trick will help you make a loop shorter or longer.
- The simplest thing remains: insert both hooks into the carabiner and attach to any suitable object. If you don’t have a wall bars or other reliable support at home, the easiest way is to buy an anchor with a hook and securely fasten it to the wall or ceiling.
Exercises with rubber loops at home and in the gym
Training with rubber loops can not only fully replace trips to the gym, but also significantly complement the use of exercise equipment. Now we will look at the most common exercises with loops for various parts of the body.
Arm muscles
Shoulder external rotation using a sling
Pass one end of the rubber loop through the other, placing it around your waist. Grasp the edges of the loop. With one hand, pull the loop to the side.
Press the elbow of your other hand to the crest of the pelvic bone and tense your hand. Rotate your shoulder in the opposite direction from your body (outward) and return it back.
The rubber loop must be in a constant state of tension. Don't let your wrist fall, it should be in one line with your forearm.
External rotation of the shoulder using an expander
One arm abduction using a rubber band
Trx loops: effective exercises
In addition to exercises designed to work with the athlete’s own weight or with additional weights, CrossFit often uses exercises that require special trx loops. This is an excellent tool for adding variety to the training process, giving a non-standard load on the stabilizer muscles and relieving the central nervous system from exhausting workouts with free weights.
In this article we will talk about how to correctly use loops in CrossFit, we will figure out who needs it and why, and whether it is possible to make this equipment with your own hands.
Bodymaster.ru recommends Fitness Trainers:
Secure one end of the loop to your foot. Use your opposite hand to grab the other edge. Bend your arm slightly at the elbow joint.
Smoothly, using muscle tension, move your arm to the side, turning your wrists with your little finger up. And return to the starting position. Don't overwhelm the brush.
French bench press using a resistance band
Sit along the bench. Fasten the loop behind the head line. Raise your shoulders at a 45° angle, bend your elbows and press them to your head.
Take the elastic band from the bottom with your palms facing up. Extend your arms at the elbow joints, keeping your shoulders motionless. Then return to the starting position.
French bench press using a resistance band
Biceps curl using a loop
Stretch the rubber loop under your feet and secure. Grab the other part of the loop with both hands with a reverse grip shoulder-width apart. Bend your elbows all the way, resisting the tension of the rubber band. Return to the starting position.
The arms should make a scooping motion, the hands should be tense, and the elbows should be parallel to each other.
Pectoral muscles
Push-ups using a loop
Place the loop over your upper back. Fix the ends of the projectile on your wrists. Take a position - lying down. Bend your arms at the elbow joints until your chest touches the floor, your elbows moving strictly along the body.
Overcoming the resistance of the loop, straighten your arms to the end and take the starting position.
Hand pinch using a loop
Place the loop over your upper back. Grab the ends with your hands. Place one leg forward. In the initial position, the arms are bent at the elbow joints with the palms facing each other, the elbows looking back.
Bring your arms in front of you until your fingers touch, keeping your elbows slightly bent. Maintaining muscle tension, return to the starting position.
Reduction of arms using an expander
Back muscles
Bent-over one-arm rubber band row
One foot is in front of the other. Secure the rubber loop under your feet. Bend your legs slightly at the knee joints. Hold your body at a 45° angle. Place your hand of the same name on the knee of your front leg, and take the loop with your other hand.
Perform pelvic rows. The elbow should move along the body, do not slouch, the lower back is slightly arched. Slowly extend your arm and return to the starting position.
Standing shrugs with rubber band
Secure the rubber loop under your feet and hold its ends with your hands. The back is straight, the shoulders are pulled back and down, the chest is open.
Raise your shoulders as high as possible, keep your arms straight, hold for 2 counts, and then lower down again.
Hamstring curl with loop
Secure the rubber loop to a stable object in line with your ankle joints. Sit on a bench and secure the loop around your ankles. Lean back slightly so that your feet do not touch the floor.
Hold the bench with your hands. Bend your knees, pulling your heels toward the bench. Return to the starting position.
Hamstring curl with loop
Squats using a loop
Secure the loop under your feet. Pass the other part of the loop over one shoulder and hold it with your arms crossed in front of you. Bend your knees until your thighs are parallel to the floor. Body weight on heels.
Make sure that your knees do not extend beyond your toes. Keep your body vertical, back straight. Return to the starting position, resisting the tension of the loop.
Bringing your leg towards you using a loop
Secure the loop to a stable object at the level of the lower part of the shin. Stand sideways and secure the other end of the loop to the same leg at the ankle. Move away to such a distance that the projectile is tensioned.
Bend your leg slightly at the knee and move it away from you. Then bring her back to you.
Bringing your leg towards you using a loop
Hip raises using a loop
Secure one end of the rubber loop to the bar at the level of the ankle joint, and the other to the shin. Stand with your back and take a few steps forward until the projectile is tensioned.
Bend your knee and raise your thigh until it is parallel to the floor. The angle between the knee and thigh should be 90°. Return your leg to the starting position.
Hip raises using a loop
Leg kickback with rubber band
Secure one end of the loop to the foot, and press the other end with the palm of the same hand. The supporting leg (not participating in the movement) should be bent at the knee at an angle of 90°. Raise your leg as high as possible without straightening your knee.
Point your heel towards the ceiling. Keep your back straight, do not bend your arms at the elbow joints. Return to the starting position.
Abdominal muscles
Twisting the body at an angle with a rubber loop
Secure the rubber loop to the bar at shin level. Grasp the other edge of the loop with both hands, palms facing each other. Stand with your side to the bar and take a few steps to the side until the band tightens. Arms slightly bent at the elbows, feet shoulder-width apart.
Using the force of your arm muscles, pull the loop diagonally upward (from the bottom corner to the opposite top corner). Slowly return to the starting position.
Body tilts to the sides with a loop
Insert your foot into one end of the rubber loop and use your other foot to press the rubber band to the floor. Bend to the side and grab the free end of the loop with your same hand. In the starting position, the hand should be at knee level.
The second arm is bent behind the head and rests on the back of the head. Straighten your body until your spine is vertical. Return to the starting position.
There are a great many exercises with loops, experiment and look at our other materials on the topic:
- What is an elastic (expander) band: exercises at home
Exercises for different muscle groups
There are many exercises with rubber loops for men and women, in which you can work out one or another muscle group in isolation. These can be: latissimus dorsi, pectoral and deltoid muscles, biceps, triceps, quadriceps, hamstrings, gluteal muscles and neck. Read below about how to do all these exercises correctly.
Back exercises
The back muscles are trained by working in two planes: horizontal and vertical. Vertical rows develop the width of the back more, and horizontal rows develop the thickness. Accordingly, with a rubber loop we will imitate exactly them.
It’s easier to imitate horizontal rods - you just need a reliable support to which you can hook a loop. If you keep your body upright, you'll get something like a block row; if you lean forward, you'll mimic a bent-over barbell row or a close-grip T-bar row.
If you hang a rubber loop over the horizontal bar, you can swing your back in a vertical projection. The movement will resemble a light weight pull-down or a lighter version of a pull-up bar. You can also perform some variation of the pullover by placing the loop above head level and leaning forward slightly.
By working with elastic loops, you will make your back muscles stiffer and fuller, since the latissimus dorsi muscles love maximum contraction and “squeezing.”
We recommend trying these exercises with rubber loops for your back:
- horizontal traction to the abdomen;
- vertical thrust to the chest;
- standing pullover;
- belt pull;
- One-arm bent-over row.
In all exercises, try to focus as much as possible on the work of the back muscles. The bands provide relatively little resistance, so it's easy to do without straining your biceps.
Exercises for legs and buttocks
This section will be especially relevant for girls who do not have the opportunity to regularly visit the gym. With just a resistance band (or a band without handles) on hand, you can give your quads, hamstrings, and glutes a good workout without leaving home. You just need to tie this tape around your shins so that it restricts your movements and makes it more difficult to take steps than usual.
Then you can start performing all kinds of lunges (in place, side, reverse and others) and walking. The main thing is not to let the tape relax completely; there should always be additional resistance. You can also do squats or forward bends by wrapping the band around a stationary surface.
The following exercises with rubber loops for the legs and buttocks are considered very effective:
- lunges with a step forward;
- side lunges;
- bending forward.
In all exercises, do not let the band relax, as your leg and buttock muscles will be under constant tension.
Exercises for the pectoral muscles
The rubber band can be used for chest training. The simplest exercise you can do is bringing your hands together in front of you. This movement will almost completely repeat the combination of hands in a crossover or peck deck. If you have a bench, you can simulate a dumbbell press or dumbbell fly while lying down. To do this, grab the handles and wrap the loop itself around the bench. The resistance will not be strong, but it will be enough to do a light chest workout. The main thing is to always tense the pectoral muscles as much as possible at the point of peak contraction. This simple technique will allow you to improve neuromuscular communication, and you will begin to better feel the work of the pectoral muscles in all exercises.
So, we do exercises with rubber loops for the pectoral muscles:
- Bringing your hands together while standing in front of you;
- Push-ups with loops.
- Imitation of dumbbell bench press. (using a bench press with a barbell as an example, but it can also be done without it)
In all exercises, we fully stretch the pectoral muscles at the bottom point, at the top we try to contract as much as possible and hold in this position for 1-2 seconds. This will shift the emphasis of the load to the middle part of the chest - precisely the segment that is underdeveloped in most amateur athletes.
Exercises with rubber loops for the neck
Rubber loops are one of the safest ways to effectively work your neck muscles. Many men ignore this muscle group in their training process, but in vain. A developed neck gives the upper body a more “completed” appearance. But not everyone understands that the cervical vertebrae are very easy to injure, and the cervical spine itself is a very thin structure. Therefore, you need to be very careful when training your neck, and exercises like the wrestling bridge or neck curls with a disc on your head are not suitable for most people. Using a rubber loop, you can train both the back and front, as well as the sides of the neck. To do this, you just need to securely fasten the handles and place the loop itself at forehead level in the front, back or side of the head. Create tension in the loop and bend your head at different angles, this way you will work all parts of the neck muscles without creating an axial load on the cervical spine.
So, we do exercises with rubber loops for the neck:
- sitting head extension with a loop on the back of the head;
- lying head bend with a loop on the forehead;
- bending the head while sitting to the side with a loop at the temple.
In all exercises, we work in a high range of repetitions (from 30 and above) and we try to additionally strain the neck at the moment of contraction. Do not help yourself with your body; work should be strictly isolated.
Watch how to do exercises with rubber loops in the video:
Exercise Tips
Before you start training with resistance bands, consider which parts of your body you want to work and create an exercise plan. Below is a ready-made training option.
If the exercise is unfamiliar to you, then carefully study the technique of performing it. This is a very important point that will help you achieve your goal as quickly as possible and without injury. Before the lesson itself, thoroughly warm up the body and prepare the musculoskeletal system for work: joint warm-up and cardio for 5 to 10 minutes. If you train at home or on the street, then running, jumping rope, and burpees will help you replace cardio with exercise equipment.
When performing exercises, pay attention to the technique of their implementation. It is best to stand in front of a mirror.
Common mistakes
We recommend taking into account the following aspects in your training:
- technically incorrect execution of exercises;
- uncontrolled sudden movement. Perform all movements smoothly and under control; it is most effective if it takes 1 second to lift and 4 seconds to lower;
- applying maximum effort. The range of movement should increase with each repetition. The first approach is a warm-up approach (with less resistance);
- training for pain. During exercise, only a slight burning sensation in the working muscles is acceptable. If severe pain occurs, stop the exercise and figure out the cause: either the movement was performed technically incorrectly, or you have any degenerative changes in the disturbing area of the body.
Principles of training training
To get results as quickly and effectively as possible, follow the following basic principles for constructing the training process:
- Continuity . Training sessions should be carried out continuously and consistently throughout life. To do this, build your training with the possibility of development and transition to a higher and higher level. Long breaks between classes are undesirable, as they will lead to a decrease in the achieved physical fitness.
- Systemic alternation of loads and rest . Much attention should be paid not only to the load regime, but also to the rest regime. Regular training against the background of under-recovery leads to decreased performance and loss of physical fitness. Manage your rest days correctly: go for a walk, attend a stretching class, or do a set of stretches yourself at home, or swim in the pool.
- Gradual increase in loads . To progress training activities, systematically increase the requirements for the motor functions of the body. As your level of preparedness increases, complicate the exercises, improve the technique of performing movements and increase the volume and intensity of the loads.
- Waviness . Taking into account the interaction of the processes of fatigue and recovery of the body, loads should be built according to the principle of their wave-like changes in volume and intensity. It is not recommended to give your best every workout, “killing” yourself. On one of several training days, perform lighter exercises.
Sets and reps
Currently, there are many options and ways to conduct training. There is no single correct rule for how many repetitions and approaches there should be. The amount depends on many factors: the purpose of training, the presence of injuries and contraindications, well-being, existing physical fitness, mood, muscle group being trained.
For example, if you have just decided to take care of your body, then the following scheme is suitable for all basic exercises: 10-15 repetitions of 3-4 approaches with a 1.5-2 minute rest between them.
If you are at a high level of physical fitness and are studying the gymnastic strength element, then stick to the scheme of 8-10 repetitions of 5 approaches.
Training methods vary freely depending on your desire. It is not necessary to perform each exercise separately. There is a variant of circuit training, where all exercises are performed one after another, without rest between them. In one circle you can combine movements to work both different parts of the body and one muscle group.
Another option is high-intensity training using the Tabata protocol. Tabata is a specific way of conducting an exercise in the following mode: we perform the exercise for 20 seconds, rest for 10 seconds, then repeat the same thing for 4 minutes. Before using Tabata, practice the technique of the exercise and bring its correct execution to automaticity.
Since you will have to work intensively for only 20 seconds, for the best effect all movements must be performed accurately and under control, without wasting time on correcting mistakes.
Rubber loops for learning pull-ups
Pull-ups are a basic exercise that develops muscle groups in the upper body. It consists of lifting your own weight by bending your arms from a hanging position until your chest touches the bar.
Everyone should be able to do pull-ups, because even the GTO has certain standards for pull-ups. If you don’t know how to do this exercise yet, now is the time to learn! Rubber loops are indispensable assistants. There are 4 types of loops, which, according to a certain color, demonstrate the degree of reduction in perceived body weight.
Follow the instructions below:
- Attach the rubber loop to the pull-up bar so that you can fit one or two legs through it.
- Grab the horizontal bar, begin to smoothly bend your arms at the elbow joints, and you will feel the loop pushing you up. Continue the movement until your chest touches the bar. If this effort is not enough, then take the next loop according to the degree of resistance.
- When you can freely pull yourself up from one of the loops from 8 to 10 times in 1 approach, then switch to a projectile with a lower level of resistance.
- Having reached the “weakest” rubber loop, feel free to try to pull yourself up yourself, without the help of a projectile.
What do the numbers in kilograms on the rubber loops mean?
The answer is simple: the resistance level, with the first number indicating the minimum, and the second the maximum. It is known that the standard length of a sports loop is about a meter (104 cm), if taken in an unstretched state. That is why the length does not matter, it is the same for all products.
Manufacturers mark loops by resistance, and to make it more clear, they use specific colors for each group. For example, for the Supreme Athletics brand, each specific resistance level will correspond to the following color codes:
- from 4 kg to 15 kg (4-15 kg) – red;
- from 9 kg to 29 kg (9-29 kg) – orange;
- from 15 kg to 38 kg (15-38 kg) – purple;
- from 20 kg to 56 kg (20-56 kg) – green;
- from 25 kg to 70 kg (25-70 kg) – blue;
- from 35 kg to 90 kg (35-90 kg) – black.
Now let's see how this works in practice. For example, let's say you purchased Supreme Athletics loops in red. When not in use, their length, like any other, is 104 cm. But if during the exercise you stretch the product to 1.3-1.5 m, you will get the very minimum resistance corresponding to the color marking - 4 kg. We continue to stretch further. With a length of 2.5 to 3 m, the resistance will reach a maximum of 15 kg. Attention! We do not recommend stretching Supreme Athletics more than 3 m, they will burst! What to do if the resistance received at maximum stretching is not enough? Buy tires from the next group.
Rubber loops are effective and safe sports equipment, but only if used correctly. Thanks to the wide variety, they are suitable for training both beginners and advanced professionals who want to improve their own physical performance and set new records.
Why should you get rubber loops?
If your goal is to increase strength or perform a gymnastic element, then rubber loops will help you with this. They have a clearly defined resistance force, expressed in kilograms, which allows you to more competently and effectively build the training process. Resistance loops can be used to either make a difficult exercise easier or to create more force on your body.
Rubber loops, as well as tourniquets, tapes, bandages, will help not only bring the body into ideal condition, but also develop strength, flexibility, speed and endurance - all those qualities that are needed for a harmoniously developed organism. These are multifunctional exercise machines that will serve you for many years.
Training with them is suitable for both classical functional training and for developing specific qualities for a particular sport, for example, wrestlers, strikers, karatekas and many others.
You don’t have to spend money and time on visiting a fitness club every month. You can train with rubber loops at home, and in the warm season even outside. You will not be tied to a specific place to maintain your shape. You can always take the projectile with you during your vacation or travel.
Even if you are a supporter of heavy training with heavy weights, then using rubber loops will prepare your musculoskeletal system for the upcoming loads. This will reduce the likelihood of injury or other negative health consequences.
This approach will be smart for achieving results and will help maintain your successes for many years.
Using rubber loops
In parallel with studying exercises on TRX loops, we recommend trying an equally interesting tool for training – rubber loops. They are made of latex and allow us to create additional resistance when lifting the projectile. For example, the degree of resistance of some models can reach 90 kg. Rubber loops can be used in the gym, doing crossfit or fitness, or at home, while resting from hard training.
With their help, you can imitate movements performed with weights in the form of a barbell or dumbbells, for example: biceps curls, standing dumbbell flyes, horizontal block rows to the chest, rear delt flyes, extensions with a cable handle and many others. The main thing is to securely fix the loop and repeat the movement with precision in the same way as you would perform it on a simulator or when working with a barbell.
There is another way to use rubber loops, it is especially popular in powerlifting. The method is as follows: the loop is attached to a barbell, the other part is attached to equipment (press bench, squat rack, etc.). In addition to rubber loops, the athlete hangs a small weight (about 50% of his one-time maximum) and thus performs a bench press, squats or deadlift. The rubber loop tightens as the bar rises upward and creates additional resistance that grows with every centimeter of amplitude. In this way, the athlete learns to overcome “dead spots” in basic movements.
Contraindications
Physical activity is a universal medicine that does not fight the symptoms of diseases, but eliminates the causes of their occurrence. But there is another side to the coin: if exercises are used unmethodically, they can also negatively affect the body! Therefore, before you start training with rubber bands, we ask you to familiarize yourself with the following contraindications.
It is not recommended to perform exercises with rubber bands for people:
- having abnormalities in the cardiovascular system (vegetative-vascular dystonia, heart defects, arterial hypertension and hypotension);
- having spinal instability;
- having diseases of the respiratory system (chronic bronchitis, pneumonia, bronchial asthma), kidneys (nephritis, pyelonephritis, nephrosis, nephroptosis and the entire genitourinary system) in the acute stage;
- at the stage of the postoperative period;
- having rheumatism, diseases of the digestive tract, gall bladder, liver;
- having prolapse of internal organs, bending of the uterus, hernia of any location, malignant tumors of the pelvic organs;
- with musculoskeletal injuries.
Also, before starting exercises, it is necessary to consult a doctor for pregnant women, women after childbirth for about 4-5 months, after cesarean section for about 6-7 months.
It is undesirable to perform exercises with loops immediately after eating, since physical activity after eating can cause indigestion. Wait 1-1.5 hours If you have any doubts about your condition, consult your doctor before you start training.
Precautionary measures
Despite the fact that rubber loops are highly wear-resistant, we must not forget about the possibility of them rubbing against surrounding objects and subsequent rupture under excessive loads. To prevent damage, regularly monitor the condition of the projectile. Before starting each workout, make sure that the resistance band is in good condition. If you notice any defect, replace the hinge with a new one.
Characteristics
In order to understand how to choose a rubber loop for pull-ups or other exercises, you need to know their main characteristics:
| Characteristic | What does it mean? |
| Color | Usually, loops are marked by color according to their stiffness. The ratio of color to hardness is determined solely by the manufacturer. There are no special standards. |
| Resistance to deformation | Determines how much the stiffness of the loop changes when it is stretched. Important when using loops as an addition to basic exercises. |
| Resistance to temperature changes | The hinges are made of latex or rubber, so it is important to check with the manufacturer about the cold resistance of the hinges. This will allow you to train with loops outside in the winter, which is important for workout athletes. |
| Wear resistance | Determines how long the loop will last and how its stiffness coefficient will change over time. |
| Belt flexibility | Flexibility also differs depending on the material. Flexibility affects the ability to use knots to secure loops together or attach to projectiles. |
| Tensile limit | An important characteristic for light hinges. Determines how far the loop can stretch before breaking. |
In the case of working on a horizontal bar, the defining characteristics are:
- Stretch limit. Unlike using loops in basic movements, when working with a horizontal bar, the loop needs to be stretched very strongly. Therefore, for beginners, it is recommended to use loops with a little stiffness.
- Resistant to temperature changes. If you are not working out in the gym, then this is very important. Under the influence of heat, hinges very often lose some of their rigidity, and in the cold they can simply tear.
Training programs with loops (exercise sets)
The training plan is developed taking into account gender differences and is designed for training three times a week. Start your training with the help of a ready-made program. But you should not repeat these complexes for more than two weeks in a row.
Frequent use of the same exercises leads to adaptation of the ligamentous-muscular system to the load, which will negatively affect your existing result.
A set of exercises for women
Day 1
Perform each exercise in 3 approaches, rest between approaches for 1-1.5 minutes. The number of repetitions is individual for each exercise and is indicated in parentheses.
- One arm abduction using a rubber loop (15 times)
- Biceps curl using loop (15 reps)
- Hamstring curls with loop (20 reps)
- Standing shrugs with a rubber loop (15 times)
- Leg kickback with rubber band (20 reps)
Day 2
Perform each exercise in 3 approaches, rest between approaches for 1-1.5 minutes.
- Twisting the body at an angle with a rubber loop (25 times)
- Loop squats (20 reps)
- Bringing the leg towards you using a loop (15 times)
- Leg abduction with a rubber loop (25 times) F14
- Twisting the body at an angle with a rubber loop (1 min.) F15
Day 3
Perform each exercise in 3 approaches, rest between approaches for 1-1.5 minutes.
- Bent-over rubber loop row with one hand (15 times)
- Crossing hands using a loop (12 times)
- Hip raises using a loop (20 reps)
- Leg kickback with rubber band (25 reps)
- Loop squats (20 reps)
We recommend watching additional exercises for women in the following video.
A set of exercises for men
Day 1
Perform each exercise in 3 approaches, rest between approaches for 1-1.5 minutes.
- French bench press using a rubber loop (15 reps)
- One arm abduction using a rubber loop (12 times)
- Bent-over rubber loop row with one hand (20 times)
- Push-ups using a loop (10-12 times)
- Body tilts to the sides with a loop (15 times)
Day 2
Perform each exercise in 3 approaches, rest between approaches for 1-1.5 minutes.
- Hand pinch using a loop (20 times)
- Biceps curl using loop (15 reps)
- French bench press using a rubber loop (15 reps)
- Twisting the body at an angle with a rubber loop (10 times)
- Body tilts to the sides with a loop (12 times) Ф16
Day 3
Perform each exercise in 4 approaches, rest between approaches for 1-1.5 minutes. The number of repetitions is individual for each exercise and is indicated in parentheses.
- Bent-over rubber loop row with one hand (20 times)
- Standing shrugs with a rubber loop (20 times)
- Squats using a loop (15 times)
- Hamstring curls with loop (15 times)
- Twisting the body at an angle with a rubber loop (12 times)
We recommend watching additional exercises for men in the following video.
A selection of exercises
The presented abdominal exercises with fitness bands are suitable even for beginners! You can adjust the load yourself by choosing different tape stiffnesses. The more effort you put into stretching it, the more difficult the workout will be. But remember that classes should not be given too easily, otherwise they will not be effective.
Scissors. Lying on the floor, lean on your elbows. Raise your legs above the supporting surface - at an angle of approximately 60 degrees. With maximum amplitude, spread your legs to the sides and cross them, imitating the movement of scissors. Do the exercise at a fast pace. Number of repetitions: 20 times.
Reverse swings. We remain on our back with our arms extended along our body. Place the band slightly above your knee and lift your legs straight up so that they are perpendicular to the floor. Tightening your abs, lower your right leg down a little, then lift it up again (you should feel the resistance of the elastic band). Now repeat the same movement with your left leg. Do 10 repetitions on each leg.
Gluteal bridge. One of the most popular exercises in fitness, which pumps up both the abs and the butt. Lie on your back with your knees bent. Place the elastic band on your legs so that it is slightly above your knee. Hands lie along the body. Lift your buttocks up. The torso from the shoulders to the knee should form a beveled line. Fix yourself at this point. From this position, spread your knees to the sides, then bring them back and lower your pelvis to the floor. Relax. Repeat the exercise 12 times.
Interesting: Standing exercises for losing weight on the stomach and sides
Complicated bike. Place the resistance band on your feet, between your toes and heels. Take a lying position with your legs straight and your hands behind your head. Raise your upper body slightly off the floor, pull your right knee towards it and try to reach it with your left elbow. In this case, the elastic band is at maximum tension. Return to the starting position and repeat the same movement with your left leg and right elbow. Perform the exercise 10 times on each side.
Leg lift. We put the elastic band on the shins, just above the feet. We lie on our backs, straightening our arms and legs. Using your abdominal muscles, lift your right leg straight and try to move it up as far as the elastic band will allow. Lower your leg to the supporting surface and immediately lift your left leg, performing the same movement. Number of repetitions: 15 times on each side.
Semi-bike. Place the elastic band on your feet - between the heel and toe. In the same lying position, lean on your elbows, raising your body above the floor. Legs are bent at the knees - try to pull them as close as possible to your stomach. Using your abdominal muscles, straighten your right leg without lowering it to the floor. The elastic stretches to its limit. Then bend your knee again. Repeat the movement with your left leg. Do the exercise 12 times on each side.
Tightening the knees. We place the elastic band in the middle of the thighs. In a lying position, bend your knees and slightly raise your pelvis on the floor. Begin to alternately pull your right and left knee towards your chest. If you can’t reach your chest, it’s okay - you just need to feel the maximum resistance of the tape. During the exercise, your hips do not drop to the floor! Do 12 repetitions on each leg.
Lifting the body with legs apart. This exercise works not only the abs, but also the inner thigh. We again take a lying position, legs raised up. Cross your arms and place them on your stomach. The elastic is located on the hips - just above the knee. Spread your legs out to the sides and lift your upper body at the same time. At the same time, the hands pass into the formed distance between the legs. Lower your body to the floor and bring your legs together. Perform the movement 11 more times.
Static leg abduction. Lying on the floor, bend your knees. Raise your pelvis slightly above the supporting surface and lock in this position. The stomach is pulled in. Straighten your right leg up. Move it to the side as much as possible and return it back. When you pull the band, you should feel your abdominal muscles working. Perform 10 repetitions without lowering your pelvis to the floor. Then rest a little and repeat the movement with your left leg.
Training with this unique compact equipment will help you quickly get your body in shape. Perform our exercises with fitness bands for the abs 2-3 times a week and the results will not be long in coming!
Interesting: Lower abs exercises for girls
httpv://www.youtube.com/watch?v=embed/Y4kDKEFRW1c
