Movement is life. Unfortunately, office work and constant driving or public transport make it impossible to move sufficiently. To solve this problem, many people think about purchasing a treadmill.
Thanks to the exercise machine, you can go for morning or evening runs without leaving the door of your apartment or house. As a result, physical health is strengthened, mood improves and excess weight is burned.
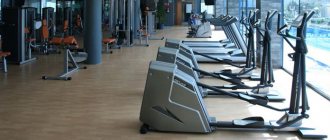
However, when choosing a treadmill, another difficulty arises - the high cost of the device. The price of a good simulator ranges from 10 thousand to 1.5 million rubles. To avoid such expenses, you can do everything yourself.
A few banal truths
At the same time, not everyone is lucky enough to work out in the gym. One doesn’t have enough time, another doesn’t have enough money, the third can’t force himself to get out of the house. Now, if the exercise machine stood next to the sofa...
It is now fashionable to purchase sports equipment for various purposes at home. Especially when finances and square meters allow. But what should those who have a small apartment do and there is absolutely no way to allocate a separate room for a home gym?
There is only one way out - decide which equipment is most important to you, reserve a corner for them (for example, in the bedroom) and start practicing. But what exactly should you choose?
In addition to the classic horizontal bar and a set of weights, we advise you to purchase a treadmill and start running at home.
Contraindications
Running is contraindicated for people with the following diseases:
- obesity (to reduce body weight, you should start with walking, gradually increasing the load);
- high blood pressure;
- osteochondrosis and joint diseases;
- severe pathologies of the heart, lungs and blood vessels.
You should also avoid intense training during pregnancy. In the absence of other contraindications, intensive walking on a treadmill is in most cases suitable for pregnant women; the benefits and harms of exercise in this case should be taken into account.
Walking and leisurely jogging on a treadmill are beneficial for most people, so if you have no obvious contraindications, give yourself the gift of jogging and after just a few sessions you will experience the full benefits of running.
Why the track?
Running is a universal activity suitable for almost everyone. So much has been written about its benefits that there is no point in repeating it. Meanwhile, organizing a basic jog in the fresh air is sometimes difficult - sometimes snow and rain, sometimes ice, sometimes dust and exhaust fumes from cars, sometimes a cramped yard and no stadium nearby.
If you have a treadmill at home, the lion's share of problems automatically goes away. Neither the weather outside the window, nor the lack of suitable equipment or time to travel to the stadium is any longer an excuse. Is it just mother laziness...
So, we’ve decided – let’s go to the store to buy this miracle exercise machine. We're coming. And we experience some shock from the prices. And I immediately remember that there is, in general, a crisis outside. And there are already places to spend money.
But is it really possible to give up on the dream of a strong, beautiful body? No, we don't give up that easily. The craftsmen of our vast Motherland have found and are finding a way out of any situation! Or almost any one.
Exercises for figure correction
Individuals interested in body shaping do not need to take special medications or use anti-cellulite creams and ointments. Working out on a treadmill is hard enough. But you don’t need to start exhausting training for wear and tear right away.
The first week is “introductory”; the individual exercises for 6 days in a row; every workout until you feel slightly tired. Then - one day of rest.
The second week is “almost hard.” This week you need to exercise for 5 days in a row, trying to run a little more every day.
After these two weeks - two days of rest. Then run once a day, three days a week. Each time the trainee runs twice the distance that he ran on the last day of the second week, and the third time he runs until he is completely exhausted. Rest between sets – 3.5 – 5 minutes.
There is no need to try to exhaust yourself by running several times a day. This method, if it helps to remove extra pounds, will be not only the disappeared fat, but also muscle tissue. The loss of muscle tissue is accompanied by a sharp increase in metabolism and negatively affects the body.
Women who need to correct the lower part of the body can also take the above technique as a basis. In this case, the intensity and volume of training on a treadmill can be neglected only in one case - if running is combined with strength exercises. Moreover, the “strength” complex should be performed four hours before or after running.
How to make a treadmill with your own hands in your own apartment?
Yes, after visiting a “cool” sports store, thoughts take exactly this direction. Do-it-yourself treadmill - is it possible? Especially if you want to have a model that will move itself - that is, equipped with an electric motor? Let's see what can be done here.
Just remember - you will still need a lot of space. But for cramped apartments (for example, one-room apartments), this problem also exists if you purchase a branded exercise machine. It’s another matter when you have a country house - sometimes you can allocate an entire basement for a mini-gym.
However, owners of spacious suburban real estate are rarely puzzled by questions of how to make a treadmill with their own hands or the like. Either they buy expensive exercise equipment or run in nature in picturesque areas.
A couple of warnings
Even if you are a recognized folk craftsman, a do-it-yourself treadmill at home may be too tough for you. Why?
Firstly, you are unlikely to find clear instructions for work. Having dug through the Internet, you will get a mountain of information about the construction of a sports ground (with a track!) for outdoor activities or advertising sites offering equipment for gyms. It’s good if you don’t “catch” viruses while traveling through dubious resources.
Secondly, there will almost inevitably be problems with acquiring the necessary materials, as discussed below. As a result, you still decide to act at your own risk. Well, let's try to share a little instructions.
Let's move on to process technology
Making a mechanical treadmill for your home with your own hands is generally not that difficult. Its basic diagram can be represented in the form of a support or frame (small runners or just legs plus a deck for the canvas). All parts are made of wood (at worst), although it still makes sense to make the legs metal - for reliability.
The frame must be connected to a pair of horizontal shaft-axes, and they should be at different heights to create a slight tilt. Then a dense elastic fabric is pulled tightly onto the shafts (like a bulldozer or tank caterpillar). And in fact, the work on creating the simulator has been completed.
If you definitely need an electric type simulator - “like a real one” - you will have to worry about connecting one of the axes to an electric motor, which will rotate it. The most creative craftsmen will probably be able to use a gasoline engine.
Troubleshooting
If a problem occurs, you will not be able to send the device to a specialized treadmill repair, so you will have to do everything yourself.
The main breakdowns of the simulator are related to the running surface and the engine. How to extend the service life of mechanisms?
If you have assembled a mechanism using an electric motor, then the first thing you need to do is turn off the power. Then find out the cause of the breakdown.
If the running surface glides poorly, there may be the following reasons:
- Insufficient glide. To fix the problem, you will need silicone treadmill lubricant.
- Ingress of debris. Just clean the space under the canvas.
- Moved out. With frequent loads, the running belt may change its position, and you have to adjust it regularly.
- If the breakdown is related to another mechanism, you can buy the necessary spare parts and find information on the Internet on how to repair treadmills.
This is interesting: What is a Capricorn woman like?
Lubricating the Treadmill
In order for the running belt to continue to slide smoothly, you need to regularly lubricate the deck.
This operation is performed every 30 hours of use of the simulator or after 300 km have been covered. Otherwise, the lubricant will evaporate and the load on the running belt and electric motor will increase significantly, which will lead to breakdown.
The need for silicone lubricant can be checked manually. Run your finger under the running belt, if the surface of the deck is dry, then it is time to apply lubrication.
Step-by-step instructions on how to lubricate:
- disconnect the simulator from the electrical network;
- release the tension of the canvas. To do this, you can remove the shafts or unscrew the adjusting screws;
- lifting the canvas, you need to apply silicone grease to the surface of the deck;
- return the running belt to its original tension;
- let the engine run for a few minutes so that the product is evenly distributed;
- Remove excess grease with a rag.
Before training, you need to slowly walk on the treadmill.
About difficulties and problems
At first glance, everything is simple. But in fact, few people bring their plans to completion. From what? Once you get to work, you begin to understand the difficulties mentioned above.
The main problem is finding a suitable material from which to make a canvas. After all, considerable strength is required in combination with elasticity. Industrial options are usually not available to single home craftsmen. It’s unclear what to take as a replacement.
Another point is that a homemade treadmill, made with your own hands, most often turns out to be bulky and takes up more space than planned. Building a compact treadmill is a task for a very experienced craftsman. For the rest, upon completion of the work, the idea may come to get rid of the resulting monster and go for a run in the yard.
The electric motor is a separate headache. It is expensive, difficult and unreliable. At home it is also unsafe. So think about it. Maybe it’s more profitable to invest one time in a simple budget option (for 5-7 thousand rubles) and forget about the problems? Moreover, in the kit you will probably receive cardio sensors with computer tracking of training effectiveness, and a set of options for their mode.
Error messages E on screen
On the treadmill screen you can see various types of errors, which are marked with the letter E. As a rule, a standard classification is used, but the numbering of errors may vary depending on the manufacturer and model.
There is no information on the screen. You should check the button to turn on the console, as well as the power cord and power switches. The overload protection system may be working, then you just need to wait a little and the track will turn on again. In addition, you should look at the wiring harnesses, connections and connectors.
E-1, connection error. There may be defective wires that require replacement. We check the serviceability of the connectors, console and controller wires.
E-2, voltage mismatch in the network. The reason may be a malfunction of the engine, or the voltage in the network may actually change by 30-50%, after which the track automatically turns off. Sometimes there is poor contact in the engine circuit, you should check the engine compartment, connectors and wires.
E-3, signal from the walking belt motion sensor. You need to check the magnet attached to the pulley or the motion sensor itself.
E-4 and E-6, inclination of the running belt. The malfunction may be in the tilt motor. It is advisable to check the wires in the voltage regulator and tilt motor. In addition, look at the wires and connectors of the console and power board controllers.
E-5, reboot protection. A very useful solution here is to turn off the network and turn on again after 15 minutes
Pay attention to the user's weight: as a rule, manufacturers slightly overestimate the maximum characteristics, so tracks should always be taken with a safety margin of 20-30% more than your parameters. If the user's weight exceeds the possible weight, this error may appear
The cause may also be wear on the engine or the track surface.
E-7, electrical part of the controllers. The cause may be a faulty connector, current transformer or defective wires. Check the wires that go from the machine computer to the lower power control board.
E-8, drive control. The drive itself may be faulty. Also check the tension in the drive poly V-belt.
E-9, position. Either the drive is faulty, or the simulator needs to be unfolded and restarted.
E-10, engine. Look at the wires that connect the console and controller. If the engine does not turn on, does not rotate or jerks, the reason is the magnetic key, you need to check it; if the problem persists, the console may need to be replaced.
It turns out that you need to know not only how to properly exercise on a simulator, but also how to properly care for it.
As you can see, a significant portion of errors occur due to faulty connectors or wires in one or another part of the track. More expensive models are usually more durable and wear out more slowly, but a lot depends on the intensity of use of the machine. Often, even budget versions of exercise machines have very reliable parts.
Monitor the operating conditions and timely prevention of various treadmill malfunctions. Thanks to this, you can significantly save on the purchase of new parts and repair work on the treadmill. At the same time, we recommend that you often trust professionals and not repair significant problems yourself, especially if you do not have the proper experience in this matter.
Dedicated to the most persistent
Let's say we haven't convinced you. Well, let’s take a calculator and calculate how much a DIY treadmill will cost you. That is, we find out the cost of materials for its independent production. It is best to make the frame not wooden, but metal - stainless steel. The footage depends on the chosen dimensions (we’re not even talking about the need to have a preliminary diagram-drawing - this is already clear).
In addition to the metal pipes themselves, you will need cutting and welding skills along with the appropriate equipment. The ideal option is when both are already available. However, you can borrow the tool.
Another necessary material is the very dense rubber surface on which you will run. And also plastic rollers.
The treadmill is assembled with your own hands in the following sequence. The pipes are cut into pieces of a predetermined size; some of the pieces will go to the frame, and some will go to the crossbars. Rollers are put on the latter (if you were unable to purchase ready-made ones, you will have to start cutting rollers from pieces of plastic). Then the entire frame is welded according to the diagram, the crossbars with the rollers on are welded inside it. Pulling the fabric onto the frame, as already mentioned, completes the procedure.
So the simplest mechanical treadmill (created with your own hands) is ready. Good luck in your endeavors!
How to calculate the correct running speed and create a weight loss program yourself
Calculating the optimal speed and building your own effective weight loss program is possible and accessible thanks to certain calculations, as well as the preparation of step-by-step instructions:
- You need to start your first lesson with walking.
- If you feel comfortable, walk quickly and there are no medical contraindications, you begin alternating running and walking for half a minute for 20 minutes.
- Training is carried out 3-4 times a week, with a gradual increase in exercise time.
- The speed at the beginning of the race is 2 km/h, then a little faster - 3 km/h, devoting 2 minutes to each stage.
- The next step is jogging with a gradual increase in speed to 7 km/h.
- Changing the inclination angle for beginners from 1.5% to 0.5%, up to several times for the remaining time.
- At the end of the workout, the pace is reduced to 2 km/h.
To independently determine a suitable load pattern, you need to take half an hour, take a heart rate monitor, then start walking briskly for 10 minutes.
Then you should increase your running speed to 7-8 km/h, without changing the angle of the track, remaining in this mode for about 5 minutes.
At this stage, the numbers from the heart rate monitor are recorded, and the running speed is slowed down to a walking state. When your breathing calms down a little, you need to raise the inclination angle to 3-5 degrees, then continue moving for another 5 minutes, after which you measure your heartbeat again.
The period during which the pulse increased determines which interval training number is suitable specifically for a given state of the body. If the heart rate monitor detects a high heart rate while running, then exercises should be carried out according to interval scheme No. 1, but if while walking, then according to scheme No. 2.
Interval training on a treadmill. Example No. 1
The initial stage, both in the first and second options, is 10 minutes of quiet walking.
First interval: walking at an incline of 3-6 degrees, at a speed of 4-6 km/h for about 5 minutes.
Second interval: the slope of the canvas is removed, running begins at a speed of 7 to 9 km/h, it continues for 2 minutes.
Third interval: 1 minute race at the fastest speed possible for the body.
All intervals require repetition at least 4 times (in turn).
Interval training on a treadmill. Example No. 2
Warm up, 10 minute walk.
First stage: zero incline, running 7-9 km/h for 7 minutes.
Stage two: Walk for 10 minutes, increasing the incline by 2 degrees every 2 minutes. For the next 10 minutes, walk with a gradual decrease in slope with a similar frequency of two minutes.
Alternate intervals 2 times; athletes with sufficient training experience repeat this scheme four times.