Share:
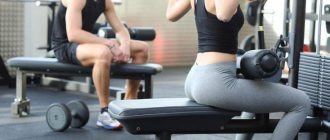
What you need
- Barbell
- Platform
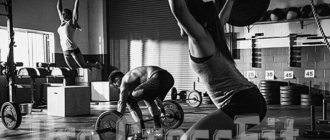
The Clean and Jerk is one of the classic weightlifting exercises that has migrated into functional CrossFit training.
Due to the technical complexity of the exercise, as a rule, the barbell push is included in the training program by more experienced and trained athletes, however, many beginners also try to perform the push (unfortunately, often incorrectly) in their training. In our article today, we will share with you a technique for learning how to properly perform a barbell push and help you minimize the risk of injury.
What's on our plan today:
- Why should you perform the barbell jerk?
- Exercise technique
- Mistakes of beginner athletes
- Official sports standards
- How to achieve an increase in strength indicators at the point?
- Crossfit complexes with barbell push.
Why is this exercise needed?
As a child, even before I became seriously interested in sports, I loved watching weightlifting competitions. This is truly a great sport, and many athletes, such as Yuri Petrovich Vlasov, Leonid Ivanovich Zhabotinsky, Vasily Ivanovich Alekseev and others, have left a truly enormous sports legacy, and their phenomenal results continue to motivate athletes from all over the world even after decades.
Weightlifters perform the clean and jerk as part of a competition, and their main goal is to lift the heaviest weight. In CrossFit, we have slightly different goals, performing the clean and jerk primarily to increase tonnage and overall intensity of the workout.
I don’t know about you, but for me, complexes that contain a barbell push are the most difficult due to the decent working weights and the need to strictly follow the correct technique. If you look at the total tonnage per workout, it's a huge number. But after completing all the complexes, no matter how difficult they may be, a feeling of satisfaction comes, because I realize that I worked 100%.
During the barbell push, the following muscles work: quadriceps, glutes, spinal extensors and deltoids. Therefore, I recommend wisely distributing the load throughout the week, for example, not performing heavy weightlifting exercises in one workout and heavy deadlifts and front squats in another. Thus, your muscles simply will not have time to recover, overtraining will occur, which will lead to a complete lack of progress in training, constant muscle pain, chronic fatigue, sleep disturbances and exhaustion of the central nervous system.
Push
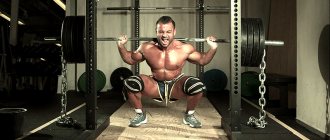
This exercise is performed second in a weightlifting competition. To perform a push, the athlete rises after squatting and fixes the position. In this case, the body should be strictly vertical, maintaining a deflection in the lower back, the feet should be spaced wider than the shoulders, the position should be as stable as possible. The elbows are brought forward, and the pelvis is moved back slightly. The bar of the bar lies on the chest, the head is slightly abducted, the gaze is directed slightly above the horizontal.
Push exercise.
Half-squat
The athlete squats shallowly, moving the pelvis back, but maintaining a vertical body position. The movement should not be performed too quickly, as in this case the bar will come off the chest and a powerful push will not work. It is necessary to use the elastic properties of the projectile. A deep squat in this phase of the exercise will also significantly complicate the subsequent push-out, so there is no need to bend your knees too much.
Pushing
Immediately from a half-squat position, the athlete, with a sharp and powerful movement, pushes the projectile vertically upward. The phase ends with almost full extension of the legs, stepping onto the toes and raising the shoulders. The bar is given a sharp acceleration, as in the case of the “undermining” discussed earlier.
Podsed
As the bar moves upward, the athlete quickly moves underneath it, extending his arms and accepting the barbell to complete the movement. Just as in the case of the snatch, the position of the legs in the squat can be either “spread” or “scissors”.
Squat rise
Exit to vertical position. The barbell is held behind the head with outstretched arms, the body is straight, there is a deflection in the lower back, the pelvis is slightly laid back. The gaze is directed horizontally.
Fixation
The athlete completes the exercise.
Technique for performing the barbell push
Due to the technical complexity of the exercise, I recommend seeking help from a competent specialist. Below I will try to describe in as much detail as possible the correct technique for performing a push, but only with an outside glance can you soberly evaluate the technique, point out mistakes and help the student achieve the desired result.
The standing barbell jerk is a technically difficult exercise, and professional weightlifters spend years honing the technique. The barbell push involves a huge range of motion, and the movement itself consists of several stages: lifting the barbell off the floor, lifting, squatting, pushing out and scissoring squat. Each stage should be worked out separately in order to fully understand the biomechanics of movement. Under no circumstances should you rush if you are not given a particular stage. Start practicing them with minimal weights until the trainer is happy with your technique. After this, you can begin to perform the clean and jerk, again, starting with light weights.
The barbell comes off the floor
Starting position:
- Feet shoulder width apart;
- Hands hold the bar slightly wider than shoulder-width apart with a lock grip;
- The toes are spread slightly to the sides, the center of gravity lies on the heels;
- We keep our back perfectly straight, while maintaining natural lordosis in the lower back;
- We move our shoulders slightly back, looking forward.
Our task is to use the powerful force of the legs and back to lift the barbell from the floor and give it the necessary acceleration in order to throw it onto the chest. Raise the barbell just above the knee, while the bar should be as close to the shin as possible.
Detonation
In order to accelerate the barbell and throw it onto your chest, you need to straighten your legs and body, stand on your toes (a small jump is allowed), bend your arms and “accept” it with your chest, while at the same time starting to lower yourself into a squat. In this case, your elbows should be brought out in front of you.
Podsed
When the barbell is at the level of the solar plexus, we begin to squat under it, while moving it with the movement of our shoulders towards our chest. If everything is done correctly, approximately halfway through the squat, the bar should “fall” onto your chest. We sit with her on our chest in full amplitude, stand up and fixate ourselves. We have a couple of seconds to gather our strength and prepare to push out. During the push of the barbell, keep your elbows turned away from each other so that the barbell lies not on your chest, but on your shoulders.
Pushing + scissor squat
With an explosive movement of the legs and buttocks, we begin to push the barbell up, while performing a scissor squat. Some weightlifters perform a split squat, but due to the anatomical characteristics of most people, the scissor squat is easier for them and allows them to lift more weight. We make a small jump, bringing one leg forward and the other back. The movement is reminiscent of lunges with a barbell. As soon as we have caught the balance point, we put the back foot to the front and fixate in this position. Now you can throw the barbell on the floor.
Detailed training on the barbell push technique in the video:
Another useful video:
Jerk
This is the first exercise performed in a weightlifting or powerlifting competition. Next, the jerk technique will be considered, including the features of performing each of its phases.
Snatch exercise.
Start
In the starting position, the athlete stands in front of the apparatus so that his shoulders are strictly above the bar, and his toes are under it. The feet are shoulder-width apart, the pelvis is laid back, there is a natural arch in the lower back, and the gaze is directed forward. Slight differences in starting position are allowed depending on the height and body proportions of the athlete.
The barbell is grasped with a lock grip. The legs, body, arms and apparatus must form a single rigid frame.
Traction
The bar lifts off the floor due to the powerful force of the legs and back and rises above the level of the knees. The bar moves along the legs not vertically, but slightly towards itself. The arms and back are absolutely straight in this phase of the movement. Lifting the bar from the platform occurs calmly, then the speed of the projectile increases sharply.
Detonation
This is the moment of accelerating the projectile due to the full extension of the legs and straightening of the body, reaching out onto the toes. The effort must be sharp and powerful. Arms are still straight. During the lift, the athlete tilts his torso back and raises his shoulders.
Podsed (care)
Thanks to the acceleration applied at the detonation stage, the bar, as they say, flies up. In this phase, the athlete must quickly get under it. When the bar has lost acceleration and is already moving downwards, it is much more difficult to accept it.
During this phase of the movement, the back remains arched and the pelvis is laid back. Hands actively interact with the projectile. The athlete takes the barbell with outstretched arms (when performing a snatch) or on the chest (if a push is planned next).
The athlete’s legs can be in different positions:
- Low squat (legged), hips pressed to the stomach.
- Scissors, one leg in front, one leg behind, as in a deep lunge.
Correct and quick squatting creates an optimal “base” for subsequent lifting.
Squat rise
Immediately from the squat, due to the powerful force of the leg muscles, the athlete rises to a vertical position. The pelvis moves along a trajectory from bottom to top and slightly back, the back remains arched.
Fixation
The athlete takes the final position, clearly fixing the apparatus on outstretched arms (in the case of a jerk) or on the chest (if a push is then performed).
Typical beginner mistakes
- Pushing the barbell is carried out primarily due to the force of the quadriceps and buttocks, while the deltoids and triceps are responsible for stabilizing the projectile. Do not confuse the clean and jerk with a push press or a military press, here we are not pumping our shoulders, we are breaking the laws of physics.
- You should not perform snatches and jerks in regular sneakers or sneakers. Spend a few thousand rubles and buy specialized high-quality weight bars; they will help keep your body in the correct position during squats. At one time, I added 40 kg to my squats with a barbell in two workouts, simply by switching from sneakers to barbells. Progress in the clean and jerk was also not long in coming.
- Contact a smart trainer. On your own, you are unlikely to be able to establish the correct push technique; only with an outside glance can you make adjustments to the technique, based on the individual anatomical characteristics of the body.
- Pay special attention to warming up your hands and elbows. When the barbell is placed on the chest and the elbows are brought forward, the joints and ligaments experience enormous stress. Use statodynamic exercises to further strengthen your ligaments and tendons.
Lesson “Jerk and Jerk Techniques”.
Distance learning assignment
Discipline:
Physical Culture
Teacher:
Israilov Mamed Monsurovich
Profession:
Electronic typing and layout operator
Group:
OR-22-18
Date of:
03/26/2020
Number of hours:
2 hours
Lesson topic #22:
Practical lesson No.. “
Jerk
and Jerk Technique.”
Target:
Training in the technique of jerking and jerking. Development of muscle strength in the legs, back, and shoulder girdle; endurance.
Pass:
03/28/2020
Exercise:
Dear students! You need to study the material and make a summary of the information provided, the task must be completed in a notebook, be sure to indicate in the margins of the notebook the date for which you are completing the remote task, take a photo and send it to WhatsApp messenger or email. Be sure to include your last name, first name, and group in the subject line!
A set of exercises for warming up.
Warm-up running and walking are performed: at a normal pace, on toes, on heels, on the inside and outside of the foot, with hands resting on the knees, bending down; with a high hip raise in a half-squat, in a squat, with hips, side and variable steps, with a cross step forward, to the side. A combination of walking and jumping is possible.
Running can be normal, with a high rise of the hips, with bending the legs back, with raising straight legs forward or backward, with a cross step forward, backward, to the side with turns, stops, throwing and catching objects, with jumping over obstacles, with moving over obstacles .
General developmental exercises include:
exercises for the muscles of the arms and shoulder girdle, raising straight arms forward, up, to the sides, back, simultaneously, alternately, sequentially; exercises for the muscles of the torso and neck - tilting the head and torso forward, backward to the sides. Circular movements of the head and body to the right and left; exercises for the leg muscles - bending and extending the legs, lunges, jumping out of the squat position, springy movements in a squat. exercises for the back muscles.
It is recommended to distribute the time allotted for warm-up as follows: warm-up running and walking – 5 minutes. General developmental exercises – 15 min.
Push technique in weightlifting
Let's consider performing the exercise in phases. Unlike the jerk, which is performed in one movement, the jerk, as already mentioned, consists of two movements and each of them must be considered separately.
First, let's look at what a push grip is.
Push grip
In a push grip, your hands should be placed on the bar at a distance slightly wider than your shoulders.
Setting your arms too narrow will cause your hands to rest on your shoulders and get in the way.
The maximum width of your arms depends on the flexibility of your arms. A grip that is too wide will immediately result in pain when lifting the barbell to the chest due to eversion of the elbow joint.
Clean
The barbell clean has the following phases:
Start
– starting position. The athlete approaches the barbell almost closely, but so that it is possible to bend his back. Usually there is literally a couple of centimeters left from the legs to the bar in a straightened position. He takes the barbell with a push grip, covering it with his palm on top. Then it bends and fixes the deflection in the back. You also need to cover the barbell with your shoulders, then the barbell will go straight up. It is also recommended to relax your hands at the start so as not to slow down the movement of the barbell.
Traction
– raising the rod to the level of detonation. After the above has been completed, the removal of the barbell from the platform begins. In this phase, the main mistakes are changing the angle of the body relative to the platform. Before detonation, you must endure and maintain the same angle as at the start.
Lift the barbell using your legs, without leaning forward or throwing your back back.
Detonation
– acceleration of the bar before leaving is performed by sharply straightening the back and legs at the same time. If the previous phases are performed correctly, then when the lift begins (the bar is approximately two-thirds of the way up the reed, depending on the length of your arms and body), your legs will be slightly bent and your shoulders will be above the bar. If not, it means you failed somewhere.
The lift begins at two-thirds of the thigh and ends just above the groin. At this time, the bar should gain maximum acceleration and continue moving upward without your help.
Podsed
– a sharp move under the bar occurs at the moment when the bar reaches the top point of detonation. The weightlifter's task is to sit under the barbell as quickly as possible and meet the barbell below.
Climb
– as soon as the bar touches the athlete’s shoulders, he begins to rise upward. At this moment, it is important not to sit at the bottom, but to start moving upward immediately. This kind of lifting is called “kickback”, since the athlete gets up not only by using the hip extensors, but also by pushing off from the calf muscles.
Fixation
– the end of the first movement before the beginning of the second. Having risen, the athlete fixes the position of the body vertically and stabilizes the apparatus. If necessary, he adjusts his hands - many athletes grab the bar wider before the push.
Barbell push
If the first movement is successfully completed, the phases of the second movement begin – the barbell push from the chest.
Half-squat
– a small squat with a barbell on the chest. It is important to ensure in this phase that the knees go to the side and not forward; the body should also not fall forward, otherwise the barbell will also fly forward. The squat is performed from the heels and a fixed back.
Pushing
–due to the sharp straightening of the legs, the barbell is accelerated upward.
Care in scissors
(or Popov's spread) - the athlete, throwing his legs forward and back (or to the sides, if this is a Popov's step), goes under the bar, meeting it with outstretched arms. It is important to perform the step quickly and meet it hard. In scissors, one leg goes forward, turning the toe inward, and the other leg goes back. On the back leg, for stability, you need to turn your heel outward - then the scissors will be more stable.
Coming out of scissors
– the legs are assembled alternately: first the front, then the back.
Fixation
– end of the second movement. At this moment, the feet should be parallel on the platform, arms straightened.
When lowering the barbell, you need to accompany it.
Standards
Next, we have prepared for you the official standards for the barbell push for the year, approved by the Russian FTA.
Table of standards for men (sum: clean and jerk + snatch, kg):
| Weight category | Combined total (kg) | ||||||||
| Adults | Boys 11-15 years old | ||||||||
| MSMK | MS | KMS | 1 | 2 | 3 | 1 yun | 2 yun | 3 yun | |
| 34 kg | – | – | 90 | 82 | 76 | 70 | 64 | 58 | 52 |
| 38 kg | – | – | 105 | 96 | 88 | 80 | 72 | 64 | 56 |
| 42 kg | – | – | 120 | 110 | 100 | 90 | 80 | 70 | 60 |
| 46 kg | – | – | 130 | 119 | 108 | 97 | 86 | 75 | 64 |
| 50 kg | – | 180 | 150 | 137 | 124 | 110 | 96 | 82 | 68 |
| 56 kg | 255 | 205 | 170 | 154 | 138 | 122 | 106 | 90 | 74 |
| 62 kg | 285 | 230 | 190 | 170 | 152 | 134 | 116 | 98 | 80 |
| 69 kg | 315 | 255 | 205 | 185 | 165 | 145 | 125 | 106 | 87 |
| 77 kg | 350 | 280 | 235 | 210 | 187 | 164 | 141 | 118 | 95 |
| 85 kg | 365 | 295 | 250 | 225 | 200 | 175 | 151 | 127 | 103 |
| 94 kg | 385 | 310 | 260 | 235 | 210 | 185 | 162 | 137 | 112 |
| +94 kg | – | 315 | 265 | 240 | 215 | 190 | 167 | 142 | 117 |
| 105 kg | 400 | 320 | 270 | 245 | 220 | 195 | – | – | – |
| +105 kg | 415 | 325 | 275 | 250 | 225 | 200 | – | – | – |
Table of standards for women (sum: clean and jerk + snatch, kg):
| Weight category | Combined total (kg) | ||||||||
| Adults | Girls 11-15 years old | ||||||||
| MSMK | MS | KMS | 1 | 2 | 3 | 1 yun | 2 yun | 3 yun | |
| 34 kg | – | – | 80 | 72 | 66 | 60 | 54 | 48 | 42 |
| 36 kg | – | – | 85 | 77 | 71 | 65 | 58 | 51 | 44 |
| 40 kg | – | – | 90 | 83 | 76 | 69 | 62 | 55 | 48 |
| 44 kg | – | 120 | 100 | 92 | 84 | 76 | 68 | 60 | 52 |
| 48 kg | 165 | 130 | 105 | 96 | 88 | 80 | 72 | 64 | 56 |
| 53 kg | 180 | 140 | 115 | 106 | 97 | 88 | 79 | 70 | 61 |
| 58 kg | 190 | 150 | 125 | 115 | 105 | 96 | 86 | 76 | 66 |
| 63 kg | 205 | 160 | 135 | 125 | 115 | 104 | 93 | 82 | 71 |
| 69 kg | 215 | 170 | 145 | 135 | 125 | 113 | 101 | 89 | 77 |
| 75 kg | 225 | 180 | 150 | 138 | 127 | 116 | 105 | 94 | 83 |
| +75 kg | – | 185 | 155 | 143 | 132 | 121 | 110 | 99 | 88 |
| 90 kg | 230 | 190 | 160 | 150 | 140 | 130 | – | – | – |
| 90 kg+ | 235 | 195 | 165 | 155 | 145 | 135 | – | – | – |
How to progress on the clean and jerk?
The secret to a powerful push is practicing individual phases of the movement and performing auxiliary exercises.
Do the following exercises:
- push push of the barbell to separately practice pushing the barbell above you;
- overhead squats and front squats to strengthen the squat;
- heavy lunges with a barbell on your shoulders to make it easier to get up from scissors;
- push with pause - this exercise involves holding a 1-3 second half squat or full squat before completing the exercise;
- deadlifts from plates, hyperextensions with additional weights and your favorite exercises for the abs and oblique muscles of the abdomen to more clearly hold the body while rising from a squat and not get injured in the lumbar spine.
Barbell Push. Technique. Barbell Clean, Chest Jerk
Barbell push. Technique. Clean and jerk You can take the Rookie course here - https://goo.gl/yi73HB Online training camp - https://bit.ly/2THregm FUNCTIONAL MUSCLES program - https://goo.gl/X5i62C Program with weights - https://bit.ly/2DT5kBQ Video author - Alexander Salmanov Demonstration of technique - Artem Leonidov (MSMK in weightlifting) Barbell push. Technique. Barbell clean, chest jerk The classic barbell clean can be divided into two parts, the first is the barbell clean and the second is the barbell clean and jerk. Let's start with the barbell clean, and we'll look at squat work. We recommend learning how to use a lock when jerking and taking, the thumb is usually covered with two fingers on top, the index and middle. We take the starting position, pay attention to the feet and knees, the knees are slightly turned outward, the feet are looking in the direction of the hips. Barbell push. Technique. Cleaning the barbell, pushing from the chest Next, after we have completed the tuck, we need to go under the barbell and meet it in the squat. In order to cope with large weights, we try to get under the bar quickly enough and take it as low as possible. Please note that when receiving the barbell, we spread our legs slightly to the sides for a comfortable and hard squat. The technique must be performed with a rigid and straight back, without hunching, keeping your shoulders high, your chest open as much as possible, and your elbows not sagging. The saddle is comfortable and confident, after which we get up and prepare for the push. After coming out of the squat, someone immediately gets up with a comfortable position of their hands, someone needs to perform an interception, for example, throw the barbell over the entire palm from their fingers, or grab it slightly for the most comfortable push of the barbell from the chest. Barbell push. Technique. Barbell Clean, Chest Jerk Let's look at the position before the push. So the chest is open, the shoulders are high, the barbell lies directly on the chest, there is no need to hold it with the strength of your arms. Pay attention to the elbows, they are slightly forward of the bar and look down. In this position, it is important to keep your shoulders high and your chest open, since in novice athletes, when the elbows drop, the back also hunches. The hands should confidently hold the bar, which is located on the base of the palm, and not on its fingers. Now you see a comfortable position before pushing out the barbell. Next we perform a short squat, the main thing here is not to sit too low, otherwise it will be difficult to get out of there with a heavy barbell. Here it is important to pay attention to your legs, do not bring your knees together when squatting, we even work slightly to the sides in order to better load the pelvis for explosive action. It is also a common mistake to tilt the body forward when sitting down; we try to sit as perpendicular to the floor as possible. Barbell push. Technique. Cleaning the barbell onto the chest, pushing from the chest Next, after we have pushed the barbell, we throw our legs into scissors, the body and center of gravity remain in the middle between the legs. The front leg goes over the entire foot and forms an angle of more than 90 degrees, while the back leg is slightly bent at the knee joint and is located on the toe. You also need to pay close attention to the work of the top, at the moment of going into the scissors we sharply insert our hands clearly above our heads or even try to stick our hands slightly behind it into a hard lock, it even seems as if we moved our head forward, the reception of the bar should be straight hands without pressure. After which we just have to collect the legs and fix the barbell; we start collecting the legs from the front leg.