Pigeon Pose Twist
Sit down, bend your right knee so that your heel touches your groin and your knee rests on the floor. Step your left leg back so that the front of your thigh rests on the floor. Then work in dynamics. Place your right forearm on the floor in front of you and, leaning on it, raise your left arm to the side and up. Turn your arm and shoulder outward.
Then change hands: leaning on your left, lift your right up. This exercise combines open and closed twists. Repeat 6-12 times. Then change legs.
Chaturanga dandasana fails. More than a push-up: Chaturanga Dandasana
For beginners, Chaturanga Dandasana is a terror that flies on the wings of the night. Everything is shaking, and the teacher orders you to bend your elbows. Naturally flexible people, for whom power poses are torment, are especially at risk.
Although it presents considerable difficulty, at the same time it is completely worth the effort. The asana evenly strengthens the arms, abs, shoulders, and prepares for hand balances, backbends and inverted poses. Chaturanga builds character.
As a rule, Chaturanga is more difficult for women than for men. They naturally have stronger arms, but technique is also important when performing Chaturanga. Often problems arise because Chaturanga is perceived as a push-up. Trying to perform an asana using the strength of your arms is a gross mistake that can lead to injury to your elbows.
Execution technique
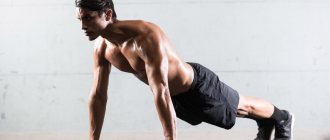
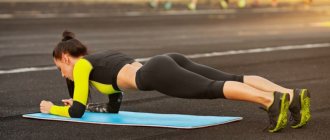
Get into Plank Pose. Place your wrists under your shoulders, body parallel to the floor. It is important to distribute your weight evenly throughout your body. Not only the arms, but also the abdominal and leg muscles should be involved in the work.
As you exhale, bend your elbows as much as possible. Observe the sensations in your shoulder joints. Press your elbows tightly to your ribs, do not allow your lower back to arch. Try not to drop your chest and shoulders, raise them further from the floor.
If there is discomfort in the shoulders or it is difficult to press the elbows to the ribs, simplify the asana. Get into Plank pose, place your knees on the floor, tuck your tailbone and bend your elbows.
To perform the second simplification option, you must use a belt. This variation teaches the correct position of the elbows in the asana. Take the belt and make a loop the same diameter as the circumference of your pelvis. Place the strap on your hands, placing it directly above your elbows, and move into Plank pose.
As you inhale, point your sternum and heels in opposite directions, lengthening your body. Then tighten your upper thighs, pointing your tailbone toward your heels. These movements prevent the central part of the body from falling down and engage the central muscles of the body. As you exhale, extend your chest forward. Bend your elbows so that the belt is taut.
Take your first steps in yoga. Let every morning begin with practice!
Yoga set “Yoga Start”
Yoga complex for beginners, clear instructions and important knowledge about yoga.
Photo: yogaforthegwinn/instagram.com
Popular on the topic:
Strong body and clear mind
Free
5 things a woman doesn't have if she respects herself
Allow yourself to be yourself and you will succeed.
4 Actions That Block Your Energy
“Blocking energy” means that every day you have less and less strength, money and reasons...
3 exercises that will make sex brighter
The secret is simple: relieve tension from the lower abdomen and free yourself from fears.
3 mantras you should never say
These words are the reason why you are still stuck.
Sarpasana (snake pose twist)
Lie on your stomach, point your toes back, tighten your buttocks, tighten your pelvic floor muscles, and press your pubic bone toward the floor. Place your palms on the floor under your shoulders. As you inhale, rise up, straightening your arms, and bend evenly along the entire length of your spine. If you feel tension in your lower back, bend your elbows slightly. Exhale and twist your body to the side, looking back and trying to see your foot. Hold the pose for 15 seconds, then perform in the other direction. Repeat 2-4 times.
Chaturanga dandasana or plank. Performing Chaturanga Dandasana in yoga: strengthening the body and spirit
Chaturanga Dandasana is translated from Sanskrit as “four-legged staff pose.” This asana helps develop strength in the arms and the entire body, including the shoulders, hips, abs and lower back. It has a beneficial effect on posture and the respiratory system.
This is one of the main poses in yoga, which often becomes a guide to the world of power asanas. It is performed both independently and as a transitional pose in various
There are two options for entering the asana: from a standing pose or from the floor.
From standing pose
- Get into Tadasana. Concentrate on breathing freely.
- As you inhale, stretch up following your raised arms.
- As you exhale, lower your palms to the floor and place them on the outside of your feet. Bend your knees slightly if necessary.
- As you inhale, raise your head and direct your gaze to the highest point. As you exhale, lower your head.
- As you exhale, assume a plank pose. Place your palms under your shoulders, tighten your stomach and buttocks, and pull your heels back.
- As you exhale, lean forward and lower yourself down (as if you were doing a push-up).
- Stop in a position where your body is parallel to the floor, with your elbows bent at an angle of 90 degrees.
- Hold the pose for as long as you can. Breathe evenly and calmly.
- To exit the pose, while inhaling, go to the Upward-Facing Dog pose, and while exhaling, go to the Downward-Facing Dog pose.
- From this position, place your feet next to your hands and carefully straighten up. Return to Tadasana and restore your breathing.
From a lying position
- Lie on the mat on your chest.
- Bend your elbows and place your palms on the floor on either side of your chest.
- Place your feet 30-35 cm apart.
- As you exhale, push off the floor and lift your torso.
- Make sure your entire core is tense. Breathe calmly.
- Hold the asana for as long as you can.
- Breathing is even and calm.
- Lower your knees to the floor and rest.
Reference! All muscles are used during Staff Pose. It develops your arms well and makes your wrists more mobile.
Adviсe
When performing the asana, make sure that:
- palms were located strictly under the shoulders;
- the whole palm, each finger rested on the floor;
- all muscles were tense;
- the chest area did not collapse;
- there was no strong arch in the lower back.
Important!
Do not spread your elbows to the sides. They should be pressed to the body. Avoid sudden movements while performing the asana. Lower yourself smoothly and concentrate on the sensations in your body. Make sure that your shoulders do not extend below your elbows.
Staff Pose Variations
If the full implementation is not available to you, then try this simplified version. Practice this until your legs, arms and back have enough strength.
Come into plank pose with your knees on the floor. Push your knees back so that your body is parallel to the floor. Hold the pose for a few seconds and increase the time every day.
For those who find this option too simple, there is a more complicated version.
Slowly roll from the balls of your feet onto your toes, moving your torso forward. The hands will be at waist level, which will increase the difficulty of holding the asana.
Useful
Benefits of the pose
Regular practice of Chaturanga Dandasana allows you to achieve the following effects:
- strengthening the muscles of the abdominal region, back and arms;
- improved posture;
- improving the functioning of the gastrointestinal tract and respiratory tract;
- improved mood;
- relief from stress.
Contraindications
Refrain from practicing asana if you experience:
- injuries to the elbows, spine, wrists;
- high blood pressure;
- exacerbation of diseases.
It is also not recommended to perform during pregnancy.
Daily work with Chaturanga helps you become more resilient and stronger. Master the correct form of asana to take your yoga practice to the next level.
Asanas for men
Men usually have greater strength and endurance than women. Therefore, it is quite easy for them to do power asanas, simple balance asanas on the arms, and lying asanas, in which the abs and back are strengthened. The situation is more complicated with flexible poses, as well as twisting asanas. Therefore, when choosing a sequence of yoga exercises, it is advisable to pay attention to poses that develop flexibility and breathing. At the same time, maintaining a balance between strength and flexibility. Basic asanas for men are vrikshasana, virabhadrasana, utthita trikonasana, uttanasana, adho mukha svanasana, baddha konasana, salamba sarvangasana.
Top 10 balance asanas for advanced
In the selection of advanced balance asanas you will find poses that require maximum concentration and concentration, but which will give you complete control over your own body. Practice one or two challenging balance poses in addition to your main practice to harmonize your body and mind.
Top 20 leg exercises with dumbbells
Half-sitting pigeon pose
Why: For awareness, calmness of the nervous system, balance and harmony with oneself.
How to do it: Stand straight, bend your right leg at the knee and place its foot on your left thigh. Keep your back straight, arms folded at your chest. While in tree pose, find balance and stability. Then bend your supporting left leg at the knee, lowering yourself into a one-legged squat. In this case, the right leg rests calmly on the left thigh. Go as low as you can, then repeat the balance asana on the other side.
How to make it easier: Don't go into a too deep squat, just bend your knee a little.
Side plank with twine
Why: For strength and endurance, flexibility and balance.
How to do it: Get into plank pose with straight arms, then shift your body weight to your right arm and leg, lifting your left side off the floor. While in a side plank, place your left foot on your right knee. Wrap your left foot in your hand and place your right foot firmly on the floor. Then lift your left leg as high as possible, holding your foot with your hand. Maintain your balance in the balance yoga pose for as long as you can, then do the same on the other side.
How to make it easier: Perform a side plank by bending your top leg at the knee and placing it on the other leg as close to your body as possible.
Single leg split
Why: For flexibility, tone the muscles of the legs and back, balance and concentration.
How to do it: Stand up straight and lift your right leg straight up. Then grab your ankle or foot with your right hand and pull your leg high up until it is parallel to your body. Grab your leg and press it to your body, then freeze, maintaining your balance and not moving. You can clasp your leg not only with one, but also with both hands to bring it as close to the body as possible. Do the same for the other side.
How to make it easier: Perform wall-supported balance asana or do straight leg extension pose instead.
Dancing Dog Pose
Why: For energy, strength and flexibility, as well as to get rid of tension, negativity and stress.
How to do it: Get into a side plank position, supporting yourself on your right arm and leg. Then place your left leg behind your right, and move your left arm far back, arching your back, as if for a bridge. The left arm should be lowered down, and the body should resemble an arch in outline. Look up and fully concentrate on the sensations, because this pose is considered very traumatic for the shoulder joints, it cannot be performed absent-mindedly. Do the same for the other side.
How to simplify: Do not bend too much during balance asana; a small bend is enough at the initial stage.
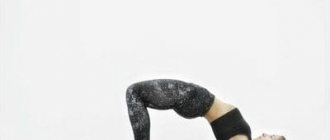
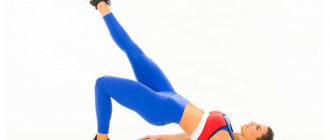
Single Leg Bridge Pose
Why: To tone the pelvic muscles, beautiful posture, flexibility and strength of the back, harmony with the body.
How to do it: From a lying position, place your arms behind your back and bend them at the elbows, resting on your palms. The fingers should be pointed towards the shoulders. Bend your knees. Straighten your arms while simultaneously lifting your pelvis up. Try to make your body position resemble an arc; to do this, you need to fully straighten your arms and legs. Lock the position and lift one leg up. Stretch your toes as high as possible. Bring your leg back and lift the other one up.
How to simplify: If you do not feel stable in the bridge, then perform a yoga asana for balance without straightening your legs. When you learn to hold the bridge for half a minute, move on to the leg version.
How to stand on the bridge
Crow Pose
Why: For concentration and peace of mind, balance and body control, strengthening the arms and toning the abdominal and core muscles.
How to do it: Lower yourself into a deep squat until your pelvis almost touches the floor. Place your palms on the floor, they should be slightly wider than shoulder-width apart from each other and one step away from your body. Without lifting your palms from the floor, lift your pelvis up while bending your elbows. Rest your knees on your hands and lift your feet off the floor. Transfer your body weight to your arms. Lean forward a little, placing your shins completely on your shoulders. Bend your legs and straighten your elbows, maintaining balance.
How to simplify: Don’t try to rise too high, just lift your feet off the floor and hold the asana for balance for a few seconds. Over time, straighten your arms more and more.
Peacock pose
Why: To normalize all processes in the body, strength, energy and concentration, clarity of mind and control over the body.
How to do it: Sit on your knees and spread them apart. Bring your arms straight together, with your palms facing up. From this position, place your palms on the floor with your fingers facing toward your body. Move your palms as close to you as possible, as if sitting on them. Bend forward to rest your head on the floor, with your stomach resting on your forearms. Resting your stomach on your forearms, transfer your body weight to your arms and lift your head and legs off the floor. Stretch your legs in line with your body. Spread your palms apart if it is difficult to maintain balance.
How to simplify: While performing balance asana, do not lift your head from the floor.
Forearmstand against a wall
Why: For strength, tone of arm and back muscles, balance, improvement of blood circulation, lymph flow and metabolism, control over thoughts and body.
How to do it: Stand with your back to the wall one step away. Sit down and place your palms in front of you. Place your feet against the wall and straighten your back. Then straighten your legs completely, they should be parallel to the floor and at right angles to the body. Lower your forearms to the floor and fix the position.
How to make it easier: Perform a stand with your knees bent.
Scorpio pose
Why: For strength, vigor and concentration, harmonization of internal processes in the body, improvement of blood circulation in the brain, clarity of mind and awareness.
How to do it: Start in dolphin pose (downward-facing dog on your forearms). Transfer your body weight to your forearms, gradually lifting your legs off the floor. When your legs are upright, bend your knees and arch your back. You can also enter the asana from a headstand. To do this, you need to bend your knees and lift your head off the floor, resting only on your forearms.
How to simplify: A complex yoga asana for balance cannot be simplified, but to learn how to perform it, often do stands on your head, hands and forearms against a wall and without support.
Headstand
Why: To relieve tension in the body, relax, improve metabolism, balance and concentration.
How to do it: You can enter a headstand from dolphin pose or from a deep downward bend while standing. In the first option, you need to stand in dolphin pose (downward-facing dog on your forearms) and lean on your head. Step your feet closer to your hands until your back reaches a vertical position. Then lift your feet off the floor, balancing on your forearms and head. Slowly raise your legs until they are in line with your body. In the second option, you need to stand up straight, placing your legs as wide apart as possible. Lean forward with a straight back, leaning on your forearms. Then lower your head and rest the top of your head on the mat between your hands. Raise your legs up while maintaining your balance.
How to simplify: Perform a balance asana against a wall or do a variant with emphasis on one leg.
Stretching-guru.ru
Name of asana (posture)
Natarajasana - King of Dancers Pose.
Classification and level of difficulty
Stand on one leg bending over while maintaining balance at a high level of difficulty.
Movements of bones and joints
- Raising the shoulder blades with separation;
- flexion of the shoulder joints;
- flexion of the elbow joints;
- supination of the forearms;
- extension of the spine.
Support leg. Hip flexion; extension of the knee joint; dorsiflexion of the ankle joint.
Raised leg. Extension of the hip joint; knee flexion; plantar flexion of the ankle joint.
Working muscles
- Serratus anterior muscle (scapula abduction);
- infraspinatus muscle, teres minor muscle (rotation of the shoulder joint outward);
- deltoid muscle (raising arms above head);
- supraspinatus muscle and subscapularis muscle (holding the head of the humerus in the joint capsule).
Intertransverse muscles, interspinous muscles, rotator cuff muscles, multifidus muscles, spinalis, semispinalis and splenius capitis muscles, longissimus thoracis and iliocostal muscles (extending the spine and holding it in this position);
psoas minor, rectus abdominis and external and internal oblique abdominal muscles (act eccentrically so as not to create excessive load on the lumbar spine, promote stretching of the thoracic region and extension of the hip joint).
Support leg. Gluteus medius and minimus, tensor fascia lata (act eccentrically to maintain the desired position of the pelvis); quadriceps muscle (extends the knee joint), hamstrings (if there is a sufficient range of motion, it should act eccentrically so that the body does not lean forward too much); muscles of the lower leg and foot (balance maintenance).
Raised leg. Posterior thigh muscles (hip extension, knee flexion); the vastus muscles of the thigh (when extending the leg at the knee, they act isometrically or concentrically to further straighten it at the hip joint); adductor magnus and gluteus maximus (extension and adduction of the leg at the hip joint).
Stretching muscles
- Rhomboid major and minor muscles;
- latissimus dorsi muscle;
- triceps;
- pectoralis major muscle;
- rectus abdominis muscle;
- external and internal oblique abdominal muscles;
- intercostal muscles.
Support leg. Posterior thigh muscle group; hip abductors
Raised leg. Iliacus muscle; psoas major muscle; rectus femoris muscle.
Barriers and Notes
In this version of the asana, the mobility of the shoulder blades is of particular importance. This is necessary both for raising the arms without creating excessive stress on the shoulder joints, and for ensuring mobility of the thoracic spine.
The deeper muscles of the back must be involved in extending the spine, since the participation of the latissimus dorsi and other superficial muscles in the movement will impede breathing and limit the mobility of the shoulder blades.
Simultaneously turning inward and adducting the leg is also a difficult task. Although many believe that fuller extension of the leg at the hip joint can be achieved by rotating it outward, this excessively increases the load on the sacroiliac joint and lumbar spine.
Positioning your arms in this pose can place undue stress on vulnerable parts of your body such as your knees and lower back.
Breath
King Dancer Pose significantly limits the movement of the diaphragm by deeply extending the spine and by forcing the muscles in the front and back of the body to counteract each other to maintain balance. Consequently, breathing in this position should be calm, and staying in it, as a rule, should not be too long, since the efforts of the muscles to maintain it quite quickly begin to exceed the body’s ability to supply them with oxygen. The longer you stay in this position, the deeper your breathing needs to be, which means your abdominal muscles and diaphragm pay less attention to stabilizing your body position, which increases the risk of injury to your spine and shoulder joints.
Attention! If you are just starting to practice yoga, then you need to do it under the supervision of a qualified specialist. Independent practice, in this case, can harm your health.
Material taken from the book “Leslie Kaminoff - Anatomy of Yoga”
Best regards, Artyom Sannikov
Website:
Features of performing Vyagrasana
In addition to the aesthetic effect, Vyagrasana also has a healing character. When performing vyaghrasana, you alternately bend the spine in both directions, thereby toning the corresponding nerves. This pose warms up the organs of excretion, digestion and reproduction located in the lower part of the body due to the influx of oxygen-enriched blood, so it is recommended to perform it for people suffering from genitourinary disorders.
Women in the postpartum period are recommended, starting from the third month after childbirth, to practice Vyagrasana in combination with other dynamic poses to eliminate disorders and pain in the organs of the reproductive system, as well as for general tightening of the muscles in the pelvic area.
Twisting Lunge (Parivritta Ajaneyasana)
- If your balance fails, place your right hand on the floor next to your left foot for support.
- Keep your front knee at a 90-degree angle and your back leg extended and straight as a string.
- Place your right elbow on your left knee and join your hands in namaste
- Squeeze your shoulder blades together and tuck your belly button toward your back for an extra abdominal workout.
- Hold the asana for 5-6 deep breaths or 30 seconds, then repeat on the other side
Performing an asana
You need to enter the asana correctly. The starting position is Tadasana, the legs should be pressed to the floor. When entering and performing the asana, you need to focus on maintaining balance. If upon entering you feel that you are losing your balance, then it is better to stop, fix the position and smoothly move on to further actions only after regaining your balance.
Natarajasana is performed as follows:
- with your hand you need to take the foot on the same side (left hand - left leg);
- the hand is pulled outward, turning the elbow upward;
- pull the foot up;
- the hand holds the leg;
- the thigh stretches behind the knee back and up;
- the pelvis and body are turned forward;
- pull the top of the head as high as possible, stretching the spine;
- the free hand reaches forward and is positioned parallel to the floor; a ring is made from the index and thumb (mudra of knowledge);
- we need to try to stretch upward with the kneecap of the leg on which we stand;
- then perform on the other leg (the right hand holds the right leg).
A more complex version for advanced users is also possible. In this you need to use both hands to pull the bent leg towards the back of your head.
When the pose of King Nataraja is achieved, you need to spend 8 to 16 inhalations and exhalations in it. The asana is performed on both sides.


