Lately, bodybuilding has fallen into disrepute due to the emergence of a new fashion trend, functional fitness. And while exercises like squats, cleans, and deadlifts should be the core of your training, you don't have to give up isolation exercises entirely.
Despite what people who are hostile to bodybuilding say, isolated arm exercises can be functional. For example, if the forearm flexors are the weak link in any position or movement. Or if you have had an injury and need to restore the strength of your arm muscles. Or if you just want your arms to be a little more voluminous.
Correct technique
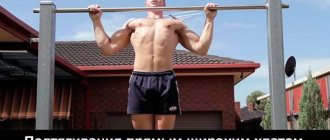
- To do the exercise correctly, you need to approach the horizontal bar and grab the bar with your hands with a reverse grip - your palms should be facing the athlete.
- After this, you need to hover in the starting position for one second. This is necessary to completely stabilize the body, as it is very important to avoid any swaying. In this case, there is no need to bend your legs, because at the lower point of the amplitude they will help the body rise up.
- The lifting of the body begins with maximum concentration of tension in the back and biceps. The body is lifted until the crossbar is level with the eyes.
- Having reached the top point, you can lower your body down. It must happen slowly. After which there is a short pause below again.
- The required number of repetitions is performed.
https://youtu.be/e1wOYkCIk2k
Grips when training with a barbell.
When performing exercises with a barbell, a closed grip is often used, which allows you to clearly fix the projectile in your hands. But there are still athletes who find it more convenient to hold the barbell with an open grip. This mainly applies to barbell exercises on the back and presses, especially the bench press, but since it is not safe, it will be better to use a closed grip.
The choice of a forward or reverse grip is often determined by the exercise itself, but different grip widths are often used when exercising with a barbell. All kinds of presses and rows are often recommended to be performed with different grip widths, which contributes to a more complete development of the target muscles.
Safety
The close-grip biceps pull-up is a challenging exercise that may not be feasible for beginners. To do it, you must first train on a special simulator. This will help teach your body how to perform pull-ups correctly, which will help you avoid any injuries in the future.
Pull-ups are contraindicated for athletes with problems with the spine and joints . The fact is that this exercise carries a serious load. It can be disastrous for weak and sick athletes, so they will have to refuse to perform it.
To further protect the back and joints from possible stretching, the athlete should smoothly lower to the lowest point of the amplitude. If this is not done and he “throws” the body down, the shoulder joints may dislocate. It is for this reason that both lifting and lowering the body down must occur using muscle strength. In this exercise, relaxation is allowed only at the bottom point, when the body stabilizes before the next repetition.
What muscles are involved?
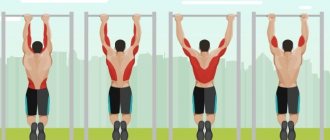
Grip plays an important role in pull-ups. Thanks to the variety of grip, you can use certain muscle groups. With a wide hand position - wide grip, the main load falls on the lats. This is good for the back, but today our task is to look at the biceps pull-up, right?
If you position your arms narrowly, your back is largely disconnected from work, and the main load goes towards training your biceps.
In order to maximally load our biceps, I recommend doing pull-ups with a narrow grip (medium). By slowly lowering to the lowest point, you stretch the muscle fibers, thereby giving them the necessary conditions for pumping blood.
When pulling up, you need to keep your elbows as close to your body as possible. This is necessary for maximum contraction of the biceps. Under no circumstances should the elbows diverge to the side, as the center of the load will shift and we will not get the desired results. This exercise improves your endurance levels in an excellent way.
3-4 approaches are the best option for training your arms. In each approach, try to perform at least 10-12 pull-ups.
Common mistakes
The greatest number of mistakes are made by inexperienced beginners. Usually they involve incorrect positioning of the legs. When pulling up with a reverse grip, do not bend your knees or cross them , as you can use the push to create additional force while lifting up. This action will significantly reduce the load from the back and biceps, and it will partially transfer to the legs.
Another common mistake is “throwing” the body down after reaching the top point . As a rule, beginners have difficulty keeping their body on the bar, so by reaching their chin to it, they immediately relax their body. This should not be done under any circumstances, as the exercise will become not only useless, but also very dangerous.
Sometimes athletes have problems with breathing technique . When doing pull-ups, it is very important to do everything correctly, so you even need to pay extra attention to your breathing. At the lowest point, a deep breath is always taken and the breath is held. It is important to exhale exactly at the moment when the chin reaches the bar, because otherwise the athlete may not have enough strength for a high-quality lift.
Medium reverse grip pull-ups
- Having chosen the grip width, the athlete begins to move upward using the biceps and back muscles.
- During the upward movement, the shoulder blades should be brought together and create a deflection in the thoracic spine.
- The upward movement is performed while exhaling. Throwing your head back is a common mistake. This movement should be excluded from the technique; it creates excess pressure on the neck. The elbow joints face down throughout the entire approach.
- There is no need to raise your chin above the bar at the top point of the movement.
- At the top, you need to pause for a second to maximize the contraction of the target muscles, and then perform a smooth and slow negative movement. The downward movement is performed while inhaling.
Equipment
As additional equipment for performing pull-ups, you will definitely need sports gloves. They will help avoid the appearance of unpleasant calluses on the soft skin of your palms. Typically, calluses begin to form after the first day of intense training on the horizontal bar.
Unfortunately, many athletes believe that gloves interfere with performance because they lose grip on the horizontal bar. Of course, if the gloves are two sizes too big, the athlete will definitely encounter this problem, so it is important to choose clothes that suit you. For pull-ups, open gloves that protect only the palm are good.
Pull-up program
To ensure personal progress in pull-ups, you need to not only follow the correct technique for performing the exercises, but also adhere to a certain training regimen. The pull-up program on the horizontal bar, designed for 30 weeks, has proven itself very well. Thanks to it, you can achieve high, stable results. The program includes 5 approaches to the horizontal bar in each workout with a weekly increase in load.
You can see a detailed diagram of how to increase pull-ups on the horizontal bar in the picture below. It is suitable for both men and women.
| 30 Week Pull Up Program | ||||||
| A week | Approach 1 | Approach 2 | Approach 3 | Approach 4 | Approach 5 | Total |
| 1 | 6 | 5 | 5 | 4 | 3 | 23 |
| 2 | 7 | 6 | 5 | 4 | 4 | 26 |
| 3 | 8 | 6 | 5 | 5 | 4 | 28 |
| 4 | 8 | 7 | 5 | 5 | 5 | 30 |
| 5 | 9 | 7 | 6 | 5 | 5 | 32 |
| 6 | 10 | 7 | 6 | 6 | 5 | 34 |
| 7 | 10 | 8 | 6 | 6 | 6 | 36 |
| 8 | 11 | 8 | 7 | 6 | 6 | 38 |
| 9 | 12 | 8 | 7 | 7 | 6 | 40 |
| 10 | 12 | 9 | 7 | 7 | 7 | 42 |
| 11 | 13 | 9 | 8 | 7 | 7 | 44 |
| 12 | 14 | 9 | 8 | 8 | 7 | 46 |
| 13 | 14 | 10 | 8 | 8 | 8 | 48 |
| 14 | 15 | 10 | 9 | 8 | 8 | 50 |
| 15 | 16 | 10 | 9 | 9 | 8 | 52 |
| 16 | 16 | 11 | 9 | 9 | 9 | 54 |
| 17 | 17 | 11 | 10 | 9 | 9 | 56 |
| 18 | 18 | 11 | 10 | 10 | 9 | 58 |
| 19 | 18 | 12 | 10 | 10 | 10 | 60 |
| 20 | 19 | 12 | 11 | 10 | 10 | 62 |
| 21 | 20 | 12 | 11 | 11 | 10 | 64 |
| 22 | 20 | 13 | 11 | 11 | 11 | 66 |
| 23 | 21 | 13 | 12 | 11 | 11 | 68 |
| 24 | 22 | 13 | 12 | 12 | 11 | 70 |
| 25 | 22 | 14 | 12 | 12 | 12 | 72 |
| 26 | 23 | 14 | 13 | 12 | 12 | 74 |
| 27 | 24 | 14 | 13 | 13 | 12 | 76 |
| 28 | 24 | 15 | 13 | 13 | 13 | 78 |
| 29 | 25 | 15 | 14 | 13 | 13 | 80 |
| 30 | 26 | 15 | 14 | 14 | 13 | 82 |
Useful tips
- The grip can be either shoulder width or narrower. However, you should not place your hands close together, as this increases the dangerous load on the joints.
- It is advisable to lower and raise it all the way. At the top point of the amplitude, the chest protrudes and moves forward to better engage the back in the work.
- To get a greater effect, it is recommended that after the last repetition, lower yourself down by a quarter of the amplitude and stay in this position for the maximum amount of time. Static load, applied against a background of fatigue, well increases strength and overall muscle endurance.
- Reverse grip pull-ups are considered the most effective biceps exercise, so they are considered basic.
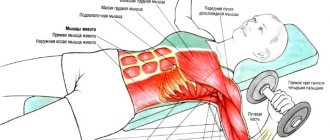
Correctly performed side bends with dumbbells will help strengthen the oblique abdominal muscles.
And if you add body rotations to the tilts, the result will not take long to arrive. For information on how to do this correctly, see here.
The essence and benefits of the exercise
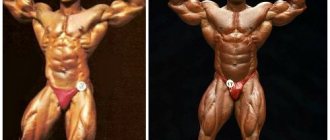
A wide grip involves the teres major and upper part of the latissimus dorsi muscles more into work, which gives the athlete’s torso an athletic silhouette: broad shoulders and chest, developed back muscles, voluminous arms, and a narrow waist. A narrow grip makes your back muscles thicker and stiffer, which means you will look more massive and muscular when viewed from the side. It turns out to be a kind of 3D load. Also, using a narrow grip helps develop strength. Over time, you will not even notice that the working weights in all basic upper body exercises have increased significantly.
This exercise is used in many sports disciplines: fitness, bodybuilding, crossfit, workout, martial arts, etc. It gained popularity due to its technical simplicity, accessibility (horizontal bars and parallel bars are now available in almost every yard) and safety. In our article today we will look at the benefits of this exercise and how to perform it correctly.
The benefits of close grip pull-ups
By using a narrower grip, you will give your back muscles more opportunities to grow. Wide-grip pull-ups are one of the most effective exercises for gaining muscle mass, but you need to understand that its amplitude is almost half as long as that of close-grip pull-ups. Large muscle groups, such as the back and legs, like to work at the maximum possible amplitude. This makes them harder, fuller and stronger. I hope everyone remembers what is the lowest point of amplitude in squats with a barbell?
This principle applies not only to pull-ups, but also to other back pulling movements, such as the bent-over barbell row or lat pull-down. From time to time, replace the grip with a narrow one in these exercises; your muscles have not yet adapted to such a load, so this will lead to rapid progress.
Contraindications
While hanging on the horizontal bar, a strong tensile load is created on the spine. Sometimes this is beneficial, and sometimes it is fraught with great potential danger. If you have osteochondrosis, hernias in the thoracic or lumbar spine, protrusion of the intervertebral disc, spondylosis or spinal deformities (scoliosis, lordosis, kyphosis), doing exercises on the horizontal bar is strictly contraindicated. This can worsen existing problems. Contact a qualified personal trainer to create a healthy exercise program for you. Better yet, contact an experienced therapist, he will give recommendations on how to strengthen your back muscles with your illness.
Safety rules and technical violations
Exercises themselves are not divided into harmful and harmless. Each of them can be performed with errors or without errors. Any of the exercises can cause harm if errors are made in execution. It's the same with pull-ups.
A common mistake for beginners is abruptly throwing back the head, which causes the chin to be raised up. Many people, when pulling themselves up, inhale, lifting themselves, and at the same time bringing their shoulder blades closer together. This happens reflexively, but can seriously injure the cervical vertebrae and even lead to the advancement of an intervertebral hernia.
When performed correctly, the reverse manipulations are performed: before lifting, you should take an extremely deep breath, holding your breath. This will help the latissimus muscles push the body upward. This will also protect small muscles from stretching. Otherwise, any minimal movement of the body will provoke severe pain in the upper back.
The main purpose of pull-ups is to make the back wider, so when performing the movements, you should do this without jerking, the body should not twitch in an attempt to do a repetition, regardless of anything. When pulling up, the body must be held in an upright position by pushing the elbows down.
Varieties of pull-ups
- “Reverse grip” is easier to perform. The grip technique is as follows: the hands and fingers “go” towards you. Types of hand placement, as with the “Direct grip”: narrow, medium and wide. Performing this pull-up engages the biceps, pectoralis major, and biceps muscles. When doing pull-ups with a wide arm position, intensive growth of the latissimus dorsi muscle occurs.
- "Parallel". The hands on the horizontal bar are attached like this: the palms of both hands are turned towards the body.
- "Direct grip." The technology of execution is as follows: the trainee’s hands are positioned with the back side, that is, they move away from you. Kinds:
- narrow (arms are strictly the width of the shoulder girdle),
- medium (arms are fixed approximately 10 cm wider than shoulders),
- wide (maximum distance between hands is created).
- “Different or mixed” - on one hand the palm of the trainee is turned towards his face, and on the other hand the palm is directed away from him.
Different grips
The way the practitioner holds the bar affects how the load is distributed.
According to the distance between the palms:
- Regular grip (medium width) - the position of the hands does not extend or slightly extends beyond the width of the practitioner’s shoulders.
- Small grip (minimum width) – the placement of the hands is narrower than shoulder width.
- Wide grip (maximum width) – the position of the hands extends significantly beyond the width of the shoulders.
According to the method of gripping the crossbar, the following is carried out:
| Grip | Hand position |
| Overhead grip (with straight arms) | The outer side of the hands is on top (away from you) |
| Rear (reverse) grip | Hands with palms facing towards you |
| Medium (neutral) grip | Arms inward, upper body at right angles to the bar |
Learning to pull yourself up
When starting to master the correct technique for performing the exercise, you should not rush. It is the slow pace of execution that contributes to the formation of muscles. You need to go up and down slowly.
To begin with, you should simply hang on the horizontal bar, increasing the duration daily. The arms must adapt to the load, otherwise there is a risk of falling off the bar. When the student can reliably hold on to the horizontal bar, he can begin to pull himself up. A medium grip is best for beginners. Keeping your hands shoulder-width apart, firmly grasp the bar, steadily rising up. The elbows are slightly spread in different directions, heading downwards. To maintain a stable body position, the abs must be kept tense. When your chin overcomes the height of the bar, begin a leisurely descent until your arms are fully straightened.
Exercises on the horizontal bar for all muscle groups
Small grip with straight arms:
When lifting, try to touch the lower part of your chest with the horizontal bar, your gaze focused on your hands.
Rear small grip:
It is performed almost as in the first case, but the lift is carried out with the shoulders pulled back and the shoulder blades brought together.
Overhead normal grip:
As you rise, bring your shoulder blades together synchronously. At the highest point, touch the upper chest with the horizontal bar. When lowering, completely straighten your arms.
Medium (neutral) grip:
The body is lifted exclusively by the latissimus dorsi muscles with the biceps “turned off”. The thumbs, along with the rest, are on top of the crossbar. Look up, lowering your elbows down.
Wide grip behind head:
In this variation, the legs and back should form a straight line. When rising to the highest point, the crossbar should “go” behind the head, and the elbows should drop down.
We do it without mistakes
In order for the classes to be as useful as possible, it is important to pay attention to compliance with simple conditions:
- You should hold onto the crossbar securely!
- When rising and falling, you cannot jerk or sway - movements are carried out solely thanks to muscle strength!
- When the highest point is reached, the chin should overcome the height of the bar.
- Ascent and descent should take equal time.
- Breathing should be uniform: exhale while rising, inhale while lowering.
- The body remains in an exactly vertical position.
- The initial position for any type of exercise, except for lifting with a shift behind your head with a wide grip, is to slightly bend your back and cross your legs, slightly bending your knees.
This exercise is not as difficult as it may seem at first. The main thing is to do it slowly, observing correct technique. If it is well practiced, it will be easier to practice in the future. Over time, it is necessary to increase the number of repetitions and practice other types of grips.
