What is joint gymnastics?
This is a special selection of movements that stimulate the production of interarticular fluid, the regeneration of cartilage tissue and increase the plasticity of ligaments and muscles. It does not include strength exercises, and the effect is achieved through regular exercise. The complex is being developed primarily for older people, patients with joint problems and those who want to become slim and flexible.
The beneficial effects of exercise are not in doubt. Now that people move little, even young people are beginning to develop joint diseases. This occurs due to the fact that without movement the production of lubrication decreases, inflammation develops, and then arthrosis, arthritis and osteochondrosis.
A large number of proprietary complexes of joint gymnastic exercises have been registered that can have a therapeutic and preventive effect on the joints. Most often, their developers are doctors or athletes. Gymnastics will not cure the advanced stage of the disease completely, but it will significantly alleviate the patient’s condition.
The right approach to doing exercises
A set of exercises is prepared by a physical therapy doctor. It takes into account the form and stage of the disease, the degree of destruction of hyaline cartilage, weight, and age of the patient. The first training sessions must be carried out under the supervision of a doctor, who will show you how to perform the movements correctly and how many approaches are needed. The basic rule of joint gymnastics is the absence of any serious loads on the damaged joint. When you feel tired, you should rest rather than increase the pace, trying to complete all the exercises faster. What becomes the purpose of the classes:
- strengthening the muscles located next to the sore joint;
- elimination of stiffness, restoration of the previous range of movements;
- increasing the resistance of the joint to the effects of external and internal negative factors;
- strengthening the muscles of the spinal column, the condition of which determines the optimal distribution of loads on all joints.
The original methods of Gitt and Bubnovsky are very popular. These doctors have developed ways to treat pathologies without using any medications. They suggest restoring joints through frequent, low-range movements. Dr. Gitt suggests paying attention to small children who, after running and playing for a long time, sit down and begin to “dangle” their legs. They instinctively choose the right way to improve the function of their knees. Such movements do not load the joint, but at the same time stimulate the production of synovial fluid.
Physiotherapeutic procedures and massage go very well with joint gymnastics. This combination helps to weaken clinical manifestations, eliminate stiffness, and accelerate recovery.
Anton Epifanov on the benefits of physiotherapy:
For what diseases is gymnastics in demand?
Joint exercises are indicated for joint diseases. It is often recommended for the following pathologies:
- osteochondrosis;
- scoliosis;
- arthritis and arthrosis;
- polyarthritis;
- intervertebral hernias.
The gymnastic complex should be performed regularly for prevention. It is recommended for people over 35 years of age who lead a sedentary lifestyle. The classes will also benefit those who work while standing. The effect will be obvious after 3-4 months of regular exercise. Patients confirm that their joint pain has decreased and their body condition has improved.
Review of popular complexes
The leaders in popularity on the Internet are the Bubnovsky and Norbekov systems
Among the selections of exercises for joints, some prefer one of a number of named complexes from modern doctors or sports instructors. Others opt for some time-tested option from the practice of Eastern healing systems. By and large, the benefits from them are the same, since all modern author’s methods are a compilation of warm-up from the practices of martial arts with the dynamic performance of some yoga asanas.
The most popular collections of exercises for joints on the Internet are complexes from Bubnovsky and Norbekov. However, let’s leave the treatment systems “invented” by them without photos and videos in this article. Let's take a brief overview of some other joint gymnastics that are popular today. It will save time and help you decide on the necessary and suitable gymnastics complex for your joints.
Advice. For those who need the treatment of arthrosis, grade III scoliosis, intervertebral protrusions and hernias, we recommend paying attention to a new product - the complex use of physical activity with relaxing myofascial massage. This technique is worthy of attention, since it was developed by A.A. Tolstonosov, who received a higher university education in the specialty of Physical Rehabilitation.
Training with Olga Yanchuk
Warm-up for joints from Yanchuk is ideal before stretching and Pilates
A selection of exercises for joints from Olga Yanchuk is a classic in-depth warm-up. It is primarily suitable for healthy people who keep fit, do Pilates and/or other types of exercises to develop stretching and flexibility.
As therapeutic exercises, this complex is suitable only for patients with healthy joints and a diagnosis of Osteochondrosis of I degree. In order to find “joint gymnastics video with Olga Yanchuk” add the query “live” in the search bar. The word “live” is the name of the television channel that sponsored and broadcast 32 classes under her leadership.
Gymnastics Borshchenko
In the photo, Igor Borshchenko performs the exercises personally
Dr. Borshchenko’s isometric gymnastics works the spine and joints in static positions, so it is suitable for absolutely everyone, especially patients simultaneously suffering from serious cardiovascular diseases.
Recommendation. In our opinion, Igor Borshchenko’s videos and books are the best materials on this topic. You can use them yourself, of course, not forgetting that the exercise therapy complex you have chosen must be approved by your attending physician.
Exercises for joints from Demenshina
Alexey Demenshin – psychologist, specialist in self-hypnosis techniques
One of the variants of Norbekov’s method is Demenshina’s joint gymnastics. It is supplemented with manipulations of acupressure self-massage and the author’s auto-training techniques. Therefore, classes with Demenshin are suitable for those who need psychological guidance for recovery and believe in the healing power of positive emotions.
“Volitional” exercises for joints and muscles from Vadim Shlakhter
Vadim Shlakhter – Ph.D. psychol. Sciences, MS in Sambo and Bullet Shooting
Shlakhter’s joint gymnastics is a combination of Bubentsov’s fine-field esoteric exercises, Norbekov’s advice, the practice of the Inspiration mantra and the author’s “volitional attitude of muscle tension.”
Attention! It is possible to practice the Schlachter method only after the instructions for each of the presented author’s exercises have been approved by the physical therapy doctor treating you.
Gymnastics by Alexandra Shevtsov
Writer's pseudonyms of Alexander Shevtsov - Alexey Andreev and Ivan Skomorokh
Orthopedic exercise therapy complex, which Shevtsov “assembled” - joint gymnastics for osteoporosis. It is based on a combination of sports techniques by Valentin Dikul and the method of Eckhart Tolle.
The last borrowing is quite strange, since Shevtsov is a researcher of Slavic esotericism, and the German spiritual speaker Eckhart Tolle preaches Tibetan meditation and offers yoga asanas and exercises practiced by Himalayan monks.
Unlike the circus artist V. Dikul, who with his own experience, subsequent receipt of sports medical education and thousands of people who have already been cured, proved the effectiveness of his complexes, Shevtsov and Tolle are engaged in medical practice, in fact, without having the right to do so. The price you can get for self-treatment using their methods is an exacerbation of the disease, up to and including forced surgery.
Important. On the Internet you can find a video from another Alexander Shevtsov, offering to cure a spinal hernia. His system is called "Grandfather's Secret." We warn you. There are no confirmed systems that completely restore intervertebral discs, and dealing with such pathologies, following dubious home-grown advice, is extremely dangerous.
Exercises for joints from Fedor Dolenko
Fedor Leonidovich Dolenko – certified rehabilitologist
Gymnastics “Take care of your joints” is described in detail in the book of the same name by F.L. Dolenko, published in 1987 and republished in 1990. The work is presented by the famous Moscow specialized publishing house Physical Culture and Sports.
Dolenko, a professional dancer who received a diploma in physical rehabilitation, knows from his own experience how a person suffering from diseases of the joints and spine feels. There are no videos or photo reviews of this gymnastics online, but you can download the book, which, together with Dr. Borshchenko’s printed publications, is a reference for many orthopedists, traumatologists and exercise therapy instructors.
Gymnastics for joints from China
Position from the complex “Stroking the mane of a white horse”
Chinese joint gymnastics is represented by a fairly large group of varieties of complexes from the health practices of Qigong and Wushu. If diagnosis and coordination training allows, then daily implementation of any of them will help stop the development of osteoporosis and osteochondrosis, bring joints to proper condition, normalize blood pressure and rejuvenate the body as a whole.
For your information. You can start doing Chinese health exercises at any age, but to be on the safe side, you should get the approval of your treating physicians.
Main tasks of gymnastics
By doing exercises, a person receives a daily dose of exercise. Thanks to this, physical and psychological effects beneficial to the body occur:
- strengthens the back and abdominal muscles;
- the body rejuvenates;
- joints are developed and strengthened;
- salt deposits disappear;
- the spine becomes more flexible;
- excess fat is removed, especially dangerous abdominal fat;
- nerves are strengthened;
- thyroid function improves;
- vitality and potency increase;
- activity increases and a surge of energy appears.
Joint exercises can serve as a warm-up before strength exercises that will shape the body and make it beautiful.
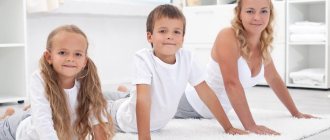
Joint gymnastics for preschoolers from 4 to 7 years old
Natalya Babintseva
Joint gymnastics for preschoolers from 4 to 7 years old
Life requires movement. Aristotle
Those who are physically stronger live better in life. Kalinin M. I.
The very name " articular "
tells us that
this gymnastics is intended , first of all, to warm up the joints of our body . It is believed that a set of such exercises is suitable for any age and level of physical fitness, contributes to the overall health of the body and more. Gymnastics provides the daily muscle load a person needs, strengthens the muscles of the back, body, and abdomen, prevents the formation of fat deposits, strengthens and develops joints , removes salt deposits, strengthens the skeletal system, and makes the spine flexible. In addition, gymnastics also gives a psychological effect: it increases activity, gives a surge of vigor, eliminates blues and melancholy, improves mood, strengthens the skeletal system, makes the spine flexible. To be fair, it is worth noting that joint exercises will be a weak assistant in losing weight, building muscle mass, or developing strength and endurance. A set of exercises for joints is performed without weights at a calm, measured pace. Joint exercises help prepare joints , ligaments and muscles for physical exercise, which will help avoid various types of injuries in the future. And for preschool children, joint gymnastics can become the basis for physical development.
After all, in childhood and adolescence, the body is still growing, the musculoskeletal system is being formed, and working with weights can negatively affect these processes. Thus, joint gymnastics becomes the golden mean between impact fitness loads or other training.
It is also worth noting that at any age, the practice of joint gymnastics improves posture, strengthens the back muscles, problems with which young people often complain, improves blood circulation, metabolism, etc.
approaches and methods to compiling joint gymnastics . The most popular of them are the domestic methods of Bubnovsky and Norbekov, and among foreign approaches in our latitudes, Chinese qigong gymnastics . All of them are based on fairly simple exercises that allow you to tone the musculoskeletal system, saturate the body’s tissues with oxygen and nutrients, get a charge of vigor, good mood, and, over time, a noticeable therapeutic effect.
The convenience of joint gymnastics is that it does not require any special devices, expensive exercise equipment, etc. to perform it. You can easily practice it at home instead of morning exercises or as a warm-up before jogging, or use it before practicing hatha yoga.
of joint gymnastics since kindergarten . Its essence comes down to rotating all the joints of our body , which are amenable to rotation or other reciprocating movements, allowing them to increase their mobility and flexibility. Let's remember together what these movements are. In order not to get confused, we will move sequentially from the top of the head to the feet.
Joint gymnastics begins and ends with breathing exercises. To do this, stand straight, place your feet shoulder-width apart, raise your arms straight up - take a deep breath. Stretch the top of your head towards the ceiling, feel the stretch in your spine.
As you exhale, lower your arms and body down freely. As in hatha yoga, the static pose “Liberation”
.
Repeat the exercise three times.
Next, we move on to joint gymnastics of the neck . To do this, carefully tilt your head to the right, spread your straight arms to the sides, placing them parallel to the floor, you can help deepen the tilt of your head by pressing lightly on it with the same hand.
Do the same in the other direction. Repeat the exercise three times in each direction.
Next, perform three head turns in each direction. Do this slowly to avoid damaging your neck muscles.
Complete the neck warm-up by tilting your head forward and backward - three times in each direction. with children of preschool age, as these movements are considered traumatic.
From warming up the neck we move on to the shoulders. To do this, stand straight, bend your elbows, place your palms on your shoulders. Perform 8 rotational movements with your shoulders forward and then the same number backwards.
To perform the next exercise, place your arms bent at the elbows in front of you - with your forearms vertical to the floor.
Complete joint gymnastics lying on your back , with your arms extended along your head. Stretch your entire body from the top of your head to your toes. Joint gymnastics is a very useful general strengthening gymnastics for all ages , including children. But the teaching methodology in adult groups is not suitable for working with children. Experience shows that the emphasis on the therapeutic effect in joint gymnastics does not work ; much better results are obtained by the emphasis on the figurative representation of the exercises performed. The following associative series is proposed, which each teacher can supplement and change at his own discretion.
for example, have the children imagine:
a) that arms and legs look out of the water, and they watch them while sitting on the bottom;
b) that they are sitting in the ground, and their arms and legs are heavy;
c) that the arms and legs are light and separated from each other;
d) that they are the ends of flames, and their movements are sharp and fast.
If the children in the group are not physically prepared enough, then it is necessary to reduce the time for performing the exercise or create your own complexes that are feasible for the children.
Combine business with pleasure. Think of any physical exercise as a game that should be interesting to children.
Children are flighty, and sometimes one word is enough to change their condition. On the one hand, you should always think about what you are saying to the child, and on the other hand, you need to play with him, travel in the world of the game, return and rejoice. Explain casually why joint gymnastics , when it can be used, for what diseases, what are the results of its implementation.
Methodology for performing joint gymnastics .
A number of joint gymnastics are performed from the “hanging” position. “Hanging out” means, in a sitting position, extend straight arms and legs forward so that the legs along their entire length - from the hips to the calves and heels - do not touch the floor. Support on a mat or on a chair in this sitting position is provided only by the pelvic bones. At the same time, the abdominal muscles are tense and maintain the balance of the whole body.
When performing exercises, stay straight, neck, back and head form one line. The face is calm, satisfied, eyes are closed, breathing through the nose, attention is directed to performing the exercise. The pace of the exercises is variable.
All muscles not involved in the exercise should be relaxed. Breathing only through the nose. Where this is not specifically stated, breathing is voluntary and calm. The load in the exercises can be dosed both by the number of repetitions and by gradually increasing the complexity of some exercises as you master the complex. During exercises performed while sitting, the load is regulated by the way the body is planted in the i. etc. when performing exercises while sitting on a chair with a full seat (the back does not touch the back of the chair)
the load is minimal; when sitting on the edge of a chair, the load increases.
When performing the same exercises on the floor, the load is maximum. Joint gymnastics exercises :
1. “Do “goodbye”
arms and legs” - movements of the hands and feet up and down.
I. p.: “hang out”
.V.: Trying to keep straight arms and legs motionless, begin simultaneous movements with your hands and feet upward, pointing your palms and toes up, towards the ceiling, and then down, trying to direct your palms and toes towards the floor. Perform the movements vigorously until they stop. Do 5, 10, 15. 20, 25 movements, counting the up-down movement as one.
Options (changes in i.p. hands and feet)
1. Right hands and feet - up, left hands down.
2. Hands - up, feet - down.
3. Right hands and feet - towards, left ones apart.
4. Spread your fingers.
2. "Tick-tock"
(say
yes
) – head up and down movements
I. p.: performed from a sitting position. V.: Vigorously, with effort, throw your head up, directing the back of your head towards your back, and down, trying to reach your chest with your chin. Start with slow movements. Do up to 25 movements, counting up and down movements as one. At first, do the exercise carefully.
Option: while bending up and down, slightly tilt your head to one or the other shoulder.
3. "Scythe"
(“Say
“no”
with your arms and legs” - turns your hands and feet left and right.
I.P.: hang out, trying to maintain a stationary position with arms and legs extended forward. B: begin simultaneous movements of the hands and feet to the right, swinging both hands and both feet to the right all the way, and then to the left, turning the hands and feet to the left as far as they will go . The arms and legs are straight, only the hands and feet move, everything else is motionless. Make movements vigorously. During one exercise, do up to 25 movements, counting left-right movements as one.
Options (changes in i.p. hands and feet)
1. Feet to the right, hands to the left
2. Feet in, hands out
3. Spread your fingers.
4. "Clock Pendulum"
(
"bell"
)
(tilt the head to the shoulders)
.
I. p.: performed from a sitting position. V.: vigorously tilt your head to the right, then to the left shoulder, trying to touch the shoulder with your ear. Make sure your shoulders don't rise. Do up to 25 movements. At first, do it carefully, gradually achieve a sharp throwing of the head. The tempo is alternating, start the exercise slowly, then speed up the movements, changing the tempo, finish slowly.
Option: tilt your head to your shoulders, slightly tilting your head back.
5. “Fan”
(Helicopter)
– rotation of the hands and feet
I. p.: “hang out”
.V.: Simultaneously begin rotating movements with your hands and feet, as if on a dial. Both hands and both feet rotate in the same direction. Then change the direction of movement. Make up to 25 circular movements in each direction.
Options: 1. hands to the right, feet to the left.
2. The hand and foot of the right side rotate in one direction, the hand and foot of the left side - in the other.
3. The right hand and left foot rotate in one direction, the left hand and right foot rotate in the other.
6. "Turning the head left and right"
(Say
no"
)
I. p.: sitting. V.: make vigorous turns of the head left and right until it stops. Do up to 25 times, counting turns left and right at a time. Do the exercise carefully at first. Achieve quick movements.
7. "Okay"
I. p.: “hang out”
. B: connect the legs extended forward to each other along the soles, turning the soles in the opposite direction. At this time, the arms are extended forward, the fingers make energetic movements, as if kneading large pieces of plasticine. Do this up to 10 times, counting ankle touches and foot touches at a time. Then tap your feet and ankles together.
8. "Yula"
(
“Kolobok running along the shoulders, back, chest”
- rolling the head.
I. p.: sitting. V.: make circular movements with your head, as if rolling it along the shoulder girdle. At the same time, the neck moves along the surface of an imaginary cone with a maximum angle at the apex, at the base of the neck. The nose describes a circle with as large a radius as possible. Start movements slowly, gradually increasing the pace. Do rolling first in one direction, then in the other. Perform up to 10 rolls in each direction. Do it carefully at first.
9. "Scratch"
I. p.: sitting. V.: while inhaling, bring your hands closer to your shoulders, moving your elbows back. The shoulder blades came together. Exhale sharply through a wide open mouth - ha! And throw your hands forward with your fingers spread wide apart. While holding the exhalation, make energetic swinging movements with your arms extended forward up and down, as if scratching the space in front of you with your spread fingers. The arms are very tense. During the same exhalation delay, stop the swinging movements of the arms, extend the arms and legs forward (it is better to hang out)
and forcefully perform scratching movements with your fingers and toes, keeping your straightened arms and legs in a motionless position. Perform with great effort. This exercise is repeated 3-5 times.
10. "Snake Moves"
.
I. p.: standing, feet shoulder-width apart. V.: make circular movements with your head in a horizontal plane. The chin moves parallel to the floor, the nose looks only forward. First one way, then the other. Performed 8-10 times in each direction.
11. "The Cockerel and the Hen"
- rooster movements.
I. p.: standing, legs slightly apart. V.: make pecking movements of the head in a horizontal plane in the sequence forward-backward, right-backward, forward-backward, left-backward, forward-backward, etc. the chin moves parallel to the floor. Make 8-10 such movements.
12. "East Dance"
I. p.: standing. V.: Interlace your hands above your head. Maintaining a vertical position of the head, move the head left and right in the plane of the shoulder girdle. Don't tilt your head. The hands move in the direction opposite to the movements of the head. Make 8-10 such movements.
Options.
1. 2 times in each direction.
2. 3 times in each direction.
13. "Show and hide your little finger"
- twisting hands.
I. p.: extend your arms in front of you. V.: Cross your arms, turn your palms towards each other and interlace your fingers. Turn the intertwined palms down towards you - up to a position in which the palms are facing up. Stay in this position. Try to ease and then completely eliminate tension and pain in your hands. Then return your hands to i. n. Swap the position of your hands and repeat the exercise. Perform 5-7 times.
14. "Who will win?"
(
"Compressed springs"
)
I.P.: place your elbows on the table (when performing while sitting at the table)
or on your knees apart
(when performed while sitting on a chair or on a mat)
. The forearms are relaxed and vertical. Palms facing each other.
.V.: the right palm slowly squeezes an imaginary spring lying on the table. Compression occurs with great effort. When your right hand reaches the surface of the table, raise it to i. n. now the right hand looks up, the left hand with tension “Compresses the spring2. When with"
compression of the spring" strains both arms, abdominals, shoulder girdle and chest. The neck is relaxed. Upon returning to i. p. the hand relaxes. Breathing is voluntary, if possible, held. Repeat 5-10 times.
Option: "springs"
squeeze two hands at the same time.
15. "Swimming"
- rotation of the forearms.
I. p.: place your elbows on the table or on your spread knees at a distance wider than your shoulders. V.: Rotate your forearms, making swimming movements. With this movement of the fingers under the chin, the back bends and the stomach retracts. When moving the hands forward, the back arches. The back, chest, and stomach move in waves. Perform swimming movements first in one direction (forward, then in the opposite direction (back)
. When the hands pass under the chin, the palms face down, one under the other. During subsequent movements, the hands turn palms up. Just 10-15 movements in each direction.
16. "Locomotive Wheels"
- shoulder rotation.
I. p.: palms lie on knees without lifting palms. V.: Perform circular movements with your shoulders forward and then back. Make up to 30 movements in each direction.
Option: rotate one shoulder forward, the other back.
17. "A Fisherman Catches a Fish"
- slopes to a point.
I. p.: - “fisherman’s pose”
. Hands are placed on the knees, fingers inward.
V.: choose a point on the floor between your feet. Tilt your right shoulder towards this point. In this case, the chin moves towards the shoulder. Maximum tilt, return to and. p., we do the same with the left shoulder.
18. "Sandwich"
- bending at the knees.
I. p.: sit up straight, palms on knees, fingers inward.
V.: Spread your knees to the sides. Legs are placed at right angles. Bend your torso alternately towards each leg, while bending your arm at the elbow joint . Bring your elbow forward and, bending over, fold your forearm and shoulder, trying to lower them behind your knee. The hand is like an extension of the leg. Do not lift your buttocks from the chair. Do 3-5 times in each direction.
19. "Opening pneumatic doors"
I. p.: sit or stand straight, hands in front of the chest, palms facing each other with a slight offset. V.: take a breath. While holding, forcefully move your open palms towards each other, as if opening the doors of a subway car. When moving, the arms are tense. When your palms are level, continue moving until you stop. Then change hands and perform the door opening movement again. Return your hands quickly but smoothly, while you need to learn to instantly relax your hands. “door openings” at a time
with a change in hand position.
20. "Shot put"
I.P.: stand up straight, arms along the body
.V.: while inhaling, move the palm of the right hand to the shoulder, pull the shoulder back. While holding, with great effort, very slowly make movements that repeat the movements of an athlete putting the shot. While one hand is moving, the other hand is relaxed. The face is turned towards the palm pushing the shot. When the hand pushing the shot is fully straightened, fix this position and stay in it for several seconds. The body is turned as far as possible to the left. Then perform the shot put with your left hand. Do 3-5 times, counting the movements of the right and left hands at a time.
21. "Moving walls and ceiling"
I. p.: sitting or standing. V.: With both hands, forcefully perform pushing movements to the sides, as if pushing imaginary walls away from you. The arms move slowly with tension until they are completely straightened. Upon returning to i. n. relax your hands. Run 2 times. Then, with both hands, push the imaginary wall away from your chest and directly in front of you. Repeat 2 times. After this, perform pushing movements with your palms up, as if lifting the ceiling above you. Repeat 2 times.
22. "Munchausen"
- stretching.
I. p.: sitting. V.: Stretch your arms up, interlace your fingers above your head in a lock. With energetic movements of your hands, try to tear yourself away from the seat: to the right, up, to the left. When you stretch your arms to the left, the right buttock comes off the seat, and when you pull it to the right, the left one comes off. The sequence of hand movements up – left – up – right is counted at one time. Finish with a vertical stretch. Do 3-5 times.
Option: hands are not locked, but press palms against each other and stretch upward ( “tree pose”
)
23. "Look what's behind you"
- twisting
(performed with your back to the north)
I. p.: sitting. V.: put one hand on your knee, place the other behind your back. Moving the back of your hand along your waist, try to follow it by turning the entire body of the vertical axis of the spine as much as possible. Turn your head along with your body, eyes closed. In a position where the head and body are turned all the way, hold your breath. Remain in this position for several seconds, trying to completely relax. Breathing is free. Then turn the body in the other direction. Perform the exercise 2-3 times, counting turns left and right at a time.
24. "Tree in the Wind"
- lateral bends.
I. p.: sitting. V.: join your hands behind your back, holding your elbows. Do not press your forearms to your back. Exhale and bend to the side without lifting your buttocks from the floor. When tilting, mentally try to see the opposite leg of the chair. Hold in the maximum tilt position for a few seconds. With a sigh, return to i. p. and perform the same tilt in the other direction. Do the exercise 2-3 times, counting the tilt to the right and left, counting the tilt to the right and left at a time. Breathing is free.
25. "Snail"
I. p.: sitting. V.: intertwining your fingers, clasp the back of your head with your palms. Take a breath. As you exhale, slowly and with tension, tilt your head with your hands to your chest and, continuing to tilt, slowly bend your back vertebra by vertebra, trying to reach the top of your head to the floor. Inhale slowly and also with tension, return to i. p. perform 3-5 times.
26. "Scissors"
I. p.: sitting. V.: With straight arms and legs in a horizontal plane, perform swinging movements left and right crosswise. Then move straight arms and legs up and down. Change the pace of movements. Do 8-10 times in horizontal and vertical directions.
27. "Football"
I. p.: stand up straight. V.: perform various strikes on an imaginary ball - sharply, with a draw. The tempo of the blows is variable. First standing on one leg, then on the other. Make 10 – 25 kicks on the ball with each foot. After this, jump on one leg, then on the other leg. Then change legs and continue the exercise. Do 10-25 jumps on each leg. Then – jump on two legs up, as high as possible. Bounce off the floor like a ball. The person is happy to perform 10-25 jumps.
28. "Slender legs"
I. p.: straight, feet together, legs touching each other at all points. The arms are freely lowered. The neck, back, and head form one straight line. The torso and arms are relaxed. V.: rise on your toes and lower on your heels, springing and swinging so that your heels just barely touch the floor. Breathing is free, eyes are closed, face is calm, satisfied. Do 25-50 times until your calves become tired.
29. "Cross"
- throwing up the legs.
I.p.: lying on your back, stretch both legs together. The arms are straight, lying on the floor perpendicular to the body. V.: raise one leg in a vertical position and lower it to the floor through the other leg, without bending the knee. Place your thumb on the floor so that your legs form a right angle. Do not lift your shoulder blades off the floor. Fix in the pose, relax. Hold the pose until you get tired. Repeat with the other leg. Do this 2-4 times.
30. "Karate"
I. p.: standing. V.: alternately with both feet, strike forward with your heels, directly in front of you, at an imaginary opponent, imitating karate strikes - 8-10 strikes with each leg. Then kick to the side with each leg in turn. Perform 8-10 blows to the left and right sides. Then – kicks back, also 8-10 kicks with each leg. Perform the blows sharply, trying to relax in the intervals between blows. Change the tempo of the blows.
Wellness session of joint gymnastics :
1. "Hands up"
I.p.: feet are placed shoulder-width apart. V.: while inhaling, raise both arms up, stretch a little and lower them as you exhale, while bending forward. 5-6 repetitions.
2. "To the side"
I. p.: legs slightly apart V.: raise the arm up, stretch, slowly tilt the upper body in the direction opposite to the raised arm, return to the starting position and lower the arm. 4-5 repetitions for each hand.
3."Bow your head"
I. p.: standing V.: put their hands on the belt, slowly tilt their head. 4-5 repetitions.
4."Roll over"
I. p.: hands are left on the belt. V.: slowly roll their head from one shoulder to the other and back. 4-5 repetitions.
5. "Hour hands"
I. p.: standing, spread their arms slightly to the sides, loosely clench their hands into a fist V.: rotate both arms, first clockwise, and then in the opposite direction. 5-6 repetitions.
6."Circles with elbows"
I. p.: standing, legs slightly apart V.: rotate the arms at the elbow joints . 4-5 repetitions counterclockwise and in the opposite direction.
7. "Brushes up"
I. p.: extend their arms to the sides. V.: raise the hands up, hold them a little and lower them down. When the exercise is performed correctly, tension and a slight tingling sensation are felt in the hands. 4-5 repetitions.
8. "Lean over"
I. p.: the same, leave your arms outstretched. Palms are in line with the forearm. V.: the upper body is slightly tilted to the side, while the pelvis is left in place. Return the body to its original position and then tilt it in the other direction. 5-6 repetitions.
9. "Rotation"
I. p.: standing. V.: put your hands on your belt and rotate your pelvis, keep your legs straight. 4-5 repetitions.
Before performing joint exercises, it is recommended to perform a leg massage and a set of stretching exercises.
Types of joint gymnastics
Special exercises do not take much effort and time, and the benefits from them are enormous. Nowadays, many methods have been developed that can improve the health of different age groups of the population. If you are unsure which one to choose, consult a fitness trainer or doctor. In addition, there are a number of contraindications in which movements are limited or prohibited, so discuss this issue with your doctor before starting.
Warming up before joint gymnastics is necessary: it will help warm up the muscles and avoid injury caused by the body’s unpreparedness for training.
Joint gymnastics by Norbekov
Classes using the methods of Professor M.S. Norbekov are aimed at strengthening joints and all parts of the spinal column. There is no license for gymnastics, so official medicine considers the method an alternative. The complex is divided into 2 stages:
- Development of the spine.
- Working with the joints of the arms and legs.
The technique has contraindications, although its main principle is to exercise with a positive attitude. Norbekov believes that the amplitude of movements or the depth of bending is not important, because there are no restrictions on the body. To practice gymnastics, you do not need to purchase expensive equipment or special tools. The main thing is the desire to work on yourself.
Norbekov’s gymnastics can cure not only joint diseases, but also improve the functioning of all organs and systems. The elastic muscle frame that forms after regular exercise helps relieve additional stress on the spine, and active movements heal the human body from the inside. As a bonus - improved mood and increased self-confidence.
Bubnovsky's gymnastics
The doctor’s set of exercises is recommended for the rehabilitation of patients with pathologies of the musculoskeletal system. Its main tasks are to improve the coordination of the patient’s movements and strengthen the abdominal muscles. Even older people, after regular exercise, can improve their posture and strengthen their body by following the doctor’s instructions. Along with gymnastics, Bubnovsky recommends to patients:
- water procedures;
- balanced diet;
- drinking plenty of water;
- breathing exercises.
With the help of this simple complex, patients achieve success in recovery quickly and painlessly.
Gymnastics according to Olga Yanchuk’s method
A set of exercises called “joint gymnastics” is made up of yoga, stretching, Pilates and industrial gymnastics movements. This type of exercise is designed to restore the elasticity of the spine and joints. Exercises will strengthen large bones, remove salt deposits from them, increase the production of joint lubrication, and also improve flexibility and stretching. Classes are suitable for frail and elderly people.
Yoga and joint gymnastics
India gave the world joint gymnastics called Sukshma Vyayama, which prepares for performing the basic physical exercises of yoga - asanas and pranayamas. An approximate translation of the phrase is 'soft warm-up, exercises'. Sukshma Vyayama has many variations. Our most common version of exercises is in the tradition of Dhirendra Brahmachari.
The difference between Indian joint gymnastics and others is that it works not only the physical body, but also the energy and psyche. It harmoniously alternates between relaxation and tension. Along with micro-movements of various parts of the body, such gymnastics trains a person’s attention and works with images and breathing.
The exercises of the complex can be either an excellent preparation for yogic asanas or practiced independently of them, providing a comprehensive healing effect on the body. They are very similar to the movements of the above muscular-articular gymnastics, however, practitioners note a stronger impact and effect of Sukshma Vyayama. If the first is similar to exercise therapy and gives good physical well-being, then the second plus gives energy, self-confidence, inner strength, mobility and endurance.
Yoga joint gymnastics
Yoga joint gymnastics can also be performed in parts. Concentration on breathing, when each movement has its own respiratory cycle and a special type of breathing (kapalabhati, bhastrika), is not difficult for most practitioners and enhances the kneading, warming aspect. Movements can begin from top to bottom, or from bottom to top, or from the limbs to the center, comprehensively working deep-lying muscles and hard-to-reach joints.
It is a little more difficult for practitioners of joint yogi gymnastics to master their attention: the crowded thoughts in the head do not allow concentration, but as you dive into the complex and strictly follow the instructions, the restless mind “slows down.” At this stage, using your imagination, you can start working with images.
So, while tilting the head, we close our eyes and mentally try to see the neck being stretched in the same place where it is. We begin to listen to the sensations in this part of the body, imagine how the ligaments soften, “allowing” the joints a greater range of motion, how the blood flow through the vessels and veins accelerates. Thus, draw pictures on your inner screen. This brings awareness to the exercises.
When practicing joint gymnastics, Sukshma Vyayama yogis often overlook the following points:
- increase the load gradually. If discomfort occurs, reduce it;
- choose a variable pace - from slow to fast, avoiding monotony and haste;
- analyze sensations;
- ensure correct posture and calm breathing (in cases where you are not working with it purposefully);
- do not change the sequence of the complex;
- Perform joint exercises systematically and on an empty stomach.
For experienced practitioners, there is a type of yogic joint gymnastics called Sthula Vyayama, which roughly translates to 'rough exercises'. Often the same exercise can be performed in sukshma and sthula variations. In the latter case, when the body is prepared, the exercises can be performed in a tense manner with special breathing (accentuated exhalation) and the inclusion of deep squats, bending, running in place, and jumping. Such movements develop muscles, strength, endurance and other similar qualities.
Rules for performing joint gymnastics
For the complexes described above, there are uniform requirements that must be met in order to avoid health problems:
- It is advisable to perform exercises for joints no earlier than two hours after eating.
- During active movements, monitor your breathing and straight posture.
- The back should be in line with the back of the head and neck.
- Do not make too sudden movements or jerks. Avoid static loads, do more stretching exercises.
- You need to do gymnastics every day, for at least 5 minutes. It is advisable to spend 20 minutes to an hour on it.
The best time to perform the complex is in the morning. But if you study in the evening, then finish no later than 1 hour before bedtime.
Joint gymnastics by Valentin Dikul
Valentin Dikul’s joint gymnastics for the spinal column gained not just popularity, but also the love of patients, whom she literally put on their feet. However, it did not bypass those who simply monitor their health and do this gymnastics for preventive purposes. It helps against the following diseases:
- Kyphosis
- Lordosis
- Osteochandrosis
- Scoliosis
- Intervertebral hernia
- Cerebral palsy
Reference. The uniqueness of this technique lies in the fact that its creator was able not only to recover from a serious injury thanks to it, but also to return to normal life.
Using his method, about thirteen thousand people recovered almost completely while fighting their illness.
Of course, the results will not come on the second day of classes - it will take months before the sick person experiences this for themselves. The secret to training is low-impact exercise. It is they who will return the joints to their former mobility.
Advantages of Dikul gymnastics:
- Perfectly works muscles and ligaments.
- The range of joint movements increases.
- The spine becomes strong and flexible.
Exercises are done both for the prevention and treatment of osteochondrosis and the spine.
Suitable for both trained athletes and elderly people.
Recommendations for classes on Dikul honey
Any technique requires some subtleties and proper execution. If everything is done correctly, then the person gets the following results:
- Metabolism is activated.
- The body is simply filled with energy.
- Blood circulation improves.
During classes you need to remember the following:
- There should be an even distribution of loads on all muscles of the spine.
- The muscle corset can be restored using a suspended rope ladder.
You need to start small, and under no circumstances overload your spine!
This technique is based on restoring the previous ability through labor-intensive and patient work.
Dikul doesn’t tell anyone that it will be easy. You need to follow the recommendations without retreating a single step. And the result is worth it - his technique brought many thousands of people back to life. And the patient’s general condition certainly improves. This once again confirms that many people constantly turned to Dikul for help and are now turning to him. Science has proven that spinal cord neurocytes are able to regenerate (recover). Academician Dikul’s methodology confirms this fact.
In addition, these classes do not deny all kinds of therapies:
- Physiotherapy
- Aquatherapy
- Acupuncture
- Physical therapy
- Manual therapy
- Therapeutic gymnastics
In specialized medical centers of Valentin Dikul there are special simulators, many of which the academician invented himself.
A set of exercises is selected individually for each patient - this is done based on the diagnosis and general condition of the patient.
In addition, joint exercisers are also used at home as an addition to the main treatment.
Valentin Dikul has developed a so-called basic set of exercises with the help of which motor activity is restored.
Joint gymnastics for beginners
This type of exercise does not involve heavy loads, so it is suitable for patients who have decided to engage in physical exercise for the first time, as well as for children. Joint gymnastics for beginners is designed for people suffering from joint diseases and those who have suffered injury.
It can be performed by someone who is just starting to play sports. Joints and muscles need to be prepared for serious training. If this is not done, they will not be elastic, and injuries may occur during exercise.
For the elderly (simplified complex)
The goal of joint gymnastics is to prepare a person for daily stress, balance the functioning of all body systems, and strengthen muscles, ligaments and joints. In older and middle-aged people, after regular exercise, vitality and mood increase. A special set of 21 exercises has been created for them, which must be performed to music and with a smile. Here we will present you with a shortened version. This complex is indicated for elderly patients. It consists of 10 simple exercises:
- Lie on your back, straighten your legs, bend one of them and place it on the knee of the other. For the first time, do 5 approaches, then gradually increase their number to 20 times.
- While lying on your back, spread your legs bent at the knees to the sides, pressing them as close to the floor as possible.
- Standing or lying down, resting your hand on the wall, perform rotational movements with straight legs. The hip joints must work. Do not make the described circle large, the main thing is that the bones are warmed up and the muscles are not strained.
- Lying on your back, lift both limbs in turn. Keep them straight and fix them for a few seconds for greater efficiency.
- Lie on your stomach and put your hands behind your head. Raising your torso, spread your upper limbs to the sides.
- Position – lying on your stomach. Raise your legs one by one. Bend your elbows and hold your hands under your chin.
- Lie on your right side and swing your left leg, and then rotate. Repeat the same movements on the other side.
- While lying on your back, pull your legs bent at the knees one by one towards your face.
- Warm-up for the neck. While sitting, place your head on each shoulder in turn, touching it with your ear. Then perform similar movements, but forward and backward.
- Sit on a chair and turn your body to the sides, reaching your hands further away.
Joint gymnastics: 20 exercises
We have selected for you the best joint gymnastics exercises, which are recommended to be performed as a complex one after the other. Do each exercise slowly and smoothly, avoiding sudden movements that are traumatic for the joints.
Head tilts
Place your feet shoulder-width apart, place your hands on your waist, and keep your head level. Bend your neck to the side, then forward, the other way, back, and so on in a circle. Perform joint gymnastics exercises slowly, avoiding sudden movements. Tilts of the head warm up the cervical spine, preventing muscle tension and pain in this area.
How much to do: 5-7 reps on each side
Head rotation
Place your hands on your waist and keep your head straight. Lower your chin down and rotate your neck from side to side, moving along an arcuate path. Do not throw your head back, avoid sudden movements, perform the exercise slowly and smoothly. In joint gymnastics, much attention is paid to working out the cervical spine, which is considered problematic for many. This exercise improves neck flexibility and relieves tension from long periods of sitting.
How much to perform: 5-7 rotations on each side
Shoulder rotations
Stand up straight and lower your arms straight down. Rotate your shoulders without regard to the movements of your arms, which should be relaxed. Perform rotations in the shoulder joints, moving in a circle, first forward and then back. The exercise promotes mobility and flexibility of the shoulders, increasing their range of motion.
How much to do: 5-10 reps clockwise, 5-10 reps counterclockwise
"Butterfly"
Bend your elbows at an angle of 90 degrees and raise them in front of you. Raise your arms to the sides with full amplitude, and then bring them together. An exercise from joint gymnastics develops the mobility of the shoulder joints, preventing the occurrence of injuries and pain. Additionally, the “butterfly” strengthens the muscles of the arms and back if the shoulder blades are brought together at the end point.
How many to perform: 10-15 repetitions
"Scissors"
Extend your arms straight out to the sides and then bring them together so that one arm is on top of the other. Spread your arms to the sides and bring them together again so that the other hand is higher. Perform scissors with full range of motion, but without sudden movements, to develop the shoulder joints, and not harm them. This exercise not only improves shoulder flexibility, but also strengthens your arms.
How many to perform: 10-15 repetitions
Circular rotations of the arms
Standing straight, spread your arms straight to the sides. Perform circular rotations in the shoulder joints, moving up, forward, down, and to the sides. You can repeat the movements in reverse order to work out the joints as much as possible. An excellent exercise from joint gymnastics is recommended to be performed during any sports warm-up, as it warms up the shoulder joints well.
How much to do: 5-10 reps clockwise, 5-10 reps counterclockwise
Raising your arms up
And one more complex exercise from joint gymnastics to warm up the shoulder joints and arms in general. Stand up straight, lower your arms along your body. Start raising your arms up above your head: first through the sides, then stretching them forward in front of you. Alternate between arm raises, stretching your shoulder joints and engaging your core, back, and trapezius muscles.
How many to perform: 10-15 repetitions
Elbow flexion
Lower your arms straight down and clench your palms into fists. Swing your arms back and forth, bending your elbows to full range at the end point. Perform joint gymnastics exercises with complete control, avoiding sudden movements. The exercise is necessary for the development of mobility and flexibility of the elbow and shoulder joints.
How many to perform: 10-15 repetitions
Elbow rotation
Spread your arms straight to the sides and bend your elbows at an angle of 90 degrees. Perform circular rotations of your forearms with maximum amplitude, moving at a slow pace. Try not to make sudden movements to prevent injury to the elbow joint. This joint gymnastics exercise develops elbow mobility and relieves pain in these joints due to frequent work in a sitting position.
How much to do: 5-10 repetitions clockwise, 5-10 repetitions counterclockwise.
Wrist rotation
Bend your elbows and clench your palms into fists. Rotate your wrists towards each other without unclenching your fists. The range of motion of the wrist joints should be maximum. Include in your joint exercises an exercise that protects your wrists from injury and helps get rid of pain in them due to long periods of yoga or working at the computer.
How much to do: 5-10 repetitions clockwise, 5-10 repetitions counterclockwise.
Lateral bends
Place your feet shoulder-width apart and place your hands on your waist. Perform side bends, alternately raising the opposite arm up. Try to bend down as low as possible to give your lateral core muscles a good stretch. The exercise develops mobility of the spine in the lumbar and middle regions, gives freedom of movement and relieves pain in the back.
How much to do: 5-10 bends on each side.
Standing lateral crunches
Standing straight, extend your arms straight to the sides. Turn your body left and right, working with full amplitude, while fixing at the starting point. When performing, do not rush, move slowly and rhythmically. The exercise gives flexibility to the back and the entire body, develops the spine, strengthens the core and abdominal muscles, and gives ease of movement.
How much to do: 5-10 turns in each direction.
"Mill"
Place your feet slightly wider than shoulder width and extend your arms to the sides. Lean forward diagonally, trying to reach the floor with your hand. Perform the bends one at a time at a dynamic pace. This exercise from joint gymnastics develops mobility of the spine in the lumbar region, promotes flexibility and relieves back pain.
How much to do: 5-10 bends on each side.
Circular rotations of the pelvis
Place your feet slightly wider than your shoulders and place your hands on your belt. Rotate your pelvis, moving forward, sideways, back and forth with full range of motion. Joint gymnastics exercise improves mobility of the lower back and hips, improves blood circulation in the pelvic organs and strengthens the core muscles. It also helps develop balance and coordination.
How much to do: 5-10 repetitions clockwise, 5-10 repetitions counterclockwise.
Knee Raise
Stand up straight and place your hands behind your head. Raise the leg bent at the knee up until the thigh is parallel to the floor, go back and lift the bent leg again, but this time moving it to the side. Repeat with the other leg. Include this exercise for runners in joint gymnastics to develop your hip and knee joints, making them more mobile and elastic.
How much to perform: 5-10 repetitions on each side.
Hip rotation
Stand up straight, put your hands on your waist. Bend your knee at a right angle and lift it up. Perform hip rotation by moving outward through a full range of motion and returning back. Repeat with the other leg. The exercise is useful to do before walking or running, as it develops mobility of the hip joint, which gives freedom of movement and helps prevent injuries.
How much to do: 5-10 clockwise reps, 5-10 counterclockwise reps on each leg.
Swing from side to side
Stand with your side to a chair or wall so that you can hold on to the back of it with your right hand. Place your left hand on your belt. Raise your straight left leg to the side and perform dynamic swings, moving along the trajectory of the pendulum to the left and right. Switch sides and repeat on the right leg. The exercise is necessary to develop the mobility of the hip joints and improve the flexibility of the legs.
How much to do: 10-15 repetitions on each leg.
Swing back and forth
Stand with your right side to the chair, grab its back with your hand. Place your left hand on your waist. Lift your left leg straight off the floor and take it back, then swing forward, moving with full amplitude. Be sure to include this exercise in your joint exercises to strengthen and make your hip joints more mobile.
How much to do: 10-15 repetitions on each leg.
Knee rotation
Place your feet together and bend your knees slightly. Lean your body forward and place your palms on your knees. Rotate your knees in a circle, helping yourself with your hands. Include a running warm-up exercise in your joint gymnastics to make your knee joints mobile. Regular practice of this exercise helps to get rid of knee pain caused by a sedentary lifestyle.
How much to do: 5-10 repetitions clockwise, 5-10 repetitions counterclockwise.
Foot rotation
Stand up straight and place your hands on your waist. Bend one leg slightly at the knee, lifting your foot. Perform rotation at the ankle joint, moving slowly without sudden movements. Repeat with the other leg. Include this warm-up exercise in your joint exercises to strengthen the ankle, which is considered one of the most vulnerable joints.
How much to do: 5-10 clockwise reps, 5-10 counterclockwise reps on each leg.
Benefits and Benefits
Advantages of exercises for warming up joints:
- They have a number of contraindications, but there are no age restrictions. They will benefit everyone without exception: children, adults and the elderly.
- Although you will find many video lessons on the Internet for both beginners and advanced, the number of repetitions can be any. Depending on the physical condition, everyone selects the required number of approaches.
- The duration of classes also depends on desire and capabilities. The main thing is to do the exercises every day for at least 15 minutes.
- Gymnastics does not require machines or specific equipment. You can practice anywhere, all you need is desire and a little free space.
Muscle-joint exercises can serve as preparation for yoga.
Joint gymnastics in physical education lessons.
Joint gymnastics
In this methodological development, I offer a complex for all joints of our body, which I use both as a warm-up in my lessons, and as a separate lesson for deep study of each joint
.
Joint gymnastics is a set of physical exercises aimed at general health. Sometimes it is called muscular-articular gymnastics, since the consequence of performing the exercises is not only to improve the functioning of the joints, but also the muscles and other tissues of the body. In this article we will figure out what this practice gives and how to get the greatest effect from its implementation.
Most often, when performing joint exercises, the main work is aimed at a separate joint, for example, the elbow. So, with the help of different exercises you can consistently work out all the main joints and muscle groups.
One of the options for practicing joint gymnastics is to perform exercises in an isotonic mode. In this case, a slow pace is maintained with constant tension of the muscles involved in the movement, without a relaxation phase. So, if we work with the elbow joint, the tension of the muscles surrounding it will remain during flexion and extension.
Joint exercises are mostly cardio-aerobic physical activity, i.e., affecting the cardiovascular system, performed at a relatively slow pace, where oxygen is used as the main source of energy to maintain muscle motor activity. Competent and regular exercise with cardio-aerobic exercise helps strengthen the body’s adaptive capabilities to changing environmental conditions, improves the condition of the cardiovascular system and musculoskeletal system, internal organs, respiratory system, and is a prevention of heart attacks, strokes, atherosclerosis, and joint diseases. , and also allows you to reduce the thickness of subcutaneous fat deposits.
Benefits of joint exercises
- The class does not require special equipment or premises. Many exercises can be done standing;
- A large selection of exercises allows you to choose a complex for individual needs;
- Depending on the amount of time, you can make shorter or longer complexes. It doesn't take much time to get the benefits.
- Suitable for children of different age groups: from toddlers to high school students;
- Muscular and joint gymnastics allows you to rid the body of excess salt deposits;
- Regular exercise allows the body to get the necessary physical activity.
- Increases vitality, energizes;
- It prevents various joint diseases and improves their condition;
- Allows you to improve your posture.
WHAT DOES JOINT GYMNASTICS GIVE?
Let's look at what happens to the body when performing joint gymnastics.
Nervous system
. At the beginning of physical activity, on average, 40–60% of the muscle fibers of the student are involved in work. In order to “turn on” the remaining fibers, by bringing the nervous system to the required level of excitation, it takes time and a gentle load. Joint exercises work well for this. If, bypassing the preparatory exercises, a student, especially if he is a beginner, immediately moves on to a heavy load, this will cause stress in the body. If you make the activity smoother and perform dynamic exercises first, the nervous system will have time to gently switch into the sympathetic mode. Especially useful for children with an excitable nervous system.
The cardiovascular system
. Physical activity increases venous return due to compression of the veins (at rest, up to 64% of the total amount of circulating blood is “stored” in the veins). Increased blood flow to the heart leads to stretching of its cavities, which increases the strength and frequency of heart contractions. If the body is in good condition and physical shape, then abruptly switching the heart into an increased work mode will not lead to any negative consequences. But, if we are talking about a child with poor physical fitness, a sharp increase in load will contribute to the occurrence of unpleasant sensations, and, possibly, consequences if the student has problems with the cardiovascular system.
With the beginning of the exercises, the backup circulatory system is gradually launched, which facilitates the work of the heart.
Muscles
. Increased work of the cardiovascular system also implies the opening of “reserve capillaries” located in muscle tissue. The minute volume of blood that falls on the muscles gradually increases several times compared to the average figure of the body at rest (from 15% to 88%). The speed and volume of blood flow increases with the onset of exercise and reaches a stable level after approximately 3 minutes. This indicator varies depending on how physically prepared the student is (for trained people this process takes less time).
Active blood flow leads to a gradual increase in the temperature of muscle tissue by 1.5–2 degrees, which reduces the affinity of hemoglobin and oxygen, oxygen enters cells more easily. Increasing the temperature in the muscles generally accelerates metabolic processes (a rise in temperature by 1 degree Celsius increases cellular metabolism by 30%) and helps to better supply the working muscle with energy. This allows the muscles to work without switching to anaerobic energy supply, preventing the formation of lactic acid, and also reduces the effect of “soreness” (muscle pain that occurs several hours after intense or unusual exercise).
As muscle temperature increases, muscle elasticity also increases, which helps prevent injury.
Joints
. With active work of the joints, which begins during joint exercises, the amount and composition of synovial fluid in the joint cavity is normalized. This fluid acts as a lubricant, but if it is not enough, the joint is called “cold”. It takes time for the joints to prepare for active work.
In the area of the articular surfaces and ligaments, as well as in the tendons attached to the joint, there are a large number of different receptors that respond to changes in the value of the articular angle and the speed of this process, as well as to changes in the activity of the muscles surrounding the joint. Some receptors give a quick response in less than a second, others require from 30 seconds to 1 minute to adapt. Therefore, there is a recommendation to spend at least 1 minute on each joint.
In order to get optimal impact on the joints, it is recommended to perform exercises with a slight “self-resistance” in order to activate the muscles surrounding them.
So, a gradually increasing dynamic load helps the body tune in to the upcoming practice if it is performed as a warm-up. If it is performed as an independent practice, we will also get a wonderful effect. We'll look at this in more detail next.
JOINT GYMNASTICS AS A WARM-UP
Warm-up is a set of exercises aimed at preparing the body for the main part of the lesson, gradually transferring the body into an increased load mode. Joint exercises can act as a wonderful warm-up technique before any type of physical activity. It not only warms up the muscles, prepares the joints and improves metabolism, but also helps to switch attention from external to internal and focus on the activity. Warming up makes it possible to better tune in to more complex exercises that require concentration and physical exertion.
If joint gymnastics is performed as a warm-up, the following recommendations can be made to achieve the desired effect:
- We choose exercises that involve all the main joints and different directions of their mobility. The time of exposure to one joint is from one minute;
- We work all the main muscle groups;
- We allocate, depending on the goals of the lesson, from 5 minutes for warm-up exercises. In the morning, a longer warm-up is required to awaken the body after sleep. It is also worth paying special attention to dynamic warm-up through muscle-joint exercises if you start exercising soon after returning from the street during the cold season;
- If the main lesson involves a specialized complex, for example, mastering balance exercises on the arms (in gymnastics lessons), then more time should be devoted to the joints of the arms, choosing a variety of exercises to work them out;
- We make sure that the body warms up gradually. We select the intensity of the exercises so that they do not tire you, but charge you with vigor. A feeling of warmth in the body indicates that the warm-up is taking place at the right pace.
- Joint gymnastics exercises can be divided into general developmental and special. General developmental exercises help strengthen the body as a whole. Special ones act locally and help strengthen a particular area in case of special need. For example, they help strengthen the wrist joints if they are weakened. That is, the same exercises can be general developmental for one student and special for another.
Ex. 1. “Move your hands up and down.”
We raise our straight arms to a horizontal position, fingers closed, straightened and directed forward. Smoothly raise your hands as high as possible, until they stop, then lower them as low as possible.
Repeat the exercise 5-15 times.
Ex. 2. “Tilting the head forward and backward.”
We smoothly lower our head down until it stops in the jugular notch and move our head down, as if trying to reach the navel with our chin, while trying to keep our back straight. Then we throw our head back, trying to reach the sacrum with the back of our head, also trying to keep our back straight.
Repeat the exercise 5-15 times.
Ex. 3. “Tilt the head to the right and left.”
We tilt our heads to the right and left, trying to touch the shoulder. The torso and shoulders, at the same time, remain motionless.
Repeat the exercise 5-15 times.
Ex. 4. “Rotation of the hands.”
We raise our hands forward as in the exercise. 1 and perform rotational movements with the hands towards each other and in opposite directions.
Repeat the exercise 3-10 times in each direction.
Exercise 5. "Turning the head to the right and left."
The spine is straight, slightly pull the head up and turn it to the right and left.
Ex.
6. "Twisting arms."
Cross your straight arms, lock your fingers, then roll your arms inward until straightened, then outward until straightened.
Swap your hands and repeat the exercise.
Repeat the movements 3-10 times.
Ex. 7. "Rotation of the head."
Rotate your head along the maximum radius (“roll” along the shoulder girdle) clockwise, then in the opposite direction.
Repeat the exercise 3-10 times in each direction.
Ex. 8. Shoulder Rotation.
We perform rotational movements with our shoulders along the maximum radius forward, then back.
Repeat the exercise 3-10 times in each direction.
Ex. 9. "Spring".
Raise your right arm to the side to a horizontal position, palm facing down. Bend your arm at the elbow so that your palm is in front of your chest, then forcefully press down on an imaginary spring until your arm is completely straight. Do the same for the left hand.
Repeat the exercise 2-5 times for each hand. Then perform it with both hands at the same time.
Exercise 10.
"
Rotation at the knees - legs together."
Place your feet together. Bend your knees slightly. Begin a slow (about 2 seconds per rotation) circular motion at the knees in a clockwise direction, slightly bending and straightening your legs. Make five movements in one direction and then in the other direction.
Exercise 11 “Rotation in the hip joint.”
Let's rotate the hip joint of the right leg. To do this, raise your leg bent at the knee; the higher you raise your hip, the better. When doing the exercise while standing, you can hold onto the wall with one hand.
Start a circular movement in the hip joint, moving your thigh up, back, down, forward, up, without touching the floor with your foot, as if you want to step over something. For one lap - about 3-4 seconds. Make five such circles, and then five times in the other direction (down-forward-up-back-down).
Exercise 12. “Rotation in the pelvic area – feet shoulder-width apart.”
Let your feet remain stable, shoulder-width apart, and straighten up. Start a circular movement in the pelvic area, while keeping the shoulder girdle motionless (the lower part of the body from the diaphragm is more involved in the movement). Five movements (one revolution in 3-4 seconds) clockwise and counterclockwise. Like belly dancing.
Exercise 13. "Rotation in the ankle joints"
Sit on the floor with your feet shoulder-width apart, supporting your back on your hands. Perform circular movements with your feet inward 5-10 times, then outward 5-10 times. Perform the exercise slowly, fully bending and straightening your feet
.
Exercise 14 “Rotation of the body.”
Stand with your feet wider than your shoulders, hands in the air. We begin circular movements of the body clockwise slowly. Do it 5-10 times. Then in the other direction.
Contraindications
This complex has a number of contraindications:
- oncology;
- acute infections;
- severe diseases of the nervous system;
- circulatory disorders in the brain;
- heart failure.
For patients with epilepsy and urolithiasis, gymnastics is used after consultation with the attending physician. Muscular-articular warm-up is recommended not only for the treatment of complex joint diseases, but also for prevention. Its lightness hides great effectiveness: the mood becomes excellent, and the body becomes mobile and flexible. Although contraindications include only severe illnesses, it would be a good idea to consult a doctor before starting use. Take care of yourself and be healthy!