Any figure should always be supported. This is especially true for body parts such as thighs and buttocks. In fact, doing this is not so easy, but it is possible. There are many different ways to lose weight, but today we will look at yoga exercises for the hips and buttocks.
This set of exercises has its own characteristics. Let's find out what are the benefits of yoga.
| The most effective way to enlarge your BUTT has been discovered! Go >>>>> | |
| It’s easy to turn any girl into a SEX BOMB! Read how! Go >>>>> | |
| Do you want a butt like Kim Kardashian? To do this you only need... Go >>>>> |
Benefits of yoga
Yoga can really help you lose weight. You choose which exercises you like best, energetic or measured. Such gymnastics helps restore balance in the body. Any fat deposits in different parts of the body are a consequence of internal imbalance, if this is corrected, then the fat deposits will disappear.
By practicing yoga, a person does not need to torture himself with grueling diets. Yoga itself is not capable of changing the shape of the hips and buttocks; it removes toxins from the body and returns the body to its natural beauty. Yoga improves blood circulation throughout the body.
Benefits of Yoga Exercises
When performing asanas, the metabolism in the body is normalized, the heart rate is restored and the elasticity of blood vessels increases.
When performing exercises, the muscles experience constant stress, due to which an increased amount of blood enters the worked areas, and excess fluid is removed from the body.
As a result, fat accumulated under the skin is burned, and the skin itself becomes smoother and tighter.
Correct and regular performance of asanas has a positive effect on the digestive, endocrine and hormonal functions of the body.
All this together allows you not only to lose excess weight in a short time, but also to tone your body and improve your mood. 30 minutes a day is enough for this.
A person who practices yoga finds harmony within himself, is more tolerant of others and does not react so sharply to life’s adversities. This is especially important for people who have gained extra pounds, because it has been scientifically proven that it is stress and stress eating that leads to rapid weight gain.
Many women use yoga to lose weight, get fit, and feel firm buttocks.
What do you need for classes?
First of all, you need to buy comfortable cotton clothes. You will do the exercises barefoot in different poses. The floor should not be slippery and there should be a mat at hand.
You need to do exercises on an empty stomach. If you have eaten, then wait four hours and start yoga. You need to drink water 30 minutes before the start of classes. Do yoga in the morning after a shower or walk outside. It is not advisable to do exercises before bed, as you may not fall asleep later.
Advice! Try to do yoga in the fresh air to saturate your body with clean air.
A set of asanas to strengthen the hips and buttocks
To reduce the size of your butt, a set of exercises should be performed daily. If you have the willpower, then do the exercises yourself at home, otherwise, ask a trainer for help. At the very beginning of yoga, you must do breathing exercises.
The first time you will not be able to do asanas, since the muscles are not stretched enough, over time, you will see the result, regardless of your age.
Locust
The first exercise is the locust asana. This yoga:
- Eliminates flatulence,
- Improves the functioning of the pancreas,
- Improves heart function,
- Strengthens the back muscles
- Improves the functioning of the digestive tract,
- Strengthens the gluteal and thigh muscles.
Doing this exercise is not that difficult. You need to lie on the floor on your stomach, your face looking at the floor, your arms lie along your body, palms down, without touching the floor. Then, lift your legs without bending them, chest and head. Keep your feet together and clasp your hands. Be sure to squeeze your butt to tone your buttocks and thighs in this pose and hold for one minute. This exercise can be done in different ways.
LiveInternetLiveInternet
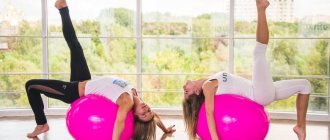
A yoga complex consisting of 8 highly effective exercises to slim and improve the shape of your legs, hips and buttocks.
These exercises will help you get rid of excess fat, make your body elastic, beautiful and sexy!
[/td]
| Exercise No. 1 – “Flying Eagle” Will help strengthen: the muscles of the buttocks and thighs, legs, and abs. Starting position – feet shoulder-width apart (right in front of left), hands on the belt. We squat low, and then “push” ourselves up, simultaneously bending our right knee and stretching our arms: left – forward, right – back (as shown in the photo). We try to stay in this position for at least 5 seconds. We squat again. Repeat the exercise 10 times, changing legs. | |
| Exercise No. 2 – “Rotating chair” Will help strengthen: thigh muscles, legs and arms, oblique abdominal muscles. Starting position - we sit on the floor, hands on the belt, knees bent, feet do not lift off the floor. Raise your legs so that they form an approximately 45-degree angle with your torso. We spread our arms to the sides, and then - at the same time - we move our arms to the right, and our legs bent at the knees to the left (as shown in the photo). Trying not to touch the floor with your feet, we change position: we move our arms (raising them over our heads) to the left, and our legs to the right. Repeat the exercise 10 times | |
| Exercise No. 3 – “Kick on the board” Will help strengthen: the muscles of the buttocks and thighs, the abs, legs and arms, and the oblique abdominal muscles. Get on all fours. Then move your left leg out to the side (try to keep it straight!) while reaching for your toes with your left hand. Try to hold this position (see photo) for at least 5 seconds. Return to the starting position, take a short break and repeat the exercise with the other leg. Repeat it 10 times. | |
| Exercise No. 4 – “Winged Legs” Will help strengthen: the muscles of the back and hips, shoulders and arms, legs. Get on all fours, keep your back straight. Bend your left leg at the knee so that your heel is at the level of your buttocks. Slowly straighten and move your right leg back. Stay in this position for at least 5 seconds. After this, return first your left and then your right legs to the starting position. Do 10 reps. While performing the exercise, watch your back - it should remain straight. | |
| Exercise No. 5 – “Rainbow” Will help strengthen: the muscles of the buttocks, back and hips, shoulders, abs, legs. Starting position – stand on all fours, toes curled. At the same time, extend your arms and legs so that your new position resembles the letter “L” (as shown in the photo). After this, bend your left leg at the knee, trying to bring your heel closer to your buttocks. Return to the starting position and repeat the exercise 10 times, remembering to change legs. | |
| Exercise No. 6 – “Triangle” Will help strengthen: oblique abdominal muscles, abs, arms, shoulders, hips. Starting position: sitting on the floor, bend your knees and fold your legs as shown in the photo. Leaning forward, lightly lean on your right arm bent at the elbow (the arm and shoulders should resemble an inverted triangle), at the same time moving to the side and then raising your left arm up to the stop (see photo). Straighten your back and return your hands to the starting position (at the waist). Repeat the exercise 10 times, changing hands. | |
| Exercise No. 7 – “Reach to the sky” Will help strengthen: oblique abdominal muscles, back, abs, buttocks and thighs, legs. Starting position – standing on the floor, spread your legs as wide as possible. Slightly bending your knees, we squat, touching the floor with both hands. Then at the same time we move our left hand first to the side, and then up and stand on tiptoes (as shown in the photo). The body, therefore, must have three points of support - the legs and the right arm. We return to the starting position and repeat the exercise 10 times, changing hands. | |
| Exercise No. 8 – “Butterfly exercise” Will help strengthen: the muscles of the back, abs, buttocks and hips, as well as the chest. Starting position: standing straight, place your left leg slightly forward. Slowly start squatting so that the angle of both legs bent at the knees is approximately 90 degrees. Keeping your arms out to the sides, lean your torso forward and then clasp your hands behind your back (as shown in the photo). Try to hold this position for at least 5 seconds, then return to the original position. Repeat the exercise 10 times, changing legs. |
Author: Evgenia Negina, Source: wday.ru
In order for a person not to experience problems with health and weight, physiologists believe, a person must experience certain daily physical activity - at least 4 hours a day. Perhaps for a modern city dweller this is a utopia. But for some, this is an ideal to strive for :o).
See also:
Yoga: 5 exercises for women's health
Yoga exercises for perfect posture
Meditation “Inner Smile”
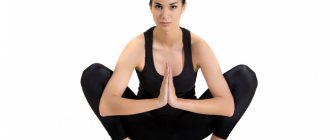
Utkatasana
Utkatasana pose eliminates the “orange peel” on the buttocks and legs. Moreover, it helps to pump up the muscles of the chest and thighs. Here are the instructions for performing the asana:
- Standing, close your feet.
- Squat down slightly so that your thighs are parallel to the floor.
- Keeping your back straight, lift them above your head without bending them.
- Stay in this position for half a minute.
By doing this exercise regularly, you will be able to hold the chair pose for a long time.
For reference! This yoga pose gives a person strength and energy, so if you suffer from insomnia, it is better not to do utkatasana.
Locust Pose
- From a wide squat, place your hands in front of you on the mat and step back with your feet. This way you will find yourself in Plank pose;
- Slowly lower yourself onto the mat, lie on your stomach, legs together. Place your arms at your sides, palms up;
- As you inhale, lift your legs, head and upper torso off the floor. Hands remain pressed to the floor. Don’t hold your breath, stretch your crown forward and upward, stretching your spine as far as possible;
- Hold this position for five breaths and then lower back to the mat.
Warrior II
Exercise Virabhadrasana II promotes:
- Cleansing the body
- Improving the respiratory system,
- Strengthening the muscles of the buttocks, abdomen and thighs,
- Strengthens joints and makes them mobile.
Thanks to this pose, a person loses weight significantly, his mood improves and his body is in harmony. This asana is suitable for those who have problems with the spine. It is done like this:
- While standing, spread your arms to the sides. Palms face down.
- Take a big step forward with your right foot and turn the same foot outward 15 degrees. Turn your left leg inward.
- Now do a squat on your right leg, pressing your heel firmly. The head should look towards the right leg, and the left leg should not move.
- Stay in this position for about minutes, keeping your body upright.
- Repeat the same with your left leg.
When doing this exercise, you need to tighten your gluteal muscles. A yoga pose will be effective when there is a visually straight line from the butt to the top of the head. In the beginning, you will find it difficult to do this exercise, so you can lean on the wall.
Warrior Pose 3
- From Warrior 1 with your left leg in front, bend your torso forward and lift your right leg up. You should balance on your left leg straight with your torso parallel to the floor;
- Extend your arms forward, pressing your palms tightly together. If this creates too much stress on your shoulders, then you don’t have to clench your palms, just hold your hands in front of you, shoulder-width apart. If stretching your arms forward creates tension or pain in your lower back, lower your hands to your hips;
- Tighten your abs to help keep you from losing your balance. Hold this for five deep breaths. Then lower your right leg into Warrior 1. Place your arms in front of you on the mat and step into Downward-Facing Dog;
- Repeat the same sequence for the other leg, and return to the original “Downward Facing Dog” asana.
Setu Bandhasana
This pose is also called the bridge. It eliminates migraines, helps fight insomnia, improves the functioning of the abdominal organs and stimulates the functioning of the endocrine system.
- Lie on the floor with your back, straighten your arms along the cable, and lower your palms down.
- Bend your legs, moving them towards your pelvis.
- Exhaling, lift your butt up.
- The hands need to be closed and they should lie on the floor under the butt, without touching it.
- The pelvis should be parallel to the floor.
- The shoulder blades need to be brought together and the chin pressed against the jugular cavity.
- Hold the pose for one minute.
- As you begin to inhale, lower your body down.
This exercise needs to be done slowly.
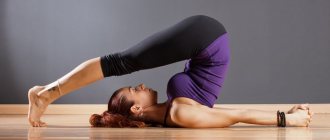
Half Bow Pose
The half-bow pose tones the back muscles, has a positive effect on the spine and straightens the posture.
Lie on your stomach with your palms on the floor. You need to bend your knees so that your shins are vertical. Raise your torso, resting your palms on the floor, while your head should be at the same level as your feet. Exhaling, extend your arms towards your feet. It is important to bend well in the thoracic region. Hold this pose for one minute.
You may experience rapid breathing, do not worry - this is normal.
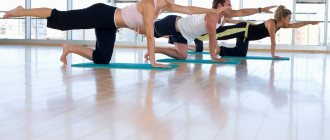
Winged feet
This type of asana strengthens the muscles of the lower legs, thighs, back and shoulder girdle. If you do this exercise regularly, then you will have perfect legs.
- Get into cat pose.
- Bend one leg and bring your heel toward your buttocks. You need to look forward, keeping your back straight.
- Raise the other leg without bending your knees. Raise your leg as high as possible and secure the position.
- Repeat the same with the other leg.
You need to perform the exercise in three approaches.
Yoga and legs
I invite you to an exciting journey from the tips of your toes to the top of your head, in which you will find out why your feet need yoga!
We will move from bottom to top and start getting acquainted with the legs from the feet.
FOOT
The main functions of the foot are shock absorption when walking (protecting the brain and internal organs) and maintaining body weight in motion and at rest.
The most common pathology of the foot is flat feet, flattening of the external longitudinal arch of the foot. As a result of flat feet, the symmetry of tone along the outer and inner sides of the lower leg is disturbed, which often leads to problems with the knee joints and negatively affects the shape of the legs (x- and o-shaped), less often, but it happens that this pathology also affects work hip joints and leads to disruption of the physiological curves of the spine.
Yoga and feet. Regular yoga practice helps:
- strengthening the muscles, ligaments, tendons and joints of the foot;
- equalizing muscle tone over the entire surface of the foot, which helps equalize the load throughout the entire leg frame;
- acquiring the skill of transferring weight to the heart of the foot, which includes the front surface of the thigh and relieves the back surface of the thigh and lower back;
Yoga therapy and feet . Foot pathologies responsive to yoga therapy practice:
- flat feet - well corrected by joint gymnastics and the flat foot yoga therapy complex developed by Artem Frolov (Yogatherapy, A. Frolov, 2015);
- arthritis, arthrosis - joint gymnastics, joint vyayamas are also indicated;
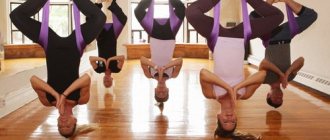
- problems with the vessels of the lower extremities of a stagnant nature - joint warm-up and inverted asanas are indicated.
ANKLE
The main function of the ankle is to maintain the vertical position of the human body, connect the lower leg and foot and ensure their movement.
The most common pathology of the ankle is dislocations and sprains of the joint ligaments, rupture of the Achilles tendons, arthritis and arthrosis.
Yoga and the ankle . Regular Yoga Practice:
- Will make the ankle stable and strong due to static holding of the asanas in which it is involved;
- Promotes mobility and flexibility of tendons through the practice of active stretching and dynamic vinyasas;
Yoga therapy and ankle joint. Joint warm-up will be an effective remedy against arthritis, arthrosis and during the recovery period after injuries.
KNEE
The main function of the knee joint is to connect and provide movement to the muscles of the lower leg and thigh.
The most common knee pathologies:
- caused by injuries: damage to the menisci, sprains/ruptures of ligaments, bruises, dislocations, subluxations;
- hyperextension of the ligaments of the knee joint: external - o-shaped legs, internal - x-shaped legs, rear - legs “like a grasshopper”;
- degenerative-dystrophic diseases of the joints: arthritis and arthrosis.
To avoid injury, it is important to understand that there should be no rotation of the lower bone relative to the upper bone in a bent state! The rotation of these bones is minimal, no more than 15 degrees, and it is IMPOSSIBLE to “open” the knee in the direction of mastering the lotus pose! This is the work of the hip joint.
Yoga and knees . Regular Yoga Practice:
- will strengthen the knees, relieve them of laxity, improve the health of the joint system of the knee, interesting details - read the article “Yoga and joint health” ;
- will teach the skill of “collecting your knees”, which will reduce their injury in other sports and everyday activities.
Yoga therapy and knees . Yoga therapy has a rich arsenal of techniques for restoring the knee joint, from joint gymnastics and fixations with belts to various Ayurvedic procedures with guaranteed effectiveness.
HIP JOINTS
The main function of the hip joints is to connect and provide movement of the legs and torso, turning on the levers of the legs and torso relative to each other.
The tilt and deflection occur in the hip joints, not in the lower back!
A safe position of the lower back is also ensured by engaging the legs through the hip joints.
Yoga and hip joints . OOOOOOOOO!!! For many of my practitioners, the hip joints are the most important! After all, twines and lotus live in them! Healthy hip joints and the correct technique for performing asanas will definitely lead you to splits and padmasana, but remember that in any asana the most important thing is the position of the spine, and only then the hips, arms, pelvis or collarbones!
Yoga is an excellent means of both improving health and increasing the efficiency of the hip joints, for example, for running - increasing the range of motion of the joint and lengthening its tendons by stretching using the yoga method will increase the length of the step, and strengthening the joint capsule will prevent its injury and will qualitatively affect the connection of the body -legs.
Yoga therapy and hip joints. There are many techniques that can improve the functional state of this group of joints:
- Joint warm-up;
- Techniques for the pelvic floor;
- Abdominal manipulation;
- Static and dynamic mulabandha;
and so on, an experienced Yoga therapist will always suggest those that will be most effective for you.
PELIN BOX
The main function of the pelvic box, consisting of the pelvic bones, is protective. Protection of reproductive and other pelvic organs.
The bones of the small pelvis are connected to each other by fixed joints like an intervertebral disc, and should not move relative to each other.
Frequent pathologies of the pelvic box in the context of the musculoskeletal system are injuries of a traumatic nature (dislocations, subluxations, bone bruises), arthritis, arthrosis.
I will separately highlight such a pathology of the structure of the human skeleton as pelvic nutation - forward tilt of the pelvis and the formation of hyperlordosis of the lumbar region.
This problem is often well responsive to yoga therapy, and even by practicing in a regular yoga class, you can significantly reduce the hypertonicity of tight lower back and hamstring muscles, and relax the iliopsoas muscle, which in a contracted state pulls (tilts) the pelvis down to the thigh.
Yoga and the pelvic box . Yoga will teach you to sit, bend, bend and easily maintain balance in any body position in space without experiencing pain, stiffness and even discomfort in the lower back, even when performing large amplitudes. Even in the splits!!!
Yoga therapy and the pelvic box . By practicing techniques such as:
- Abdominal manipulation;
- Ashwini mudra;
- Mulabandha;
- Working out the hip joints in the general complex of joint warm-up and separately for this group of joints;
You will receive excellent reproductive health, massage of the organs, diaphragm and pelvic muscles, improvement of the excretory and digestive systems, and get rid of problems with stool, if any.
We looked at the joints of the legs and the pelvic box - the bone components of the lower part of the musculoskeletal system. Let's move on to the muscles!
MUSCLES
EXTERNAL SKELETAL MUSCULATE OF THE LEGS
I won’t overwhelm you with locations, attachment points and names of muscles, but I will tell you what you should know as responsible users of your body - your legs should not only be strong!
The muscle tone on the front and back surfaces of the legs should be the same! Often, the back surface of the thigh is overstrained, and the front is weak, while the internal muscles - the adductors - do not work at all, although this is the strongest and most useful array of muscles.
Yoga and leg muscles . During a yoga class (and at an Ishvara yoga class, guaranteed!) you will be taught to use all the muscles of your legs without creating hypertonicity on any of their surfaces. The muscles will work evenly, the emphasis will only shift to the specifics of the exercise being performed! BUT! Neither in a bend, nor in a deflection, nor in a split, not a single muscle will be left idle, but at the same time it will not be overstrained. At the end of the day, you are simply guaranteed strong, strong and beautiful legs!
Yoga therapy and leg muscles . Yoga therapy will be useful in case of varicose veins of the lower extremities and any other pathologies of a stagnant nature, for example, postoperative lymphostasis.
INTERNAL SKELETAL MUSCULATE OF THE LEGS
ILIOPSOUMAS MUSCLE, IPM (lat. Musculus iliopsoas) is a muscle of the internal group of pelvic muscles. It is formed as a result of the connection of the muscle bundles of the psoas major, psoas minor and iliacus muscles lying closer to the center. The muscle from the pelvic cavity exits through the muscle lacuna and, moving downwards, passes along the anterior surface of the hip joint, attaching with a thin short tendon to the lesser trochanter of the femur.
The PPM is the internal core muscle, a powerful array of muscles that is often completely unconscious to a person. Being in a contracted state and with a fixed hip, tilts the pelvis forward. In the “straightened” state it serves as an additional support for the spine in balance. In deflections, part of the load from the lower back is transferred to itself, qualitatively deepening the deflection and eliminating excessive compression of the rectifier muscle in the lumbar region.
Knowing how to control this muscle mass, you will be able to:
- it is much more effective to balance in the most complex asanas and transitions between them;
- master deflections of any degree of complexity without pain and discomfort;
- deepen the splits;
- unload the lumbar spine;
- eliminate possible hyperlordosis.
Yoga and PPM. Yoga will teach you how to control this muscle! And the above items will be on your list of victories!
Yoga therapy and PPM. Yoga therapists work with the PPM in cases of violation of the physiological curves of the spine, for example, with hyperlordosis, it is actively stretched to reduce the angle of the pelvis.
Instead of a conclusion:
What should you do in a yoga class to get beautiful, strong and flexible legs?
- Be able to transfer weight to the heart of the foot;
- Strengthen leg muscles;
- Strengthen joints;
- Relax overstrained muscles, turn on “lazy” ones and be able to equalize the tone of the leg muscles on the front and back sides of the thighs;
- Perform inverted asanas to prevent or treat varicose veins of the legs and pelvis.
Being a powerful and strong foundation for the spine, the legs in combination with the pelvic box and the PPM will serve as a reliable foundation for your spine, and any asana or exercise will be easy and relaxed for you!
Stay healthy and practice sustainably!
Does yoga help you lose weight?
Those who do yoga have a beautiful figure. However, apart from yoga, they are very careful about their diet and lifestyle. It is important to drink plenty of clean water and lead an active life. Try to walk a lot and quit bad habits.
When you do yoga, perform each exercise well and tighten all the muscles. When doing yoga, a person should not rush, otherwise the exercises will have little effect. Watch your breathing. It would be useful to do breathing exercises before yoga. Therefore, my dears, if you want to get your buttocks back to normal, take yoga seriously. Follow the additional recommendations and then you will see the result. Alice was with you, see you soon.
| The most effective way to enlarge your BUTT has been discovered! Go >>>>> | |
| It’s easy to turn any girl into a SEX BOMB! Read how! Go >>>>> | |
| Do you want a butt like Kim Kardashian? To do this you only need... Go >>>>> |
- Related Posts
- The most effective exercises for the buttocks: training at home
- Exercises to strengthen the buttocks and thighs: a list of the most effective
- How to make a beautiful butt at home: tips for different body types
« Previous entry