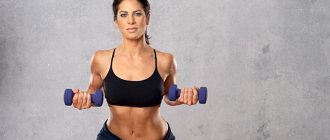
If you want to lose weight using the Oxysize technique, read the article. It describes the exercises and proper breathing of this training complex.
Not all people know that in order to lose weight, it is not always enough to stick to proper nutrition and do physical activity on your muscles. It is also important to perform breathing exercises correctly. After all, the process of burning fat depends on the process of saturating the cells of our body with oxygen. What is oxysize? Are there any contraindications and how should such exercises be performed correctly? Read about it in our article.
What is oxysize in fitness?
What is oxysize in fitness?
If a woman wants to lose weight, then she looks for different ways to achieve results. It is important to eat right, perform physical exercises under the supervision of a trainer, and also do breathing exercises. It is correct breathing that often brings the best results compared to other weight loss methods. What is oxysize in fitness?
- Oxysize is a breathing exercise . With the help of her exercises, oxygen molecules influence the body's metabolic systems.
- Fat burning in this case is associated with the magical effect of oxygen on every cell in our body , which plays a huge role in metabolism.
- The Oxysize training technique is an excellent solution for those people who want to get rid of obesity, but at the same time do not want to work in the gym for a long time.
The result of using this technique is immediate - a beautiful and slim body in 15 minutes a day without training or starvation diets. You will be able to observe the first results 2 weeks after you start using breathing training positions.
OXYSIZE
Oxysize is a system that can truly be called the younger sister of the Bodyflex system. It is based on breathing and physical exercises - oxysize breathing exercises for weight loss. The peculiarity of the difference is that in our Oxysize there is no long breath holding and no loud “PA-A-AH” sound. This unique system was also developed by an American, Jill Johnson. The name of the technique itself comes from the English “oxygen” and “exercise”.
Physiologists from America, having studied the program and methodology, came to the conclusion that the beliefs of the author of Oxysize are not empty words. Moreover, fat burning and muscle tightening with Oxysize is confirmed by many people who have used it.
Firstly, Oxysize is very effective for effectively eliminating huge amounts of fat. For example, the more light, loose, shapeless fat there is on the body, the faster and stronger a person’s weight loss will be. Due to the fact that Oxysize forces a huge number of muscles to work, it thereby helps to burn extra calories.
To achieve this result, you need to spend 20-30 minutes daily on breathing exercises. This half hour will be enough for results. Just like in Bodyflex, first you need to study breathing. And only then – bring it to automaticity.
It is worth browsing the Internet and becoming familiar with this new system. Since it has been proven that Oxysize burns 140% more calories than on exercise machines.
There is also hypopressive gymnastics (“Isobreathing”). This gymnastics, like Bodyflex and Oxysize, involves performing (after or during breathing exercises) physical exercises. Yoga can easily be included here. Moreover, the systems are really effective with regular classes, there is also another big plus: for classes you will need about 15-20 minutes a day, and this is very little compared to other systems.
* * * As you can see, breathing exercises are a very useful thing. They come in different types, for example, with loads and an inhalation-exhalation system. But almost everyone has the same principle: “oxygen always burns fat.” Completely different methods must be selected, since not everyone is suitable for the same weight loss method and not everyone has the same requirements. Whatever method you choose, know that home breathing exercises should be regular and done conscientiously.
Be beautiful and healthy!
Bodyflex oxysize: what is the difference, what is better, what is more effective?
Bodyflex is a breathing training exercise, just like oxysize. Both of these techniques are based on diaphragmatic breathing from the abdomen , but in bodyflex you need to exhale sharply and powerfully through the mouth, and in oxysize you exhale forcefully and protractedly through the mouth, but do not hold your breath.
Bodyflex oxysize: what is the difference, what is better, what is more effective?
Breathing according to the bodyflex training system consists of 5 stages:
- Exhale slowly through your mouth.
- Then you inhale sharply through your nose - noisily, so that your lungs are completely filled with oxygen.
- Then you exhale through your mouth and say “groin” at the same time.
- After exhaling, purse your lips and hold your breath for 10 seconds.
- Inhale through your nose.
Important: This training basic breathing is performed strictly on an empty stomach - in the morning. After exercise, you should not eat for another half hour.
Bodyflex oxysize: what is the difference, what is more effective?
The Oxysize technique is performed in 4 stages:
- Take a deep and noisy breath through your nose and inflate your stomach.
- Inhale through your nose three times, tighten your stomach.
- Now exhale forcefully through your mouth, stretch your lips, stretch your stomach as far as you can, pull it in.
- Take 3 breaths, keeping your stomach in the same pressed state.
You perform these stages one after another 4 times - this will be one circle or cycle of breathing positions according to the Oxysize system. If you want to lose weight, then you should do at least 30 such breathing cycles every day. In Oxysize, it is recommended to first learn how to breathe correctly, and then move on to gymnastic positions.
Important: The body will be shocked by the intake of large amounts of oxygen. Therefore, it is important to bring breathing exercises to automaticity, and then only begin physical activity.
The difference between bodyflex and oxysize is that bodyflex is performed only in the morning and on an empty stomach. Oxysize can be performed at any time of the day, but 30 minutes should pass after the last meal. After gymnastics, you should also not eat for half an hour.
The difference between these two breathing techniques is in the exercises:
- Number of gymnastic positions. In bodyflex - 12, oxysize - 30. But the time required to complete the full complex is the same amount - up to 15 minutes. But this is provided that in oxysize you have learned to breathe correctly and do each position automatically.
- The number of repetitions while performing gymnastic positions . In bodyflex - 3, in oxysize - 1 breathing cycle per position.
- Type of exercise. Bodyflex uses isometric, isotonic exercise positions, as well as stretching. In oxysize, there are no active physical activities, and only static positions are used. Stretching also needs to be done, but it is not given as much time as in bodyflex.
See the difference between these two techniques in the video below.
What will oxysize give you?
1. It is a very effective fat burner. Oxygen, entering the body in increased quantities due to diaphragmatic breathing, oxidizes fat, which is excreted from the body in the form of carbon dioxide and water.
2. Strengthens metabolism.
3. Reduces body volume in problem areas (where there is excess fat, since when these areas are tense, oxygen enters exactly there).
4. Shapes the body according to your desire - you choose which parts of the body you will do exercises on.
5. Improves health. In particular, the lymph is cleansed, since deep diaphragmatic breathing is carried out by contracting one of the largest muscles - the diaphragm. In the East, the diaphragm is considered the “motor” of the lymphatic system, that is, it is the one that “drives” lymph throughout the body.
This is not a complete list of the benefits you receive by practicing.
How to breathe correctly?
Mastering the oxysize breathing technique
1. Take the correct pose. We slightly bend our knees, tighten our buttocks and pull in the muscles of the perineum. This is called “tipping the pelvis.”
2. Smile. Smile with the corners of your mouth wide. This will allow you to inhale more air. Imagine that you are inhaling the scent of a wonderful rose - and your nostrils will widen. In addition, the facial muscles are tightened.
3. Inhale. Inhale through your nose without raising your shoulders. Place your hand on your stomach to make sure that you are breathing from your stomach and not from your chest (diaphragmatic breathing is breathing from your stomach). When inhaling, the abdomen should swell and protrude.
4. Three breaths. Keeping a smile on your face, take 3 additional breaths. You should use the muscles of your face, neck and abdomen.
5. Exhale. Keep a smile and exhale forcefully through your mouth with a straw. Don't lower your head while doing this. Exhale must be with tension!
6. Take 3 sharp breaths. The buttocks and perineum are still compressed, there is a smile on the face, and we completely exhale all the air from ourselves. At the same time, the stomach is pulled inward.
7. Repeat three more times - this is one breathing cycle.
Watch how Marina Korpan, who promotes the American bodyflex and oxysize techniques in Russia, performs this breathing.
The exercises themselves are done simultaneously with breathing, unlike bodyflex, where we do the exercises while holding the breath.
You need to do breathing practice every day (ideally), 15-20 minutes a day. It is not necessary to do all the exercises at once; you can divide them into intervals of 5-10 minutes, if possible.
Do the exercises on an empty stomach - either in the morning on an empty stomach, or 1-2 hours after eating (depending on how much you ate).
You need to do 30 breathing cycles per day.
Take measurements of your body regularly. This will inspire you to continue studying.
Check out this breathing along with the exercises.
Until you have mastered breathing to the point of automaticity, it is better not to move on to exercises!
Try it and decide which technique - bodyflex or oxysize - to choose. By the way, you can combine them perfectly - do bodyflex in the morning, and oxysize in the afternoon. Published by econet.ru
Join us on Odnoklassniki
Video: Oxysize breathing technique, basic exercises
It is more convenient to see the differences in the form of a table. It describes the main points of these two techniques that you should know before making a choice.
Bodyflex oxysize: what is the difference?
Which is better, which is more effective of these two techniques? We can say unequivocally that these two complexes are equal in effectiveness. But each person decides for himself which technique he likes to practice more. Some people use bodyflex breathing, while others use oxysize.
Oxysize: how many times a week to exercise
Oxysize: how many times a week to exercise
If you decide to lose weight using the Oxysize technique, then it is important to do it systematically.
- To achieve any results, it is the system that is important - this has long been known.
- For example, if you are prescribed a medication, it is important to take it a specific number of times a day for a certain period of time. If this is not done, there will be no proper therapeutic effect.
- Also with training systems, if you do not do the exercises systematically, it will be difficult to achieve results.
- Exercises using the Oxysize technique can be performed every day, but doing it 5-6 times a week is enough.
You can study, for example, from Monday to Friday, and rest on Saturday and Sunday. The body will get used to such a schedule and will already “demand” exercise when needed.
Oxysize: contraindications
Oxysize: contraindications
Oxysize, like any other physical activity or breathing exercises, has contraindications. These include the following conditions:
- Cardiovascular diseases
- Epilepsy
- Postoperative period (up to 6 months)
- Exacerbation of chronic diseases
- Hiatal hernia
- Some kidney diseases (nephroptosis, glomerulonephritis)
- Eye diseases
Important: Even if you do not have the above diseases or conditions, you still need to consult a doctor before starting classes. This will help protect yourself from unwanted consequences.
Foundation or Guide to Basic Breathing
Inhale
- Inhale sharply and very quickly through your nostrils, not your mouth. Inhaling in this way, the air heats up and undergoes purification. Breathing is strictly diaphragmatic.
- Smile! To the whole world, to yourself, feel the surge of energy. When you smile, you involuntarily widen your nostrils, the air passes faster and easier, when you smile, your facial muscles also tighten, and you don’t forget to control your body.
- Relax, let your abdominal muscles be in a calm state, prepare yourself to take as deep a breath as possible.
Climb
- As you inhale, pull your stomach in as much as possible.
- Inhaling, rock your pelvis inward and upward, think Elvis, but don't flop around like a duck.
- Now tighten your buttocks, pull them in.
- The pelvic floor muscles should also be tensed; women should remember the famous Kegel exercises.
3 breaths through the nose
You need to take three extra breaths! These 3 breaths will help you work on the muscles of your face, abdomen and neck. The lungs, in turn, will be filled with air as much as possible. Take action!
Exhalation
- As you exhale, make a tube out of your lips or imagine that you are drinking through a straw and exhale with maximum effort. Due to such simple manipulations, you should have a lot of tension under your chest.
- When exhaling, do not lower your head down, control yourself, because the lowering is involuntary. Imagine that your head is being held by an invisible string.
- Don’t forget about the buttocks, just like during inhalation, they should remain tense and retracted.
- Maximum effort when exhaling, lips like a tube.
Now take 3 more sharp exhalations. At the same time, DO NOT relax your buttocks and DO NOT lower your head. This way, you will release air after inhaling, thereby increasing the volume of your lungs for subsequent inhalation and exhalation. As you exhale, the abdominal muscles become very tense, and therefore become toned and tightened, which undoubtedly has a positive effect on the results of training.
After performing this breathing exercise four times, you will have completed one repetition of the incredible Basic Breathing!
Oxysize weight loss exercises for beginners: for legs, hips, arms, abdomen, waist
Before moving on to Oxysize exercises, you need to master the breathing technique as described above. When you learn to breathe correctly, it will be easy for you to do the exercises. So, Oxysize exercises for weight loss for beginners:
Gymnastics for legs
Oxysize weight loss exercises for beginners: for legs, hips, arms, abdomen, waist
Oxysize weight loss exercises for beginners: for legs, hips, arms, abdomen
Oxysize weight loss exercises for beginners: for legs, hips, arms
Oxysize weight loss exercises for beginners: for legs, hips
Oxysize weight loss exercises for beginners: for legs
Exercises for hips and back
Oxysize weight loss exercises for beginners: for the back
Oxysize for weight loss: for the back
Oxysize for weight loss for beginners: for the back
Oxysize weight loss exercises for beginners: for hips and back
Oxysize for weight loss for beginners: for hips and back
Hand exercises
Oxysize weight loss exercises for beginners: for arms
This needs to be done 5 times, 3 breathing cycles each.
Oxysize for weight loss for beginners: for arms
Exercises for the abdomen to have a thin waist
Oxysize weight loss exercises for beginners: for the waist
Oxysize for weight loss for beginners: for the waist
Principles of the Oxysize breathing technique
Before you start performing a gymnastic complex, you need to thoroughly study the key points of diaphragmatic breathing. It is best to learn how to breathe from a professional. If it is not possible to enroll in courses, the basics of breathing practice can be learned at home.
To begin with, you need to take a comfortable position - standing. Your back should be straight, your shoulders should be straightened and slightly pulled back. For beginners, during their first lessons, it is recommended to keep one hand just below the chest and the other in the abdominal area.
The full cycle of the Oxysize breathing technique consists of 4 stages:
- stage. Take a deep breath through your nose so that your stomach is completely filled with air.
- stage. Take three additional micro-breaths.
- stage . Extend your lips with a tube and exhale smoothly, while simultaneously drawing in your abdomen.
- stage. Complete the cycle with three short exhalations, trying to release as much air as possible.
You can monitor the correct execution of the technique using video lessons available online. Without mastering the skills of diaphragmatic breathing, moving on to performing a gymnastic complex is pointless.
Oxysize: how many times should I repeat the exercises?
Oxysize: how many times should I repeat the exercises?
Not all exercises will be easy for you, especially at first.
Important: Pay attention to your body’s reaction. If a position is difficult to do, don’t make much effort.
- Work out for a week without heavy loads, and then add breathing cycles and the number of repetitions.
- How many times to repeat exercises using the Oxysize technique depends only on your physical fitness and the capabilities of your body. It is optimal to do 3-5 repetitions of 3-4 breathing cycles. You can do more or less.
- If you have a lot of excess weight, then for the first 2 weeks it will be difficult for you to perform even the simplest exercises.
Important: The body will be unusual in receiving large amounts of oxygen. This state of shock is considered normal for Oxysize - do not stop breathing exercises under any circumstances.
Oxycise (oxysize): everything about it.
Here is a very clear and detailed description of the oxysize breathing technique by one of the moderators of the Minus 60 System forum - Samanta36. "Hello everyone. So I will begin my detailed treatise. I hope that my explanations will help you quickly, and most importantly, correctly master basic Oxysize breathing and become slim, beautiful and happy in record time.
To begin with, I would like to advise everyone to practice well in front of a mirror, take your time and master breathing with all the important details.
Remember: if it’s easy for you, then you’re doing something wrong. Oxysize breathing, if done correctly, will require a lot of effort from you, and it should be difficult for you, and when you start adding positions, I promise a quick and difficult death for you and your fat deposits.
The first thing we must do is master the basic Oxysize breathing cycle.
Diaphragmatic breathing:
Let's start with a simple test: place one hand on your chest and the other on your stomach. Now exhale all the air forcefully. Which hand moves the most? Try again. The lower hand lying on the stomach should move more. Now inhale, not with your chest, but with your stomach. Feel free to stick it out, it will soon disappear. Think positively and be happy that you are working on yourself. There is nothing more pleasant than the anticipation of quick and impressive results. So, let's repeat several times, inhale and exhale, belly forward, belly back, you can help yourself with your hands. Make sure you have mastered diaphragmatic breathing. Start to get used to the feeling of moving only your stomach, your chest does not move. Stand in front of the mirror and smile, carefully watch your shoulders. Often we involuntarily raise them while inhaling; this should not be done under any circumstances; the shoulders are relaxed and motionless. Now we straighten our back, raise our chin, imagine that from the tailbone to the top of our head there is a string that constantly pulls us up, our back is straight, as if we had swallowed a stick. To do this, let’s imagine that we have a ponytail and under no circumstances should we lift it up and put our butt back, it is constantly tucked in, so our back will always be straight, and our hips will be in the desired forward position. In English it sounds like "pelvik till". So when you hear this on the video, know that this is a call to move your hips forward, or tuck your tail, as you like. We imagine ourselves as ballerinas, slender, with perfect posture, we don’t lower our chin, we continue to breathe with our belly. It is important that you do not lean forward as you exhale; this pinches your lungs and interferes with air circulation. So, a prerequisite for all exercises: a straight back, a string pulling the top of the head, a tucked tail, only the stomach breathes, and not the shoulders or chest. Got it? Let's breathe a few more times and move on.
Let's start learning basic breathing. Girls, try not to miss a single detail, I, in turn, will try to explain everything in as much detail as possible. So, our approach begins with the diaphragmatic inhalation from the belly that we have practiced. Relax and, very important! We smiled. Not just shy or sly, but joyfully and with all his 32 teeth! Look in the mirror and don't be lazy! So, we smile broadly and joyfully. For what? First, when we stretch our lips into a wide smile, our nostrils open up and we can breathe in much more air. But notice that we do not breathe through an open mouth! We continue to breathe through our nose, but our mouth should be open, i.e. the smile must necessarily have “teeth.” See for yourself, try to breathe deeply with your lips simply stretched but not open (as Marina Korpan does) and then with your mouth open and smiling wide. Did you feel the difference? Personally, my problem with out-breathing was easily and quickly resolved when I began to smile with my mouth open, while I had it closed, I did not inhale even half of the air that I was able to absorb in the smile of a joyful cannibal. Another reason why we should actively smile is that in this position all the muscles of our precious face are tensed and exercised throughout our entire workout. Jill claims that her clients, their husbands and other relatives are crazy about the changes in their faces already in the first weeks of oxysize training. A smile is not such a heavy price to pay for a toned chin, cheeks and neck. So, let's remember everything from the beginning: relax your knees, open your smile, pull the string from the top of your head, tuck your tail and take a deep breath with your nose into your stomach. Exhale, repeat several more times, look in the mirror, don’t miss a single detail.
Now, after we have breathed in all the air, the most important thing!!! I haven’t found an analogue in Russian, so I’ll call it in English.
Now we have to make a "lift". This is the most important and most difficult stage of our breathing to master, so treat it with great concentration and seriousness. Now we will understand why we need bent knees. It is thanks to them that we create a wonderful and wonderful “elevator”. There are a lot of subtleties here, but we will do everything wonderfully. So, the first thing we must do is twist our pelvis forward and upward. Let’s imagine that we, ballerinas, have not yet reached our previous dimensions and are trying to button up our tight jeans of the 36th European size (each person can determine the size for herself). What are we doing? We quickly and forcefully pull up the tummy and, as it were, push the pubic bone up. Let's help ourselves with our hands, place them on our stomach and feel the movement. Start over. We inhaled, smile, straight back, now we quickly picked up our butt, squeezed our buttocks, pubic area forward and upward, belly with force, zip up our jeans. Let's exhale. What should we feel? No, not the butt, although the buttocks are very tense. We need to feel our abdominal muscles! This is very, very important! It’s hard to feel at first, but over time everything will definitely work out. When we forcefully bring everything into ourselves, as in the movie “Office Romance,” we must still manage to do a Kegel exercise. For those who don’t know what it is, I’ll say it simply and clearly, without going into details with medical terms: we squeeze the muscles of the perineum with force, as if we really want to pee-pee, but we haven’t reached the toilet yet, so we hold with all my might. Now let’s try everything together again: relax, bend your knees, straighten your back, pull the top of your head up and tuck your tail. We smile with all our teeth and crowns, take a breath, sticking out our belly, the facial muscles are tense and constantly strengthened and toned. Have you breathed in all the air from the room? Well done! Now the “lift”, quickly, quickly, tucked the pelvis, squeezed the buttocks, did not forget about Senor Kegel, forcefully lifted the stomach and felt the abdominal muscles, buttoned up the jeans. We exhaled. Well done! Let's repeat it several times, look in the mirror and don't forget about anything!
Well? Have you gotten used to it? If you can not forget about anything, feel your abdominal muscles and squeeze everything you can, we are on the right track. Go ahead.
After we have done the “lift”, we must take 3 small breaths. This is where we need an open mouth; with a wide smile we won’t have any problems with this. And if at first you don’t do it very well, it doesn’t matter, over time, you will inhale even better than Marina Korpan. Why do we need this? If we look in the mirror, we will discover how much all our muscles, necks and abs are tense. This means that we take deep breaths to achieve maximum effect by tensing all the muscles and at the same time filling our lungs with oxygen to the point of failure. So, we perform deep breaths immediately after the “lift”. That is, the cycle is as follows: a deep breath with the stomach while smiling, a quick lift and three deep breaths with the stomach already tucked in. If you watch Jill Jones in her video, you will see how her stomach works during the in-breath and pre-exhalation. And she counts her breaths not rad-two-three, but “elevator”-two-three. Hence the conclusion: the “elevator” practically coincides with the first breath. Let's try from the very beginning: soften the knees, tuck the tail, do not move the pelvis back, inhale, a quick “lift” and three short and intense breaths. We exhaled. Did you feel your abdominal muscles working? You should feel them especially strongly on your last breath. Let's repeat it a few more times. When we get comfortable, we move on.
After taking deep breaths, without ceasing to smile, we close our lips, stretched out in a smile, leaving a tiny slit. Now let’s exhale, overcoming the strong resistance of the lips. Marina explained exhalation as “blowing on tea.” I'll explain the difference to you. Try it yourself. Blow on the tea. What's happening? That's right, nothing. I myself have exhaled like this before. Now let’s imagine that our stretched lips are thick rubber, in which there is only one small crack, through which we need to exhale all the air in our room, which we just inhaled in 4 stages. We begin to exhale forcefully through the slit, overcoming strong resistance. How did we feel? Right. Our press has become wooden. Let's do it again, inhale, exhale with resistance, the abdominal muscles work to the maximum. Let's remember this feeling; you need to monitor it with every exhalation. We seem to push the air out with our stomachs, through our strong rubber lips. The less air remains inside, the more our stomach is pulled inward and the greater the tension in the abdominal muscles. We exhale forcefully and strain our stomach to the maximum. Another very important detail: the lips are still stretched, under no circumstances should you pull them into a tube, this will reduce the “lifting” effect and will only add fine wrinkles around the mouth. In Jill's video, it is very easy to observe the position of the lips both when inhaling and exhaling. When it seems to us that there is not a single gram of air left inside, we take three intense short exhalations, pushing the air out again with our stomach. Let's try again: inhale, inflate your stomach, “lift” - all in, buttocks are tense, the pubic bone moves forward and upward, we feel the tension in the hips all the way to the knees, three breaths, working the abdominal muscles as much as possible, closing the lips, resisting with force we exhale all the air, everything is compressed below, and we push out our last three breaths with our abdominal muscles . Bravo! Now the long-awaited moment: we can relax. This does not mean that you can fall off and fall dead. I didn’t find any information from Marina about when you can relax; for some reason, she “tilts” her pelvis before the exercise and doesn’t say anything about when it can be returned back. I have seen many questions about this in the forums and I am telling you, as they say, at the request of the workers. The relaxation phase (relative, of course) always(!) occurs during the first deep breath. We must relax in order to breathe fully into our belly. In order for the stomach to protrude forward and accommodate the entire volume of air, its muscles must be relaxed and elastic. Only the stomach relaxes and our “pelvik till”, that is, the pelvis moved forward remains in place, watch this, because when you inhale, you really want to put your butt back. But that's where all the crap ends. As a rule, I also use this phase to better control our position. The positions are all based on either static tension or stretching. Just at the moment of inhalation, when I relax my stomach, I manage to tense some limb more or stretch, depending on the posture. And that’s all, because then, I have neither the strength nor the attention for it. When you try to do the “lift” by pulling your leg back or squeezing your knees, you will understand what I mean. It's very, very difficult. And believe me, I’m not new to the world of fitness, I’ve tried a lot of different workouts, but with oxy, when I get to the phase of exercises against the wall, I go to the wall on trembling legs and literally drench myself in sweat. In the end I could easily be buried.
In conclusion, I want to once again consolidate our breath and give some advice from me personally. So, let's go to the mirror. They stood up straight, straightened their back, tucked their butt (tail tucked), a string from the tailbone to the top of the head. Let's start transforming into ballerinas! Smile widely, feel your cheeks rise, your chin and neck tense, relax everything below, take a deep breath. Now a rapid “elevator”, zip up the jeans, feel the stomach and push it through 3 breaths, cover your lips, leaving a slit, exhale all the air with strong resistance, forcefully gluing the stomach to the spine, breathe out 3 more times. Hurray, relax while inhaling, belly forward and repeat everything again.
We repeat this approach 4 times! That is, we inhale-3 inhales-exhale-3 exhales 4 times . This will take you about half a minute. And these half a minute or 4 approaches are the main cycle of basic breathing “Oxysize”. For each position we do 1 cycle of basic breathing (or 4 approaches), for a total of 30 cycles or 120 approaches.
I want to encourage you to take your time and make every effort to master basic breathing, because this is the basis of everything. Follow the advice from the book, start with the simplest positions in which you can control and perform each phase of basic breathing with maximum efficiency. Remember, if it’s easy for you, if nothing is trembling, if you’re not sweating, then you’re doing something wrong. Go back and re-read this guide again and again. And don’t just read, follow the step-by-step advice, work through each phase separately, make sure that you are doing everything correctly, that all the sensations are correct. When you start doing the exercises, constantly monitor the “lift” phase; if you can’t move your pelvis forward (as in the “squat” exercise where we put our butt back like a duck or in pulling our legs back while lying on the floor), be sure to try to feel the work of the abs during the inhalations and still try to move your pelvis forward at least a centimeter. In all positions without exception, do the “lift”, no matter how difficult it is. And you will see the difference. And you are sure to get a result that will pleasantly surprise you. Take your time, do several exercises first, repeating them so that in total there are at least 30 breathing cycles (or 120 approaches), this will not affect the speed of your weight loss, because fat is burned through breathing, and not by changing positions. We need poses to strengthen or stretch muscles, and the main thing is breathing. You noticed that Oxysize does not have the usual abdominal exercises. Now you yourself understand why. After several cycles of full and correctly performed breathing, you will be convinced that our abs are constantly working and very soon the tummy will acquire the desired shape, and the fat covering it will evaporate forever. I also strongly advise you that if you study using videos, study with the author of the program, Jill Jones. In the non-stop training video, you don’t need knowledge of English. One-two-three everyone already understands, inhale - inhale, out-exhale, in-in, in, out-out, exhale, pelvik till-pelvis forward or tuck your tail, “lift” is now our favorite word. Try it, this will allow you to feel the rhythm of breathing well and do it correctly, neither fast nor slow. Well, in general, it’s nice to work out in the company of such a smiling and pretty woman, and in such great shape. You watch and get motivated.”
Read it very carefully if you are serious about getting into oxysize. First you need to master basic breathing and only then apply exercises to it. In general, everything is like in bodyflex.
Oxysize: results - before and after
When someone you know starts to lose weight, it makes you delighted. The results before and after serve as excellent motivation for action. Look at the women who lost weight using the Oxysize method:
Oxysize: results - before and after
Oxysize: before and after
Oxysize: results - before and after photos
Oxysize: is it suitable for pregnant women?
Pregnancy is a wonderful time for every woman. It is important not to harm yourself and the child during this period, so that there are no undesirable consequences. Is Oxysize suitable for pregnant women?
- In such an interesting situation, you need to consult with your doctor who is managing the pregnancy. After all, only he can know about the state of health.
- It is worth noting that the Oxysize method includes special exercises for pregnant women. But it is better to perform them under the supervision of a trainer.
- Therefore, if you have no contraindications, but you are familiar with a professional fitness trainer, then you can do Oxysize breathing exercises for pregnant women under his supervision.
Important: If you feel discomfort or pain during exercise, you should immediately stop exercising and consult a doctor.
Description of the complex
Oxysize is a modern set of exercises designed to combat excess weight. It is based on correct breathing technique. Oxygen is the main destructive force for fat deposits. When it enters the human body, it combines with carbon, which is found in fats, after which they are quickly excreted, and the body is tightened and acquires beautiful contours. People who are familiar with Bodyflex may notice a subtle similarity with Oxysize, but these are different complexes.
Indications and contraindications
Much to our surprise, this complex has no contraindications. Experts say that even pregnant women can do it if they want to stay in good shape and feel great during pregnancy.
Anyone who cares about their health can safely start exercising. Your figure will soon take on new shape, you can easily regain your prenatal parameters, and also realize your dream of becoming fit and slim, with a minimum amount of effort.
Oxysize or Bodyflex
Bodyflex has long been known to millions of people around the world. It has its own reputation and followers, but Oxysize has not been practiced in Russia for very long - only a couple of years. And despite this, this complex already has many fans. There is nothing strange in this, since Oxysize has clear advantages over Bodyflex:
- You don’t have to wake up and immediately, without eating anything, go half asleep.
- In Bodyflex, many exercises are accompanied by loud sounds, which can greatly disturb your household. Oxysize does not have any sound accompaniments, you can exercise at any suitable time, including after meals, the point is that there is no heaviness in the stomach and you are not haunted by the feeling of complete satiety.
- This technique does not require any special equipment or additional exercise equipment; you only need to practice for 15-20 minutes. Please note that you need to practice daily. After 10-14 days, you will be in a great mood to go shopping in search of a dress that fits your new figure.
Oxysize non-stop with Marina Korpan - a set of exercises for weight loss: description, video
Oxysize non-stop with Marina Korpan - a set of exercises for weight loss: description, video
Marina Korpan is a famous Russian fitness trainer. She has helped thousands of people who had already lost all hope lose weight. As a child, Marina was a well-fed child, and in her teenage years she gained many kilograms. She decided to devote her life to sports and got rid of extra pounds. Now the girl helps women and men get into normal physical shape.
Oxysize non-stop with Marina Korpan is a set of exercises for weight loss. You will find it in the video below. The fitness trainer describes in detail how to perform each exercise and how to breathe. You can find basic breathing exercises in the video above. Video description:
- The coach clearly demonstrates the starting positions.
- When performing each position, possible errors will be indicated.
- The video presents the basic exercises from the Oxysize complex.
If you systematically perform a set of exercises with Marina Korpan, then you will not need additional strength training, endurance exercises or stretching.
A set of basic exercises
To significantly strengthen the muscles of the whole body, get rid of excess weight and normalize blood pressure, experienced trainers recommend performing the following types of exercises daily:
- Side stretch. To perform the exercise, you should stand straight, pull your shoulders back and bend your knees slightly, raise your right arm up and bend to the side behind it, but without lunging forward or backward. You can use the back of a high chair as a guide to the degree of deflection when tilting. While in this position, you should perform 4 breathing cycles.
This exercise must be repeated three times on each side.
- Wall squats. You need to stand against the wall, lean your back directly against it and sit down in this position. At the moment when your thighs become parallel to the floor, you should extend your arms forward, combine them with each other “fist-to-fist” and perform 4 breathing cycles.
This exercise must be repeated three times.
- Chair squats. To perform the exercise correctly, you should stand behind the back of a chair and squat, turning your knees in different directions and tightening your buttocks, and you need to do this as hard as you can.
In this position, perform 4 breathing cycles. We also repeat it three times.
- Push ups. For this exercise, you should turn to face the wall and lean on it with your hands, which must be placed directly in front of your chest. Then try to do push-ups and catch the point at which the muscles will be in the most tense state. At this moment you need to line up your body in a straight line and stand on your toes.
In this position, 4 breathing cycles should be performed. It should be repeated 3 times.
More details in the video:
While practicing all the exercises, you should look in front of you - this is the only way you can concentrate. Try to accurately perform breathing exercises and abstract yourself from what is happening.
Oxysize: reviews
Oxysize: reviews
If you are still thinking about which weight loss method to choose, then read the reviews about the Oxysize system. Using this technique, many women lost weight: some after childbirth, others as teenagers, and others struggled with age-related obesity. Here are the reviews:
Lyudmila, 32 years old
I gained 20 kilograms after my second birth. I started practicing the oxysize technique 4 months after the baby was born. A month later I lost 10 kg, now it’s already the third month and I’m approaching the mark that was before giving birth. I am very pleased with my result!
Irina, 22 years old
I've always been plump. When I turned 16, I gained 10 kilograms. Doctors said it was hormonal. Now I’m tired of walking around with excess weight, and for 2 weeks I’ve been working with a trainer using the Oxysize method. Lost 3 kg. Determined for a good result.
Alina Ivanovna, 55 years old
I had heard about age-related fatness before, but I didn’t think it would affect me. For five years I struggled with extra pounds, but to no avail. Hope appeared when I started practicing at home using the oxysize technique. First I mastered breathing, and then started the exercises. I’ve already lost 5 kg, but I’m not going to stop, because I have good spirits and I’m always in a good mood!
Oxysize - what is it, who is it indicated for?
Oxysize is a combination of special breathing techniques and sports exercises. The program involves high-quality training and strengthening of the whole body. During the execution of the elements, deep diaphragmatic breathing is used. Actively supplying the body with oxygen helps accelerate metabolism, which leads to more active fat burning.
Gymnastics is recommended for both women and men who have excess body fat. If you have an athletic build, this system is ineffective; only strength training allows you to pump up your muscles well.
The Oxysize technique is often confused with Bodyflex. But there is a significant difference between these two directions. The latter has a 5-stage breathing principle, including holding, and places the main emphasis on stretching. In Oxysize there are 4 stages of inhalation and exhalation.
Due to the presence of breath holdings, Bodyflex is contraindicated for hypertensive patients. The Oxysize system has virtually no contraindications, and is even recommended for hypertensive patients and people with diabetes and joint diseases. Pregnant women can perform breathing practice under the supervision of a trainer.
