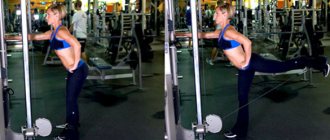
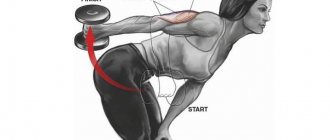
Triceps crossover extension with different types of handles
Crossover triceps extensions can be performed with different types of handles.
Each of them allows you to practice different variations of exercises, suitable for both beginners in sports and those who have been working out in the gym for a long time:
| Handle type | Features of loads |
| Straight handle | Basic exercises are performed with it, allowing you to move your arms in the amplitude familiar to everyone. Extensions in a crossover with a straight handle enable the athlete to evenly work out all three main muscle bundles of the upper extremities. |
| V-handle | With its help, an athlete can lift heavy weights. This becomes possible due to the adoption of the anatomically correct position of the shoulder girdle when placed in the original position. That is why exercises with a V-shaped handle in a crossover should be performed only 1-3 months after the first training in the gym. Otherwise, due to a lack of understanding of the exercise technique, the athlete may get injured, which will require long-term rehabilitation. |
| Pigtail or rope handle | This type of handle will make it possible to work the deep muscles of the upper arms, without overloading the triceps, which are already “clogged” with exercises that involve pressing. It is necessary to choose a “pigtail” or a rope only if the athlete already has extensive experience in the gym, and is also able to follow the exercise technique independently, without the supervision of a fitness trainer. |
Myths
All of them are associated with the use of handles of various configurations. It is suggested to do the exercise with a pronated grip on a straight handle, and with your hands at an angle to each other on a V-shaped handle, and with a parallel grip using a specialized rigid or flexible rope handle, and even use a supinated grip.
There is also no clear position in grip width: From a shoulder-width grip to a narrow grip when the palms touch each other. And it is believed that all this diversity includes the triceps in different ways and allows you to shift the emphasis from one part to another. A particularly popular myth is that when performing forearm extension with a supinated grip, we are focusing on the lateral head of the triceps.
All this is completely untrue. The load on the triceps in this exercise depends solely on the weight of the weight and does not depend on the grip used. The triceps is a biarticular muscle and is involved in the movements of the shoulder and forearm, causing shoulder extension and adduction, and forearm extension. The long head of the triceps begins from the subarticular tubercle of the scapula, and the medial and lateral heads from the posterior surface of the humerus.
All three heads of the triceps come together to a single tendon, which attaches to the olecranon process of the ulna. The joint connecting the ulna and humerus is trochlear-shaped, with one degree of freedom. Rotational movements are impossible in it!
Whatever the grip, pronated or supinated, the position of the ulna to the humerus does not change , only the radius moves, since the glenohumeral joint is ball-and-socket. When the hand is supinated, the radius is parallel to the ulna, and when pronated, it rotates around the ulna with its distal portion, crossing with it. But the ulna does not move. And since the triceps is attached to the ulna, the rotational position of the hand does not matter to it.
Grip width is determined by the rotational position of the humerus. By supinating the humerus we expand the grip, and by pronating we narrow it. Which also doesn’t matter for the load on the triceps. Since the movement of the analyzed exercise does not include shoulder extension and shoulder adduction, the load on all three heads is uniform.
Why then, when performing a supinated grip, are we forced to use less weight? Because in this position, a large static load falls on the hand extensor muscles, and their strength potential is not high, and on the finger flexors. They are the ones who limit the weight of the burden. It is easy to understand that when using such a grip, the triceps are not developed and this type of exercise is the least effective for it.
Which handle should you choose? The one at which you are most comfortable working with heavy weights. Typically this is a V-shaped or parallel handle with comfortable rests for the edge of the palm. When using them, the load on the forearm muscles is minimal, which allows you to fully concentrate on the work of the forearm extensor muscles and use maximum weights.
Features of choosing a simulator handle
It is recommended to choose handles for a crossover taking into account the level of training of a particular athlete, the presence of contraindications, as well as the training program in the gym:
- If the training program involves changing the level of load within one approach (usually used in training people with good physical fitness, but for a number of reasons are unable to exercise at full strength, for example, due to injury), it is recommended to choose a rope or “braid”. Rubber bands or elastic shock absorbers are attached to such handles.
- To pump up the triceps in a crossover, a beginner can only use a straight handle. Since the athlete is not yet able to independently monitor the correctness of the chosen grip, the classic straight grip option will be most suitable for him. To implement it, you will need to stand facing the machine, then grab the handle with your hands shoulder-width apart, and then slightly move your body forward and perform the required number of approaches.
- Using a V-shaped handle would be advisable when an athlete wants to pump his arms “wide”. If this is not the goal, it is recommended to choose a rope or a “pigtail” when performing exercises in a crossover.
Arm extensions with rope
Triceps extension in a crossover using a rope handle will be most effective if the athlete strictly follows the recommended technique when performing the exercise.
From the top block
The technique for performing arm extensions from the upper block in a crossover with a rope handle looks like this:
- Stand facing the machine, placing one of your legs 10 cm in front of the other. Distribute body weight evenly between two limbs. Straighten your back, lift your chin, and take the handle in your hands. The upper limbs should be bent, elbows pressed to the body.
- As you exhale, you need to straighten your arms, thus moving the handle down. At the moment of changing the position of the limbs, the body must remain motionless.
- Without pausing at the bottom point, with a deep breath, the arms should be returned to their original position. The return speed of the arms should be minimal so that the resistance to the pull of the machine works the deep muscles of the arms, including the triceps. Elbows should be pressed to the body.
- Repeat steps 2-3 as many times as necessary.
From the bottom block
The technique for performing arm extensions from the lower block in a crossover with a rope handle looks like this:
- Firmly grasp the handle of the simulator, having previously secured it to the lower mounts of the simulator. Raise your arms up, then turn your back to the machine.
- One of the legs must be placed back, and then the body weight should be evenly distributed between the two limbs. The body should be moved forward slightly.
- As you exhale, you need to raise your arms above your head, while fixing your elbows at your temples. Brushes must be moved strictly from the back of the head.
- Fix your hands at the top point for 1-3 seconds.
- With a deep breath, slowly bend your elbows, bringing them to their starting position. The elbows should still be kept close to the head and the body motionless.
Pigtail extensions
Triceps extensions performed with a pigtail handle are recommended to be done as follows:
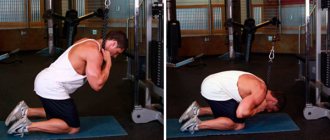
- To begin, you need to kneel, facing the machine. You need to take the handle in your hands, while your elbows should be pressed to the body. The body must be slightly leaned forward, the neck should be stretched, and the stomach should be tightened.
- As you exhale, you need to lower your hands down, bringing the handle to the desired position as slowly as possible. When moving limbs, the body must remain motionless.
- At the lowest point, it is not recommended to fully extend your arms, as this increases the chance of injury. The duration of the pause in the lower position should not exceed 3 – 5 seconds.
- After the specified amount of time, the arms must be slowly returned to their original position, resisting the pull of the simulator. When moving the limbs back, the body must also remain motionless. While returning your hands to the starting position, it is recommended to simultaneously take a deep breath.
The optimal number of repetitions of the exercise should be determined by the fitness trainer, taking into account the physical preparation of the athlete, as well as the characteristics of his health.
For beginners who do not have serious health restrictions, this is usually 3 sets of 10 repetitions, for more advanced athletes - 5 sets of 20 repetitions.
What heads work?
For consideration, it is better to take the safest and simplest exercise in terms of mechanics, namely, standing arm extension on a block. Why exactly this? Depending on the inclination of the body, you can easily work on the desired head without changing the mechanics itself. What other exercise can boast such variability?
In general, while working with the block, all three heads work:
- Lateral;
- Medial;
- Long.
| Variation of the exercise | Accent | Technique |
| Standard position | Uniform development | Stand straight in front of the block, slowly extend your arms straight down. |
| Body tilt forward | Lateral head | A slight pulling movement towards the body. The body is tilted relative to the block by 20-30 degrees. |
| Working with lower blocks | Medial head | Stand with your back to the block. Pull your arms up - like a French press. |
| Knot | Long head | Same as standard position. In the lower position, move the knot slightly to the sides to create an accentuating load. |
Extension of the arms of the upper block with a regular grip
Triceps extension in a crossover from the upper block is most conveniently performed with a straight handle, placing your hands on it with a regular grip.
The technique for performing this type of load should look like this:
- First, you need to position yourself facing the machine, then fix the handle in your hands, pressing your elbows to the body. It is recommended to place your hands at shoulder distance. The back should be straight, the body should be slightly leaned forward, the legs should be placed at a distance of 10-15 cm from each other, evenly distributing the body weight between them.
- As you exhale, you need to lower your hands down, bringing the handle to the desired position as slowly as possible. When moving limbs, the body must remain motionless.
- At the lowest point, it is not recommended to fully extend your arms, as this increases the chance of injury. The duration of the pause in the lower position should not exceed 3 – 5 seconds.
- After the specified amount of time, the arms must be slowly returned to their original position, resisting the pull of the simulator. When moving the limbs back, the body must also remain motionless. While returning your hands to the starting position, it is recommended to simultaneously take a deep breath.
Crossover triceps extension is a technique performed with a regular grip with a straight handle.
The optimal number of repetitions of the exercise should be determined by the fitness trainer, taking into account the physical preparation of the athlete, as well as the characteristics of his health. For beginners who do not have serious health limitations, this is usually 2 sets of 10 repetitions, for more advanced athletes - 4-5 sets of 15-20 repetitions (the minimum values are used during warm-up, the maximum values are used during the main part of the lesson).
Extension of arms on a block. What, why and why?
It is one of the most popular women's manual exercises and many ladies use it to get rid of the “jelly” at hand. As we all know, young ladies are not very fond of such equipment as barbells and dumbbells, but various blocks and exercise machines cause wild delight in them, which is why extension of the arms on a block is so popular among the female audience of gyms. However, you often see how each beauty tries to bring something of her own to the exercise, so to speak, to add a special twist, to add her own unique charm. Whether this should be done and how, in general, to perform block extensions correctly, we will discuss in this article.
Note:
For better assimilation of the material, all further narration will be divided into subchapters.
Muscle atlas
The exercise belongs to the class of isolating, single-joint exercises. The target muscle group is the triceps, which makes up 2/3
manual volume and responsible for cosmetic, i.e. “chattering-cold” appearance of the hand.
Muscle ensemble exercise includes:
- target muscle - triceps brachii;
- stabilizers - latissimus dorsi, teres major, posterior deltoid, pectoralis major (sternal head), pectoralis minor, lower trapezius, rectus abdominis/obliques, wrist flexors;
- antagonist-stabilizers – spinal extensor muscles.
Advantages
By performing arm extensions on a block, you will receive the following benefits:
- development of triceps strength;
- targeted and isolated training of the triceps brachii muscle;
- more toned arms/relief appearance of arm muscles (reduced “jelly”);
- greater arm volume;
- increasing bench press characteristics in basic exercises.
Execution technique
The arm extension exercise on a block is not technically difficult, but it is not without its subtleties. The step-by-step execution technique is:
Step #0
Go to the upper block and install the appropriate handle (straight or inclined bar), then equip the machine with a certain weight. Place your hands, with a grip shoulder-width apart or slightly narrower, on the handle from top to bottom. Standing straight with your body slightly tilted forward on slightly bent knees, lower the handle until your forearms form a right angle with your shoulder. Keep your elbows close to your body. This is your starting position.
Step #1
Using only the strength of your triceps, in an isolated movement, bring the plank down until it touches your front thigh and your arms are fully extended, exhaling through this part of the movement. Linger on 1-2
counts in a shortened position, additionally squeezing the triceps. From the compressed position, slowly and under control, return the bar to the IP position while inhaling. Complete the prescribed number of repetitions.
In the picture version, all this disgrace looks like this:
In motion like this...
Variations
In addition to the classic version of arm extensions on a block, there are several variations of the exercise, in particular:
- with rope handle;
- reverse grip;
- with different types of handle (straight, EZ, V).
Secrets and subtleties
To get the most out of the exercise, follow these guidelines:
- squeeze the projectile down exclusively due to the isolated work of the triceps;
- at the lowest point, fully straighten your arms and hold the contraction for 1-2
seconds; - do not throw the weight back up, but slowly and under control accompany it throughout the entire trajectory of movement;
- keep your elbows tightly pressed to your body;
- do not stand on straight legs, but slightly bend your knees and lean your body forward;
- use the exercise last in the PT arms as a finisher;
- at the initial stage, do not use too heavy weights;
- if your shoulders (anterior deltoid) hurt, then do not use this exercise;
- numerical training parameters: number of approaches 3-5
, repetitions
10-15
.
Actually, this is all theoretical information, now let’s look at some practical points.
Is the cable curl an effective exercise for the triceps?
A team of scientists from the University of Wisconsin, led by Dr. Porcari, decided to identify the best women's triceps exercises in terms of electrical muscle activity. During the experiment, it was revealed that of the 8 most popular exercises, arm extension on a block takes 5
(with a rope) and
6
(with a straight handle) places with EMG values
74+-22.64
and
67+-20.48
. The best exercise was considered to be push-ups with a close grip in a triangle position.
Thus, we can conclude that arm extensions are quite effective, but they are best used at the end of manual training.
Handle VS rope. What to choose?
In fact, it all depends on the athlete’s goals and different handles have different effects on the triceps. In particular, the rope allows you to “reach” the deepest muscle fibers of the triceps and has a fuller range of motion.
Different handles target the triceps from different angles, for example the v-bar is more focused on the outer triceps while the straight bar is more focused on the long head. Conclusion - choose a handle based on your manual goals (pulling up lagging areas).
Well, that’s probably all, now let’s sum it up and say goodbye.
Afterword
Another technical note has come to an end.
Today we dealt with arm extensions on a block and there is one more exercise in your hand toolkit. Of course, theory is nothing without practice, so let’s finish reading the article and head into the hall for a run-in, let’s get going!
PS.
do you use block exercise machines in your arm training - yes, no?
P.P.S.
Did the project help?
Then leave a link to it in your social network status - plus 100
points to karma, guaranteed :).
With respect and gratitude, Dmitry Protasov
.
Triceps extensions from the upper block - an isolating exercise aimed at working the triceps muscle, placing the main load on the lateral fascicle of the triceps muscle.
It is this part of the triceps muscle that stands out well on the outside of the shoulder. The exercise allows you to perfectly work out the shape and relief of the triceps.
Main working muscle group:
triceps (lateral bundles).
Auxiliary group:
elbow muscle.
Triceps extension from the upper block - execution technique.
1. Take the starting position by grasping the handle of a cable machine with an upper block, medium grip, from above. The elbows are pressed tightly to the body.
2. Lean forward a little so that the entire load falls on the middle bundle of the muscle. Watch your body position so as not to lose your balance; place your feet shoulder-width apart.
3. Pull the handle of the machine to chest level to begin the movement.
4. Set the weight on the machine to perform the required number of repetitions.
5. As you inhale, straighten your elbows in a downward motion, pressing the handle. Extend your arms completely, watching the contraction of the triceps muscle, take a short pause at the lowest point.
6. Then return the weight to the starting point, more slowly than you lowered it. Concentrate all your attention on curling your arms (negative phase), this will properly load and tire the triceps.
7. Throughout the entire range of motion, only the elbow joints work. The shoulders and wrists are absolutely static. Do not put a lot of weight on the machine, otherwise the entire load will fall on your lower back!
You can also perform the exercise using a rope handle.
Extension of the arms on the block is the main and safest exercise for working the triceps of the arms. The range of movement is achieved by extending the arm in only one elbow joint. Due to this, the exercise is isolating.
Target muscles: triceps
hands The forearms are slightly activated.
Different exercise options:
Straight handle extension with reverse grip
It is recommended to perform extension of a straight handle with a reverse grip in a crossover using the generally accepted technique:
- Position yourself facing the machine, then fix the handle in your hands, pressing your hands to your body. The fingers must be turned towards you (reverse grip), the hands should be at a distance of 5-10 cm from each other. The back should be straightened, the body slightly leaned forward. When using large weights, it is recommended to put one of the legs forward to achieve the most stable position. If an athlete trains with light weight, the feet should be placed at shoulder distance.
- As you exhale, you need to lower your hands down, bringing the handle to the desired position as slowly as possible. When moving limbs, the body must remain motionless.
- At the lowest point, it is not recommended to fully extend your arms, as this increases the chance of injury. The duration of the pause in the lower position should not exceed 3 – 5 seconds.
- After the specified amount of time, the arms must be slowly returned to their original position, resisting the pull of the simulator. When moving the limbs back, the body must also remain motionless. While returning your hands to the starting position, it is recommended to simultaneously take a deep breath.
The optimal number of repetitions of the exercise should be determined by the fitness trainer, taking into account the physical preparation of the athlete, as well as the characteristics of his health. For beginners who do not have serious health limitations, this is usually 3 sets of 8 repetitions, for more advanced athletes - 5 sets of 18 repetitions.
Arm extensions from behind the head
It is recommended to perform arm extensions from behind the head in a crossover using the generally accepted technique:
- It is necessary to turn your back to the machine, having previously fixed the handles in your hands (for this exercise it is recommended to use a “pigtail” or rope). Your legs should be placed close to each other and slightly bent at the knees, your back straight, your arms bent, and your elbows pressed to your head.
- As you exhale, your arms should be straightened without changing the position of the body and lower limbs. The elbows remain pressed to the head. Changing the position of the arms should occur as slowly as possible so that the deep muscles of the arms, in particular the triceps, can be worked with the help of the resistance of the simulator rope.
- Without pausing in the upper position, and also avoiding full straightening of the arms, it is necessary to return to the starting position, slowly bending the arms and moving the handle back.
- Repeat steps 2-3 as many times as necessary.
The optimal number of repetitions of the exercise should be determined by the fitness trainer, taking into account the physical preparation of the athlete, as well as the characteristics of his health. For beginners who do not have serious health restrictions, this is usually 2-3 sets of 10-12 repetitions, for more advanced athletes - 5-7 sets of 20-25 repetitions, performed in dynamics (the minimum values are used during warm-up, the maximum - during during the main part of the lesson).
One hand
Triceps can be worked in a crossover, loading your arms alternately.
In this case, it is recommended to do extensions like this:
- The athlete needs to turn to face the machine, fix the handle in one hand, and grab the handrail of the crossover with the other. The legs should be positioned like this - one leg in front and the other behind, and the distance between them should be no more than 10 cm. The back should be straightened, the body should be slightly moved forward.
- As you exhale, you need to lower your hand down, bringing the handle to the desired position as slowly as possible. When moving a limb, the body must remain motionless.
- At the lowest point, it is not recommended to fully extend the arm, as this increases the chance of injury. The duration of the pause in the lower position should not exceed 3 – 5 seconds.
- After the specified amount of time, the hand must be slowly returned to its original position, resisting the pull of the simulator. When moving the limb back, the body must also remain motionless. While returning the hand to the starting position, it is recommended to simultaneously take a deep breath.
The optimal number of repetitions of the exercise should be determined by the fitness trainer, taking into account the physical preparation of the athlete, as well as the characteristics of his health. For beginners who do not have serious health limitations, this is usually 1-2 sets of 8-10 repetitions for each hand, for more advanced athletes - 4-6 sets of 15-20 repetitions, performed in dynamics (the minimum values are used during warm-up, maximum – during the main part of the lesson).
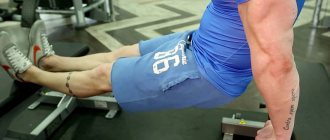
How to do dips on parallel bars correctly. How to learn to do dips
The benefits of dips
- works well on the triceps, which, along with the biceps, has a visual impact on how your arms look.
- the pecs are significantly loaded, namely the lower part (especially if you add weights).
- also the muscles of the shoulders and back - deltoid, trapezius and rhomboid, as well as the muscles of the forearms.
Dips are a closed kinetic chain exercise. And they “pump up” neuromuscular coordination well—the ability to tense and relax the right muscles in time for the most effective work.
One of the clear advantages of this exercise is that it requires a minimum of equipment.
Execution technique
1. The most common mistake is hunched shoulders during the exercise. Therefore, after you jump onto the parallel bars, lower your shoulders
Throughout the entire exercise, it is necessary to control the rise of the shoulders.
2. In this exercise, the elbows receive quite a negative load. To reduce negativity, make sure that your elbow does not “lock”. At the top point it remains slightly bent - this way the muscles will be in tension throughout the entire approach.
3. After making sure that the starting position is correct, smoothly lower yourself down until your shoulders are parallel to the floor.
4. When lowering and at the lowest point, make sure that your elbows go back and not to the sides to avoid unnecessary stress on your shoulders and elbows.
Also, do not lean your body forward too much.
HOW TO LEARN how to do push-ups (help)
If you can’t do push-ups on the uneven bars, or your technique leaves much to be desired, then there are a number of auxiliary exercises that allow you to improve your technique.
To do this, it is enough to perform assistance 3-4 times a week with a break of one day between workouts in 5 sets of 8-10 repetitions.
Reverse push-ups
Plus: Feet are on the floor, which makes the exercise easier.
Disadvantage: In this exercise, the elbows are bent behind the back, not at the sides, which significantly loads the shoulders.
Control the movement of your body (it should move close to the support) and raise your shoulders to the top point.
Reverse push-ups with legs raised
Straight legs on an elevated platform. You can start with a small stand and gradually increase the height. The higher the stand, the more difficult the exercise.
The rules of execution are the same: at the top point, do not lower your shoulders, try to move close to the support.
Push-ups with band
A very good option for working out the technique of the exercise, but at the same time, the elastic expander under your feet pushes up and relieves part of the load.
The most difficult thing is to select the resistance of the expander so that you can perform it 8–10 times per set. As you pump up your muscles, change the tape to a thinner one.
Eccentric dips
If you don't have an expander band, try the eccentric version. Jump onto the bars and lower yourself down as slowly as possible.
When the muscles get stronger, switch to the classic version of dips, but watch the technique. Remember: it’s better to do less, but do it right.
How to make the exercise more difficult
If you can easily perform 10 or more repetitions, then you can add variety and complicate the push-ups
Add weight
Almost every gym has special weight belts. You can hang a plate with any weight on a chain and do push-ups like that.
No need to chase weight. The main thing is technique!
Ring push-ups
Push-ups on rings are more difficult due to unstable support. You have to strain not only to push yourself up, but also to maintain your balance on the dangling rings.
A very energy-intensive exercise that involves almost all muscles to stabilize the body.
Tilt of the body in the position “facing the crossover”
It is recommended to tilt the body in the “standing facing the crossover” position as follows:
- First you need to kneel, facing the machine. The legs should be placed as close to each other as possible, the back should be straightened, and the body should be slightly leaned forward. You need to fix the handle of the exercise machine in your hands, having first bent them at the elbows.
- As you exhale, you need to lower your arms down, bringing your forearms to a position parallel to the floor. The distance between the upper limbs and the floor should be no more than 5 cm. Changing the position of the back and legs is not recommended at all.
- Pause at the lowest point for at least 3 seconds.
- Slowly return to the starting position, resisting the pull of the machine. When moving the limbs back, the body must also remain motionless. While returning your hands to the starting position, it is recommended to simultaneously take a deep breath.
The optimal number of repetitions of the exercise should be determined by the fitness trainer, taking into account the physical preparation of the athlete, as well as the characteristics of his health. For beginners who do not have serious health restrictions, this is usually 2-3 sets of 10-12 repetitions for each hand, for more advanced athletes - 5-7 sets of 20-25 repetitions, performed in dynamics (the minimum values are used during warm-up, maximum – during the main part of the lesson).
Basic crossover shoulder exercises
Sources:
Adolfo Cassan "Illustrated Atlas of Human Anatomy"
Frederic Delavier "Anatomy of strength exercises"
In this article, I will not talk about why to pump your forearms, because this is already understandable. But besides the aesthetic component, powerful forearms have another advantage that not everyone knows about - increasing the working weight in biceps exercises. And as a result – an increase in muscle mass in the arms. I want to tell you about how to pump up your forearms quickly and about the best exercise for them.
How to pump your forearms correctly?
Just like the abs and lower legs and neck. That is, in a strength style with heavy weight and an average (up to 10) number of repetitions per set. Why is this so? Because all these muscles that I mentioned in ordinary life contract thousands of times a day. You won’t surprise them with a high-repetition load. But working in a radically different mode is easy.
Slowly lowering the bar
Even if not in every approach, but only in a couple of final ones, the return from using these techniques in pumping the forearms, and other muscles of the same kind, is simply amazing. Yes, pumping your forearms this way is painful, but effective.
Conclusion: the muscles of the forearms are difficult to grow because they do not respond to high-repetition loads. But they respond very quickly to strength training.
What's the best forearm exercise?
The taste and color, as you know... But nevertheless, if you think soberly, then for each muscle group you can immediately name the exercise that causes their hypertrophy faster than others:
For legs - barbell squats
For the back – pull-ups on the bar
For chest – dumbbell bench press
For the shoulders - dumbbell press again, but sitting, and so on.
Why exactly these exercises and not others? But because in each muscle group there is a department responsible for its mass. At the legs it is the quadriceps, and at the back it is the latissimus muscle, and at the chest it is the pectoralis major muscle. That is, by pumping them you can increase the muscle mass of each group in a short period of time.
There is such a section in the muscle group of the forearms. It is called the brachioradialis muscle or the anterior forearm muscle. And it occupies no less than 60% of the volume of the forearms.
Consequently, the larger it becomes, the larger the mass of the forearms itself. What is the function of the brachioradialis muscle? Flexion of the forearm at the elbow joint with a pronated grip (overhand grip).
This means that you won’t be able to pump up your forearms by doing exercises for them with a regular grip, because the brachioradialis muscle will not be involved in the work. So what is the best forearm exercise? Lifting the barbell with a reverse grip. There are no options here.
Conclusion: if desired, you can use dozens of other exercises to define your forearms and develop their endurance. But if we are talking about gaining mass, you need to pump up your forearms by holding the barbell with a reverse grip.
How to lift a barbell with a reverse grip correctly?
Not only is this exercise the most correct from the point of view of biomechanics, but the working weight in lifting the barbell with a reverse grip will always be greater than in other exercises for the forearms. In this exercise, part of the load goes into the brachialis and even into the biceps, but quite a lot of it remains with the brachioradialis muscle. Enough to increase its size and quickly.
Conclusion: you can pump up your forearms with dozens of different exercises, but you can pump up your forearms quickly with only one – lifting the barbell with a reverse grip.
Pumping up your forearms, or any other muscle group, is not as difficult as it seems. You just need to determine its most important area, understand which exercise is best for it and actively use it. In the case of the forearm muscles, this is curling the arms with a barbell with a reverse grip.
“How to pump up the forearm on your left hand”
Seated arm extension
Extension of the arms in a crossover from a sitting position is recommended to be performed with a “pigtail” or rope handle.
This should be done according to the standard algorithm:
- To begin, you need to kneel, facing the machine. The buttocks should be placed on the calves, the back straightened, the chin slightly raised. You need to fix the handle in your hands, stretching your limbs in front of you.
- As you exhale, pull the handle toward your chest while bending your elbows. The rest of the body should remain motionless.
- Hold the position for 3-5 seconds, then slowly straighten your arms, resisting the pull of the machine. When moving the limbs back, the body must also remain motionless. While returning your hands to the starting position, it is recommended to simultaneously take a deep breath.
The optimal number of repetitions of the exercise should be determined by the fitness trainer, taking into account the physical preparation of the athlete, as well as the characteristics of his health. For beginners who do not have serious health limitations, this is usually 4 sets of 10 repetitions for each arm, for more advanced athletes - 6 sets of 18 repetitions, performed in dynamics.
Technical errors
Regardless of the type of exercise chosen, the athlete must be careful not to make technical errors, the most common of which are:
- swaying the body while changing the position of the arms (flexion/extension);
- movements of the forearms;
- changing the position of the hands not with the help of one’s own efforts, but by inertia;
- transferring body weight alternately from one leg to the other (this creates an incorrect distribution of the load);
- moving the hands along the length of the handle during extension or bending of the arms;
- lack of fixation in the shoulder joint.
Effective triceps extensions can be done both in a machine, such as a crossover, and with free weights. The first option is considered the most effective and safe, since the movement of the fixed handle reduces the risk of performing the exercise with an incorrect amplitude, which provokes sprains, tears and even dislocations.
Contraindications
The only contraindication to performing this exercise as part of a standard training program is injuries to the elbow joints. Due to isolation, the entire load falls on them, so any departure from the technique can result in injury.
In addition, it is not recommended to use it during the rehabilitation period, or after sprains.
Options with a block analogue of the French press also have limitations for use after injuries to the shoulder joint, since the static load is carried out at an unnatural angle, which can lead to damage and serious injury.
It is highly not recommended to perform the exercise if you have wrist injuries, due to slight supination of the hand during the approach. Not critical, but it is better to reduce the working weight by 30-40% until full recovery.
Otherwise, there are no general contraindications to standing arm extensions on a block machine.
Note: If possible, it is better to train with free weights, due to the more natural amplitude. Block simulators are best used at the very end of a workout with light weights, for finishing and pumping the triceps.
