After you have learned how to do the splits, you will most likely want to move on, make your body even more flexible and strong. There are other benefits that may make you want to learn how to throw your leg over your head. This asana has a positive effect on the health of the joints, making them more mobile and strong, and also improves blood circulation in the pelvis and hips.
Ready to learn how to throw your leg over your head? The next 8 asanas will bring you closer to this. Do them for 1-2 minutes. Breathe deeply and don't try to do more than you really can. Regular exercise will lead you to the desired result, but injuries due to haste can make the goal unattainable.
Consult your doctor if you have any contraindications to performing the exercises described below. Before each workout, do a short (5-10 minutes) warm-up.
Upavistha konasana
The next asana, which will help you learn how to throw your leg over your head, is also used to do the splits. In both cases, it is important to stretch the inner thigh, which is what this exercise does.
Sit on the floor and spread your legs as wide as possible. Raise your arms up and straighten your back. As in the previous asana, take a deep breath and lower yourself as low as possible with your back straight.
Shoulder stand
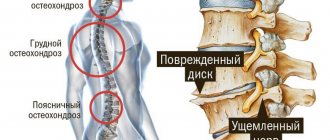
This is where the first difficulties begin. However, you should not skip this asana if you want to learn how to throw your leg over your head. Without working the upper part, neck and shoulders, there is a high probability of getting injured later.
Lie down on the floor. Push your feet off the floor and contract your abs to lift your legs.
How to get up correctly?
You can get up any way. Just like walking, sitting, bending... The question is that not all methods are equally useful, and some are even harmful. And for some reason, we often, without thinking, use exactly these methods. The result of this is: chronic muscle strain, injuries, and as a result – chronic and acute pain in the muscles, joints and spine. But learning to move correctly (that is, naturally and with minimal effort) is not so difficult.
Main rules:
– minimize muscle tension;
– competently use the inertia of movement;
– “round” movements;
– avoid sudden movements.
As you know, you can win either in strength or in the length of the path. By standing up (and generally moving) incorrectly, we move our body with muscle effort, often overloading our joints and spine. The correct movement is usually longer, but it does not require any noticeable effort or additional support on anything.
But first, let's lie on the floor. Of course, you can do this quickly by taking a prone position with a fall on your hands, and then lower yourself to the floor. But we will take a different path: longer, but much safer, natural and pleasant. For ease of learning, the movement is divided into phases, but of course in life it is performed together. I will note that this in itself (with repeated concentrated performance) is an excellent exercise for regaining the ability to move harmoniously and naturally.
So, to learn to get up, you must first lie down:
1. We get down on one knee (for example, the right one - you can start with the one that is more convenient for you personally).
2. Place your right palm on the floor in front of you.
3. Place your left palm.
4. Leaning on your palms, lower your second knee to the floor.
5. Continuing to lean on our hands, we turn our pelvis to the left, lying on the floor with our right thigh.
6. Left palm on the floor, right arm extended along the floor to the left - perpendicular to the body, lie down on the right side.
7. Smoothly roll onto your back. Let's relax.
All!
Here we avoid bending and bending in the back, trying to lower ourselves by bending the knees and elbows, rounding the movements and rolling where possible. We will rise from the “lying on your back” position in the reverse order:
1. Bend your knees (feet on the floor), tilt your knees to the right. At the same time, the pelvis naturally rotates.
2. Continuing to rotate the pelvis, we roll onto the right side and shoulder.
3. We continue to roll onto the chest, with the arms under the body (the right arm may “want” to stretch forward, do not interfere with it!). The rotation will facilitate slight stretching along the longitudinal axis of the body towards the head. Bent knees will prevent you from turning over, so they straighten as you move. We pull our hands to our shoulders - this will give us the opportunity to push off the floor.
4. Bringing the pelvis back, we come to our knees. We do not raise our head and torso, our back is inclined. Palms remain on the floor. You can push off with your hands, helping yourself to your knees.
5. Bring your buttocks to your heels, shift your body weight back, and smoothly sit on your knees.
6. Shift our body weight forward and rise to our knees.
7. Get down on one knee.
8. We rise to our feet.
We reached the “standing” position: smoothly, without unnecessary effort or pain, without putting any strain on the back. Be sure to alternate performing the exercise on both sides, this is the key to the harmonious development of the body and brain. You can understand the nuances and individual characteristics of the movement with leisurely repeated repetitions. Try to move naturally, and not so much to think as to feel. The body itself will suggest a rational path, you just need to let it do it and listen to the prompts. Relax, alternate tucks and stretches as your body wants.
Sundial
If you have completed all the previous Alans, we move on to a new level of difficulty. Sit on the floor with your legs bent in front of you. Raise your left leg and push it with your left hand as far back as possible behind you until you can eventually place it on your left shoulder. When the discomfort becomes less, grab your left leg with your right hand, which was previously the support, and continue to push back. Now the support is the left hand.
Continue to perform asanas regularly until you can straighten your legs, arms and back. Don't forget to switch legs!
What to do if an elderly person falls
To begin with, do not give in to the instinctive desire to immediately pick up the fallen person and try to remain calm.
Precautionary measures
- Lift a person from the floor only if you are able to do this without harm to yourself and the fallen person. If you are not strong enough and don’t know how to lift weights correctly, you will end up injuring yourself and even more so the person who fell.
- Before you help someone get back on their feet after a fall, you need to make sure it won't harm them. For example, if an elderly person has a broken hip or a severely sprained muscle in his leg, he will suffer additional injuries when standing up.
- First, help the person on the floor to calm down and assess for serious injuries. If he's panicking, have him take slow breaths until he feels better.
- DO NOT move a person if they complain of a head, neck, or back injury.
When to call an ambulance
If an elderly person falls, you should call an ambulance if:
- he is bleeding heavily;
- there are serious bruises;
- he complains of severe pain;
- lost consciousness;
- he finds it difficult to breathe.
Even if it turns out in the end that the injury is not as bad as it seemed, it is better to be safe.
If you are sure that immediate hospitalization is not required, the older person should still be seen by a doctor as soon as possible.
How to lift an elderly person off the floor - step by step
While the fallen person is lying on the floor, check for damage. In most cases, you won't be able to see the broken bones, but you will likely notice scrapes, bleeding, abrasions, and bruises.
Ask the older person what hurts and how bad it is. Avoid touching any areas that cause severe pain.
If there are spilled water, broken glass, objects that have fallen from a table, etc., nearby after a fall, remove them first to help raise the elderly person as safely as possible.
After this, if the fallen person does not experience severe pain and does not have serious injuries, you can begin the lifting process:
- Place one chair at the elderly person's feet and another at his head. These should be durable chairs with non-slip legs. If an elderly person falls next to a sofa, armchair, coffee table or bedside table, then these pieces of furniture can be used as support.
- With one hand on his shoulders and the other on his waist, roll the person over onto his side. Do this carefully.
- Once the older person is on their side, place the top leg in front of the bottom leg. The forearm should be bent at the elbow and the hand should lie on the floor. This is necessary to make it easier for him to kneel.
- If the floor is not carpeted and is very hard, place a folded towel under the older person's knees. This way it will be more convenient for him to first get on all fours, and then just on his knees.
- Ask the older person to sit up with his hands on the floor and at this point help him move his hips so that he is on all fours. In this case, both his palms and both knees should rest on the floor.
- Bring the chair or other furniture you placed near the head as close to the older person as possible. He needs to place both hands on the chair alternately, this will help him get to his knees. If it is impossible to move a piece of furniture (for example, a sofa), then, if possible, help the fallen person crawl to it on all fours.
- As soon as the elderly person changes his body position (instead of kneeling on all fours), wait a couple of minutes, as he may feel dizzy after this.
- While the older person is kneeling, place a second chair (the one at his feet) directly behind him. When the person who has fallen eventually stands up (slowly and starting with one leg), hold the chair so that the person can sit on it safely.
If in the second step you find that you are unable to turn the elderly person on his side, then you should not continue. Ask for help.
We throw our legs behind our heads
Having completed the previous 5 steps, you can probably throw your leg over your head. Sit on the floor with your legs bent in front of you. Take your left leg to the side. Place your left hand in front of your left shoulder. Helping yourself with your right hand, place your left leg on your left shoulder; if possible, you can immediately move your left foot behind your head. Slowly straighten your back. Don't forget to alternate legs and arms.
Subscribe to our channel to find out more interesting things!
Classic burpee technique
Perform a partial squat and lower your hands to the floor.
From this jumping position, go into a lying position.
Bend your arms and lower your body down, touching the floor with your chest. You can also touch the floor with your stomach and thighs.
Push yourself up while lying down.
Jump your feet toward your hands. Don't bend your legs too much. The angle at the knee should be as obtuse as the stretch allows. This protects the knee joint during numerous repetitions.