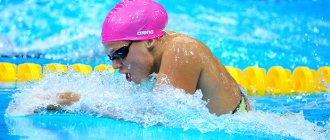
If you have ever thought about how to make crawl swimming clearer, easier, more beautiful and faster, then we invite you to work with us to understand what the freestyle swimming technique consists of, what stages and phases it consists of. It is necessary to know the theoretical part in order to understand what you are doing correctly and what you should pay more attention to. Next, you will learn how to swim the front crawl correctly, what elements the front crawl consists of, what mistakes can be made and how to correct them.
Further:
Note for newbie
Next, you will read in order of importance the elements of the front crawl swimming technique. Stick to this sequence.
- The very first and most important element of the technique is breathing . Don’t rush to move far without learning how to breathe correctly.
- Footwork comes second . The reason for this is that if your legs sink, trainers often use the term “heavy legs,” then the effectiveness of all other stages is reduced to almost zero. Learn to keep your body afloat and only then move on to the next stage.
- Hand work.
- Head position.
- Corps Rotation.
Origin and development of style
The crawl is the most natural way of swimming; our ancestors moved in water in a similar way in ancient times. At the competitive level, the crawl has become noticeable since 1884, when at international competitions held in London, American Indians using this style in the freestyle category left the lot of local athletes who practice exclusively breaststroke swimming.
Charles Daniels, founder of freestyle swimming
However, the pride of the losing Englishmen did not allow them to adopt a more efficient style of swimming, as they believed that the crawl was the prerogative of savages due to the fact that its movements create a lot of noise and splashes.
The first European to seriously consider freestyle swimming as a sport was Arthur Tredgen, who traveled to Argentina in the 1880s. He met local swimmers and learned their style, but Tregen's attempts to compete were not successful, as he made many mistakes in his footwork.
The father of the modern crawl technique is considered to be the American Charles Daniels , who at the beginning of the 20th century worked in detail on all aspects of the style and created a number of methodological recommendations for athletes. Since then, the rabbit has suffered virtually no major changes.
Breath
Proper breathing while swimming is the basis of both sports and recreational activities in the water. Experienced specialists teach this skill in the very first training sessions. Learning to breathe properly while swimming crawl can be divided into the following stages:
- Breathing training on the spot
- Breathing training while swimming with a plank
Breathing training on the spot
This stage begins with attempts to exhale into the water using the mouth, first immersing only the face, and with successful attempts, the entire head under water. Inhalation must always be done using the mouth (since if you inhale through the nose, you can also draw in water in addition to air).
If you successfully try to exhale through your mouth, you can switch to exhaling through your nose. Here, in addition to the uniformity of breathing, another goal is pursued - using air to displace water that could potentially penetrate the nose.
During the learning process, you need to reduce the inhalation time as much as possible and lengthen the exhalation time. When you achieve the rhythm “inhale for one count, exhale for three,” you can move on to the next stage - learning to breathe in motion, in particular when swimming with a board.
If you are a beginner swimmer
How to swim correctly - a general description for beginners
Breast crawl is a method of movement in water in which the limbs work perpendicular to its plane, which allows one to minimize the resistance of its molecules and also develop good speed.
This is what crawl swimming looks like from the outside:
This technique in full coordination can be described as follows :
- The swimmer continuously works with his arms and legs: his arms make alternating strokes, and his legs make kicks . This makes crawl very different from breaststroke (read more about the differences between crawl and breaststroke here).
- slight turns during strokes
- To breathe, while extending the arm, the chest, followed by the head, turns and takes a sharp breath.
The face is turned down while swimming or to the side when breathing.
When using the crawl, the muscles of the back, shoulders and legs are maximized. So if you are interested in strengthening your back muscles, treating or preventing spinal problems, then this style will definitely suit you.
Let's consider the question of how to swim crawl, analyzing the technique step by step - arms, legs, breathing, body movement.
Hand work
Correct hand technique when swimming freestyle consists of the following phases:
- Capture or support phase;
- Pull-ups;
- Repulsions;
- Exit;
- Carrying;
- Influx.
Let's take a closer look at each of the phases of hand work.
Capture phase or support phase
First of all, let's define the term “capture”. The grip is the moment of movement in which you cling to the water with your brush.
The capture phase is very short. It lasts from the moment the stroke begins until approximately the moment indicated in the photo below:
The hand in the grasping phase travels approximately 25-30 centimeters. Let's look at the sequence of movements and points to pay attention to:
- Starting position – the rowing hand lies on the water, representing a straight line of continuation of the body
- The beginning of the capture. The arm begins to bend at the elbow while grasping
- The hand remains level throughout the entire grip phase and does not bend in relation to the forearm.
- The elbow during the grip, when the forearm is already gripping, is kept as high as possible to the surface of the water
- When gripping, the hand passes close to the line of the middle of your body
During the grip phase, control of a straight hand is important. To strengthen your wrist, you can do the following exercise:
Pull-up phase
This phase of the stroke begins immediately after a few centimeters of arm movement in the catch phase.
It looks like this: imagine a swimmer lying horizontally in the water with his arms extended forward. Now this athlete begins to bend his arm at the elbow, but without bending the hand (the hand remains an even continuation of the forearm) and, very IMPORTANT , without lowering the elbow down or pressing it to the body. A small movement of the hand and forearm along the line of the middle of the body, turning into a bend of the arm with the shoulder. Let's look at the sequence of movements and the points that you need to pay attention to in the pull-up phase:
- Starting position - the rowing arm is bent 25-30 centimeters after the capture phase and is located on the line of the middle of the body
- The hand and forearm move along the line of the middle of the body towards the pelvis. The elbow remains higher than the hand
- The angle between the forearm and shoulder is 90 degrees.
Watch the video of the exercise for practicing the grip and pull-up phase with an expander and it will be easier for you to understand what exactly the points above are about (from the beginning to 36 seconds):
A couple of exercises to develop the technique of the pull-up phase.
Exercise with a rubber band expander (as in the video above)
- Attach the expander in front of you to a wall bars, or to a door handle, or to a tree. For anything in general.
- Pull back until you feel a moderate stretch.
- Lean forward so that your body is horizontal, as if you were swimming.
- Stretch your arm forward that holds the expander and imitate the grip phase. The expander creates additional resistance which helps the muscles remember the movement better. Video exercises:
Wall exercise
- Stand with your back to the wall
- Raise up the hand whose technique you will practice
- Press the elbow of this hand against the wall
- Perform the rowing motion without lifting your elbow from the wall
Repulsion phase
After pulling up, the hand continues its movement and strives for an even and parallel position relative to the body. What you should pay attention to when practicing:
- The hand is still level relative to the forearm
- The hand continues its movement along the line of the middle of the body
- In the final push-off phase, the arm is aligned at the elbow
A common mistake is to enter the swing phase early without completing the push-off phase. Only after the arm is fully straightened, when it is parallel to the body, can the push-off phase be considered complete.
In the Soviet Union, swimmers were specially smeared with brilliant green on their thighs. Those who correctly performed the push-off phase ran their hand along the thigh to emphasize the end of the movement. By the end of the training, proof of correct movement was the absence of green on the athletes’ thighs.
Video exercise for practicing the push-off phase with an expander:
Exit phase
The phase begins from the moment the hand appears above the water after the repulsion phase. The task of the exit phase is to prepare the hand for the carry.
The hand rises above the water from the elbow. First the elbow rises, and then the hand. At this time, the opposite arm lies extended and stretches forward in front of the body, which in turn creates a slight rotation of the body towards the outstretched arm. So, what to pay attention to:
- First the elbow comes out of the water, and then the hand
- At the moment the elbow comes out, the opposite hand is already reaching forward
- The body rotates towards the arm extended forward
Carrying
The sweep is performed at the same time as the other hand performs the stroke. This is a synchronized movement where the hand that carries out the sweep increases its speed from slow when the hand exits the water to fast at the moment of entry. The hand can be relaxed during the swing phase and does not need to be kept level with the forearm.
Key points of the carryover phase:
- Performed while the other hand is rowing
- The speed of the hand at the beginning of the stroke is lower than the speed of the hand at the end of the stroke
- The hand is relaxed until the hand enters the water
Rush phase
The influx occurs after the carry and before the capture begins. In this phase, the swimmer plunges the hand that completed the sweep into the water. First the hand goes in, then the elbow goes in. At the moment of immersion, the arm straightens, reaches forward, the hand tenses and becomes an extension of the forearm, preparing to begin the capture phase. At the same time, the opposite hand ends the push-off phase and the swimmer’s body performs a slight rotation towards the front hand.
Key points of the influx phase:
- First the hand enters the water, and then the elbow
- The hand reaches forward as far as possible after being completely immersed in water
- The hand tenses, becomes even in relation to the forearm
- The body makes a slight roll towards the front hand
A beginner who has mastered breathing and footwork techniques can begin to master hand techniques. If you are a beginner swimmer
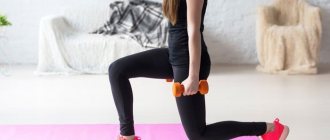
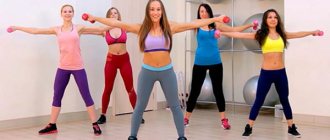
Warm up before swimming
To make swimming lessons successful and very comfortable, it is very important to do an exercise before training that has two goals at the same time.
First, warm up the muscles that will work in swimming.
Second, you are stretching yourself, which will allow you to swim more efficiently in the future.
Here are some general exercises:
- Stretch your neck. Create a head tilt in different directions.
- Stretch your arms out to the sides and begin to twist your forearms in and out.
- Place your feet shoulder-width apart and lean forward. Hands reach the floor without bending your knees.
- Get into a standing squat position and extend one leg forward. Tilt your body and arms in the direction.
- Do a leg stretch—sit on the floor and reach forward to straighten your legs, or do similar exercises while standing.
- Take your hands in a “lock” behind your back (arms should be straight) and raise them in this position.
The same warm-up is also suitable for breaststroke swimming (you can read about the relationship between crawl and breaststroke swimming methods in our separate article).
A good warm-up before swimming is also visible in this video:
Head position
Breathing technique when swimming crawl is as important as during any cyclic physical activity. It is necessary to maintain an even pace of breathing. Try not to hold your breath when swimming crawl, inhale quickly and exhale consistently. In the pool, you may have heard the phrases “breathing on 3” or “breathing on 5.” This means that you inhale every third or fifth stroke. We talk more about breathing in the article “How to breathe correctly when swimming,” but here we would like to draw attention to how you need to hold your head when swimming crawl, since the speed and comfort when inhaling depends on this.
The position of the head in all phases of the stroke should be natural. The natural position of the head is when you stand or sit straight, and your head is also level. In other words, the cervical vertebrae are not curved in relation to the thoracic ones. This situation can be simulated as follows.
- Stand with your back to the wall.
- Press your pelvis, lower back, shoulders and back of your head against the wall so that you look straight ahead
- Raise one arm straight up to ear level
This should be your position during the end of the surge phase and before the capture phase.
If you want to inhale, you need to lean a little more to the side and lean more on the opposite hand during the catch phase. Try not to turn your head in your neck at the moment of inhalation, but inhale by rotating your body.
In all other stages of swimming, try to keep your head straight without bending your neck. Lifting your head forward can sometimes be done when you need to look at potential obstacles that may lie ahead. Swimmers, even in open water, when they need to look around and orient themselves in space, lift their heads out of the water using their body, and not by bending their neck.
A beginner who has mastered the technique of breathing , footwork and hand work can begin to work on the position of the head in the water.
If you are a beginner swimmer
How to avoid getting tired while swimming
As a rule, freestyle swimmers (as, in general, other styles) set themselves either the task of swimming as quickly as possible - this can be realized primarily over short distances, or the task of swimming as long as possible without getting tired.
In the first case, when speed is important, you need the “classic” crawl, which was described above and is discussed in more detail in the linked articles. In order not to get tired, you need to create good physical shape - aerobic endurance and muscle base.
If the task is to swim as far as possible without getting tired, then we recommend paying attention to the “Total Immersion” technique.
Its basic principles are discussed in these videos:
Balance in water:
Sliding and long body:
Body position:
Points:
You can also read more about this technique here.
Footwork
Footwork when swimming front crawl helps maintain the body in a horizontal position (the legs do not sink) and contributes to a significant increase in speed. If you watch the starts of professional athletes in the crawl style, you will see how after the start the pros swim like a dolphin underwater. This is because the movement of the legs is powerful and significantly increases swimming speed.
In freestyle swimming there are two strokes, four strokes, and six strokes crawl. What does two-beat or four-beat mean? This means that for a full cycle of arm work, two or four kicks are made, one or two kicks with each leg, respectively. If you learn to swim and try to work technically correctly, and at the same time you make oscillatory movements with your legs to keep them afloat without paying attention to the number of strokes - most likely you will swim six stroke crawl without even realizing it.
Frequent footwork, such as during the six-strike freestyle, is more important for sprint distances. When you need to give your best in a short period of distance or time. The legs have large muscles that require a lot of energy. Therefore, at long distances (from one kilometer or more), athletes more often use the two-impact crawl. Two kicks during a full cycle of arm movement helps keep your legs afloat in a horizontal position and helps save the strength and energy that you need to spread over hours of covering the distance.
Three facts about footwork when swimming freestyle:
- For professional athletes, footwork provides 10-15% efficiency. The remaining 85-90% of speed is developed by hand strength and technique.
- Elite athletes also have greater joint flexibility in their ankles, knees and hips. Due to this flexibility, athletes are able to achieve an angle of attack of the water with their foot, which, when the foot strikes, incredibly effectively propels the athlete’s body forward. Most adult athletes will not be able to achieve such flexibility, since it is necessary to work on joint flexibility for such results from early childhood. By the way, it is still worth working on ankle flexibility, as this will allow you to reduce the likelihood of injury in the ankle area. Especially if you do triathlons and run a lot.
- Amateur athletes manage to achieve approximately 5% efficiency in moving forward through footwork. Distance swimmers and triathletes prioritize increasing the number of arm strokes rather than expending energy through frequent leg work.
Let's look at the main points that need to be emphasized in footwork:
- Hip kick. The impact of the foot on the water should not be due to flexion and extension of the leg at the knee, but through the movement of an almost straight leg at the hip. In this case, the knee should not be tense, but relaxed and slightly bent during the impact. A common mistake triathletes make when working their legs is bending the knee. Perhaps this is due to the work of the legs while running and occurs on an intuitive level. But with this technique, a lot of energy is spent on the unnecessary movement of flexion and extension of the knee joint with the quadriceps femoris muscle, and it also increases resistance with water due to a decrease in the streamlining of the legs.
- Toes inward For accentuated, sharp and effective leg movements, you need to turn your feet slightly inward. A common mistake is the reverse position, when a novice athlete turns his feet outward. You just need to remember this moment, and over time, the accustomed body will do this automatically. Remember that when you are tired and continue to swim, this is when your technique deteriorates. Don’t “turn off your brain” when you’re tired, but rather try to perform every movement consciously.
- Ankle Flexibility Even if you have accepted the fact that you can't achieve a significant increase in speed through your footwork, that doesn't mean you can give up on them. The reason is simple. If you score, the incorrect foot technique will even begin to reduce your speed! An unretracted foot in the water creates resistance. Include a simple mat exercise in your warm-up every workout:
- Sit on a soft mat
- Put your feet under your butt
- Place your feet so that you sit on them with your body weight
Perform the exercise for one minute for 3-4 sets before each workout.
A beginner who has mastered the breathing technique can begin to practice footwork techniques.
If you are a beginner swimmer
Basic mistakes
A ride on the bicycle
This mistake consists of excessive leg bending . As noted above, make sure that your movements are more like a whip, and more like a cyclist.
Do not do strong bending!
Amplitude too large
If we imagine our legs in the form of “flexible” scissors, then this mistake consists of opening them too wide , when one leg at its highest point comes out of the water, and the other goes far below the line of flight.
In this case, our limbs disrupt the general gliding of the body and begin to become a parachute - something that stops on the water and slows us down.
The correct amplitude should not be too wide
Most often, this error occurs at the moment of inhalation and is due to the fact that the swimmer at this moment loses balance, begins to float worse on the water and tries to push himself further with his legs - which, perhaps, works, but ultimately reduces the speed.
Excessive force during upward movement
If you are swimming a short sprint distance and your task is to give your all, then there is probably nothing wrong with that.
Otherwise, you need to understand that the main effort should be during the downward kick (here it’s really worth straining the muscles), while to return it up you shouldn’t put in excessive effort - the muscles should receive a certain relaxation, otherwise you won’t be able to swim.
Likewise, you don't want to let your ankle heal too much, especially when lifting your leg up.
Exercises for learning to swim crawl
To better master the freestyle swimming technique, beginning swimmers are offered to practice their movements during special exercises. Thanks to the latter, a person better assimilates all the necessary actions and performs them automatically.
All basic exercises are performed first on land, then in water:
- Describe ellipses with moving hands. Bend the brush a little or fold it into a boat.
- Move the brush upward, as if raking in the air. Slightly bending your arm at the elbow, insert it into the water. Straighten and pull forward, tightening your body. The exercise for the second hand is performed in the same way.
- Lie on your stomach and row alternately with your arms. Stretch your leading hand forward. Raise the second one to make a stroke. Bend it a little and rake it so that it goes under the water, turn it and return it to its original position. After making a few strokes, change hands. This exercise is aimed at developing the shoulders.
- There is another variation of the previous exercise - do not pull your hand forward, but place it along the body and press it to your hips.
- Make a fist and swim. This will increase the driving force. The exercise trains repulsion from water. It is better to make a fist with the hand that is not dominant during swimming.
What are the positive effects on the cardiovascular system?
Swimming crawl is an aerobic exercise. At the moment of sliding, the legs work without stopping, and there are quite large muscles on them that consume large amounts of oxygen.
In addition to the legs, the shoulder body and arms are used, which have to be swung over a wide amplitude. Continuous footwork and cyclical arm movements require a lot of oxygen. Thanks to its supply, the heart receives the necessary load. Swimming crawl regularly will really improve your cardiovascular health if you remember to take your pulse. It should not exceed permissible limits.
Interesting information
The question of why this style of swimming is called crawl is rhetorical. Just look at the swimmer's position and movements to get the answer. People often wonder how freestyle differs from freestyle. These concepts are often considered synonymous. In fact, there are no differences. Crawl is an independent swimming style that has many varieties and techniques. As for freestyle, it is a sports discipline. Its regulations allow the use of various styles during swimming competitions, and very often athletes choose the crawl style. This is facilitated by his speed and entertainment.
After reading the article, you got an idea about the fastest swimming style, its technique and the benefits it brings to the body and appearance. A lot of information on this topic can be found on the Internet, and some of the advice is really useful. However, with all the wealth of information, you should not try to master crawl swimming on your own. Don't neglect the help of professionals! Only a trainer will help you correctly distribute the load, monitor your progress and prescribe the necessary exercises to further consolidate your skills.
A specialist will teach you how to make a correct turn when swimming crawl, help you increase your gliding speed, and reveal all the secrets. If difficulties arise, do not despair. The more thoughtfully you perform your training exercises, the more perfect your style will be in the future.
Exercises to help you master the style
Every interested person should know these techniques. They will help you not only quickly learn to swim crawl, but also improve your existing skills. The first popular exercise is the “Star”. During its execution you must:
- Lie on the water with your chest down.
- Inhale and then lower your head under the water.
- Extend your arms and legs to the sides.
Over time, you will begin to sink, and it is very important to grasp this moment. The exercise should be repeated, resisting going to the bottom. Over time, you will learn to maintain balance on the water, this is the essence of training. Doing this exercise will help you overcome your fear of depth. You can train both in the pool and in the river. At the initial stage, the process should take place at a shallow depth and under the supervision of a trainer.
The exercise “Crawl with legs and a swimming board” will help you learn how to use your legs correctly when sliding. To do this, you need to stretch out and lie on the water with your head down. Then a board is taken into hand, which serves as a support. You hold on to it, swing with relaxed legs, and they should work from the pelvis. The goal of the exercise is to achieve movement using the legs. A more advanced exercise is the crawl with a board. It involves adding a hand to a familiar algorithm. You lie down on the water, stretch out and start training. After 5 swings or kicks, inhale and make a large circle with the hand free from the board.
A more complicated version of the exercise is that after 5 swings and a stroke, during which the hand stops at the hip, you need to turn on your side and inhale. After this, the head is lowered into the water, where an exhalation is made. When performing the exercise, it is important to change the hands doing the stroke. When you acquire a certain skill, you can release the board. The “Full Crawl” exercise is performed with the same movements, but without a plank. First, the strokes are made with one hand, then the second is used.