Author: Mikhail Ziborov - author of the website makefitness.pro | more details >> I am a swimming coach at a youth sports school and a gym instructor.
Place in the ranking of authors:
23
(become an author)
Date:
2020-09-07
Views:
983
Rating:
4.5
| All articles by the author >> | Medals articles >> |
Articles are loading...
Leg workout
For beginners - holding hands on a support
The first exercise for very beginners is to grab some support and, holding on to it, work with your legs - as shown in this illustration:
Footwork while holding on to the side
In this case, you will be motionless in place, but your body should not sink, but should float.
It is recommended to immediately perform all tasks
with your head lowered into the water - exhale into the water and raise your head as needed to inhale.
With board
This exercise is not only recommended for beginners - it is useful for all swimmers , it is the main way to train footwork.
Swimming with a board - bottom view
We take a swimming board and swim solely due to the work of our legs, focusing on them. As in the previous case, it is highly recommended to immediately start working with your head in the water.
Tasks:
- develop rhythmic and non-stop footwork;
- focus on working from the hip;
- make sure your legs work close to each other.
Without a board just using your legs
Two arms outstretched
Having practiced enough with the board, we stretch our arms forward in front of us (so that they form an arrow) and swim using the movements of our legs.
Pay attention to the correct hand position , which is shown in this illustration:
One hand is extended, the other is pressed
This task is performed generally similar to the previous one, but only one arm is extended forward and the other is pressed to the body.
Swimming with your hand pressed
Both hands are pressed
This is the most difficult option, in which both arms are pressed to the body. The legs need to work the hardest here so that they don’t start to sink.
It is recommended to take breaths to the side - to the right and to the left, by turning the body.
A big plus of this task is that thanks to it you can get rid of the habit of leaning on water while inhaling.
Fins – with and without board
This is one of the best ways to develop both muscle strength and overall footwork technique, including their rhythm.
The classic version of this exercise is to take a board in your hands and work only with your feet in fins; the greater the distance, the better, as a general rule.
Swimming with fins is a great way to train both leg strength and technique.
Straight legs
This is a good way to wean yourself from bending your knees too much. The goal is to swim with perfectly straight legs.
Let us remind you that in normal swimming there are still slight bends, but here we specifically make perfectly straight legs in order to develop the skill of moving precisely at the expense of the hips.
Under the water
Leg movements are felt much more strongly when the torso is completely underwater. This allows you to work out the amplitude and keep your limbs level.
Swimming underwater with arms extended forward
This movement is performed through swims over a distance of 12 to 25 meters.
You need to stretch your arms forward and move only with your legs ; to make the task easier, you can put on flippers .
Swimming Features
First of all, you should consider the features of swimming:
- When moving in water, all muscle groups work simultaneously. To do this, it is necessary that the muscles of the whole body work not only simultaneously, but also that their movements are coordinated with each other and make the maximum contribution to the effective advancement of the swimmer.
- When moving in water, swimmers do not have any support for movement and they have to create it independently by muscle power; it is for this that the muscles of the trunk must be well developed and able to hold the entire body in the water.
- As the swimmer advances, he makes the same repetitive movements and if he does not have any additional training, then over time a muscle imbalance arises, that is, one group becomes much better developed than others, and this negatively affects health.
- For a swimmer, not only strength and endurance are important, but also flexibility. An insufficiently flexible body will not only become an obstacle when performing the technique, but can also lead to injury.
- The shoulder joints receive the greatest load when swimming. To avoid injury to these joints, you must carefully monitor your swimming technique.
Hand technique
Training for Beginners
For very beginners taking their first steps in freestyle, we can recommend trying two exercises at the very beginning - imitation of movements and alternating strokes with a board .
Imitation of movements while standing on the bottom
Stand on the bottom with your legs spread wide enough and one of them forward so that your body does not drift.
Try to imitate all phases of the stroke to get a feel for how they are performed. The sequence of actions is shown in this illustration:
Imitation of movements
At the same time, do not make a strong effort directly during the raking movement, otherwise you will be carried away.
Alternating strokes with the board
Take your board and start swimming with your head down, using your legs.
As you move, start doing alternating strokes:
- the hand makes a stroke,
- then she returns to the board,
- then the stroke is made with the other hand.
One hand holds the board, the other makes the stroke.
While performing this exercise, it is also recommended to practice breathing to the side.
Arm strength
Swimming with shoulder blades and/or stick
This is one of the best exercises for developing a strong stroke.
In the classic version, it is done as follows:
- shoulder blades are put on;
- a bun (or swimming board) is clamped between the legs;
- we swim only using our hands , our legs are inactive;
- Thus, depending on the level of physical fitness, we swim 50-400 meters (but if you are a beginner, do not overload your shoulders!).
The blades are described in great detail here:
The shoulder blades require much more force to rake water with them, so this method perfectly trains the necessary muscles.
Mill
Starting position: one arm is extended in front of you, the other is pressed.
Then they begin to work simultaneously: one hand makes a stroke under water, the other sweeps above the water. We work in this mode - hands change without catching up with each other.
You can see what it looks like at the sixth minute of this video:
On fists
Swim in full coordination, but at the same time clenching your fists . Try to push the water through your hand (from wrist to elbow).
This teaches the following: - “everything is learned by comparison”: after such swimming you feel much more strongly how your open palm clings to the water - we train the work of the forearm and hand
Correct stroke (wild grip)
Often when swimming, swimmers do not grip the water enough and do not bend their arm enough at the elbow to make a stroke movement.
An exercise that an author from the Silver Swim school calls “Wild Grab” .
Its meaning is to make only rowing movements underwater and, without bringing your hand through, immediately return it forward and make the stroke again.
Thus, progress is achieved only due to the stroke phases , and if you do them incorrectly, then it will be extremely difficult to swim.
Here's what it looks like:
Long stroke
Swimming with alternating hand work (“catch-up”)
This exercise allows you to focus on your arm technique and develop a long stroke.
Algorithm of actions:
You can't argue with that!
- We begin to swim with our arms extended forward;
- We make a stroke with one hand;
- We return it to its original position;
- Then we make a stroke with the other hand.
Counting the number of movements
While swimming through the pool, count the number of strokes it took you.
After that, try swimming the next pool with fewer strokes, and so on.
As a result, the fewer strokes you make over the same distance, the better you glide - you develop a “long stroke”.
High elbow
Along the track divider
The point of this task is to swim along the lane divider , but in such a way as not to touch it with your shoulder area.
In this case, the limb has to be lifted over the top. You need to lie with your right side closer to the lane separator and perform strokes with your elbow raised up. Be careful not to touch the separating element. Do the same on the left.
Bringing your hand near the divider
Holding the thumb near the ear
touch your ear with your thumb for a couple of seconds while moving your hand above the surface of the water .
Only after a delay can the limb be placed into the water.
Military salute
This is an analogue of the previous task - when bringing your hand, we deliberately touch your temple with it . In this way you can train the correct trajectory, raising the elbow.
Fingers in the water while carrying
We make a stroke, but do not take our fingers out of the water while carrying it .
Thanks to this, we gain:
- the position of the elbow is correct (it should look up);
- body rotation.
Try also leaving your entire palm and even your hand in the water.
Thumbs forward
After the hand is placed in the water, we point the thumb forward in the direction of our movement so that the shoulder, elbow (its inner part) and thumb form a straight line.
This allows you to practice stretching and get rid of a common mistake - the tendency of your hands to the center in front of you.
Lightning
After the stroke, the hand slides from the hip to the armpit and back (as if zipping and unfastening a zipper on the side), then is placed in the water.
This trains the raising of the elbow and the trajectory of insertion into the water.
Feeling the water
Take a ping pong ball or similar object with your fingers and swim with it as shown in this video:
This teaches you to feel how your hand clings to the water - while part of your palm is occupied by the ball, you should focus on clinging to the water with the rest of your palm.
Practicing blows on a pear
Working on the bag is an important part of boxing. Thanks to such training, physical fitness improves, the strength and rigidity of the blow develops, and technique improves. However, in order to improve all this, and not harm the body, it is important to practice the blows correctly. Let's look at some important tips that will help improve your boxing skills.
We hit, not just push
Everyone, even an inexperienced boxer, should be able to kill a fly on the glass with a punch. Many coaches say so. Even if this expression is a little exaggerated, it means that the boxer’s blow should be biting, “go deep” into the target.
To achieve this, the fist must make contact with the bag (and in the ring with the opponent) precisely when the entire arm, body and legs form a single stable system. Only in this case will the maximum shock impulse be achieved. If the contact occurs when the hand is still in a bent position, that is, continues to straighten, there will be no whiplash. In the end, everything will feel like a push, not a blow.
Attention! You need to throw your hand out in accordance with the technique, the contact should be short, the hand returns to the starting point along the same trajectory.
You need to hit higher than usual
This principle helps to prepare for an opponent who will be taller. Yes, it’s more difficult to deliver such blows, but as everyone knows: it’s hard in training, easy in battle. When performing strikes, the body muscles receive additional stress and strength endurance increases, which will be a huge additional advantage.
Important! Never give up, even when practicing punches on the bag. It doesn't matter that he won't counterattack you. This way you will get used to the fact that the projectile will not fight back, and you will behave in the same way in the ring. It's best to simulate real combat.
Don't forget about your feet
It is the legs that play a very important role in this sport. They are responsible for the quality of movement around the ring, for coordination (flutter like a butterfly). Plus the initial impulse depends on them. This means that the strength and effectiveness of the blow will depend on the legs. Don't lean forward. Always imagine that in front of you is not a bag, but a real boxer. After all, a real person will not forgive mistakes. For this reason, move more, additionally include bending, diving, and the like.
Don't break the pace, stick to tactics
Use combinations of several hits, 4-5 would be optimal. This will help bring them to automaticity and easily apply them in real combat. It is these series that will be best suited, since longer ones during the battle will be ineffective.
Strike often
Training on a bag involves a more intense regime than in real combat. On pears you need to give your all not 80% or even 100%, but 120% or more. Move smartly, imitate sparring intelligently.
All this will help improve and develop techniques. When you get used to hitting a lot, during a real fight you will be able to mobilize all your strength and carry out several good combinations in a real fight. Plus, how quickly you throw a series will determine whether it will “fly” to you in the interval between the strikes or not.
Hull operation
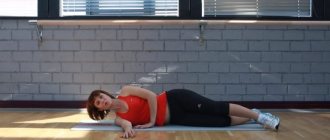
Balance on the chest
Sliding in the pool
Push off from the side and slide with your arms extended forward and your head between them. Ideally, slide underwater for as long as possible before surfacing. Next, slide until you come to a complete stop.
Push from the side and slide
Do 5-10 reps.
Thanks to this, we learn to feel the balance of the body , including feeling whether it is leaning forward, backward or sideways, and we also develop muscle mass in static conditions to maintain a horizontal position in the water.
Sidestroke
Swim the pool on your side using your legs , while one arm (supporting, lower) should be extended forward and the other pressed to the body. When you swim back, change sides.
You can also do a change right during the swim - for example, every six kicks.
Another option for completing this task is shown in this video:
Slip
Skater
Imagine a speed skater who glides across the ice and makes his glide even faster by pushing with his foot .
Try to do the same in water, only our tools in this case will be our hands.
Modify your normal swimming technique (in which you constantly change hands) as follows: after completing a stroke with one hand, do not immediately move the other, but slide a little and only then make a stroke with the other hand. At this moment, imagine yourself as the same speed skater who is gliding and with the movement of his limb only speeds up his glide.
This technique makes it very good to feel that the basic principle of swimming is gliding, and our limbs should only accelerate it.
Five strokes plus a glide
We alternate strokes and side slides, as shown in this video:
Body rotation
Ten by ten
We swim with one hand pressed to the body and the other extended forward, head on the side, mouth above the water. We make 10 kicks, then we make a stroke with our hand, we carry the second one and put it into the water (that is, we change them). Then, after 10 strokes, we repeat this operation again.
During these cycles, we focus on rotating the body .
10/10 with breathing
We do the same as in the previous task, only now we swim with our head in the water and add breathing.
Then we gradually reduce the number of strokes until we move on to the usual six-beat crawl.