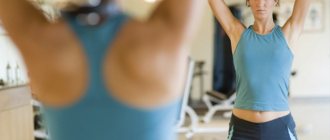
Probably everyone has already heard about yoga. A healthy body, a beautiful and fit figure, spiritual harmony with oneself... The word “yoga” in Sanskrit means “union, union, connection, unity, harmony.” It’s worth thinking about, with what?
Here the opinions of philosophers were divided. For idealists, this connection is nothing more than unity with the deity, high reason or absolute spirit. For materialists, yoga is the practice of integrity, harmony of spirit and body, as a harmony of perfect physical health and spiritual wealth of a person.
The subject of yoga, as an Indian teaching, is the three principles of man: physical, mental and spiritual. The desire to balance them and maintain them in constant harmony.
The mechanism of the influence of yoga on the human body
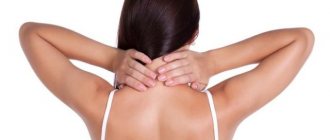
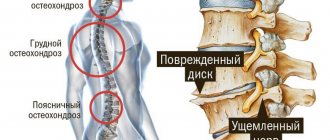
Today, a sore back is a common sign of anxiety at any age. Yoga can (and should) be used as physical therapy for the back and spine, as well as simply as a means of relaxation.
Yoga influences human energy
Types of effects of yoga on the human body:
- Mechanical impact. A significant portion of the asanas engage not only the majority of the muscles, but also those muscles that are not usually used on a daily basis. They involve specific muscle groups and have a mechanical effect on the internal organs of a person through non-standard changes in body shape.
- Humoral effects. The exact sciences of physics and chemistry represent the human body as a collection of vessels filled with various liquids and gases. Yogic asanas allow for their specific hydraulic massage.
- Psychosomatic effects. It's no secret that the psyche is very closely connected with the human body. If you influence the body in any way, you can make changes in your state of mind.
- Stressful impact. Most yoga poses are unnatural for the body. Each asana puts the human body into a stressful state through an unusual body position. However, too much stress has the opposite effect and you need to know when to stop.
- Hormonal influence. Some asanas have a beneficial effect on the endocrine glands by changing the intensity of blood flow, thereby stimulating their work.
- Energy impact. The subject of influence of asanas is human energy. They direct energy in the right direction and give a person strength.
The benefits of yoga for the health of the spine and back
All asanas are performed statically. When a person takes any position, the pressure inside the intervertebral discs becomes less, and the degree of mobility of all parts of the spine increases.
People who regularly practice yoga in their lives have fewer health problems, including back pain, and, accordingly, look better. People who exercise daily have a strong, healthy and flexible back.
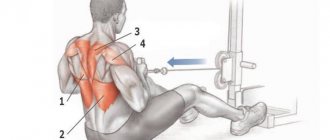
Yoga trains muscles
Yoga has the following effects on the back:
- stretches the spine, increases flexibility, promotes its straightening;
- works the back and neck muscles, which prevents the development of back diseases;
- relaxes tense muscles;
- relieves internal tension, improves mood;
- nourishes the body's cells with oxygen, renews cells, preserves youth through measured and deep breathing;
- makes the back straight, improves posture, reduces curvature;
- increases the mobility of each vertebra;
- strengthens the walls of blood vessels;
- relieves back pain and reduces it with regular exercise.
Indications and contraindications
Yoga classes increase the elasticity of tissues, increase the mobility of each part of the spinal column, restore the functionality of the muscle corset and improve blood circulation. The benefits of therapeutic exercises do not end there. It also helps normalize the functioning of the respiratory and nervous systems, relieve stress and improve overall well-being.
If you want to practice yoga to strengthen the muscles of the back and spine, you need to study the indications and contraindications for the practice. You should also consult an experienced physician. Only a doctor can advise the correct approach to training.
Yoga is effective in the treatment of diseases such as scoliosis, lordosis, arthritis. It can be safely practiced for hernia of the lumbar spine, osteochondrosis of the cervical spine, and protrusions. Nervous disorders, gynecological pathologies, endocrine diseases - all of this can be treated with yoga.
Contraindications to classes are:
- period of exacerbation of chronic pathologies of the spine;
- infections and inflammatory processes;
- rehabilitation period after injuries and operations;
- malignant tumors.
Yoga helps with back pain and impaired joint mobility only if the disorders were detected at the initial stage. Exercises are also effective as a preventive measure and in combination with complex therapy. For successful training, you need to master breathing techniques, learn to relax and listen to your body, and visualize. Yoga is a practice to achieve harmony of soul and body.
Contraindications for yoga
Yoga has a beneficial effect on the body, but it also has contraindications that need to be taken into account before starting classes:
You cannot do yoga with a spinal injury
- migraine;
- schizophrenia, psychosis;
- severe blood diseases;
- hernias in the groin;
- diseases of internal organs;
- traumatic brain injuries;
- hypertension stages 2 and 3;
- spinal injuries;
- infectious joint diseases;
- the first six months after a stroke;
- malignant neoplasms;
- the first 60-90 days after surgery in the peritoneum and chest;
- arthrosis of the joints of the lower part;
- spinal hernia (it is better to consult a vertebrologist and neurosurgeon after treatment to draw up a set of exercises);
- scalene displacements of the vertebrae;
- high joint hypermobility;
- radicular syndrome;
- tachycardia, arrhythmia, aortic aneurysm, uncompensated heart defects;
- during pregnancy and the first three postpartum months (for pregnant women there is a separate complex - yoga for pregnant women, which prepares women for motherhood and maintains normal health for 9 months);
- fever, increased body temperature;
- acute respiratory infections, ARVI;
- suppuration;
- period of menstruation.
IMPORTANT! For all of the above diseases, yoga is strictly contraindicated and can only be performed after treatment!
There are no age restrictions when practicing yoga. If you are 60 years of age or older, it is not recommended to practice yoga therapy on your own; it is better to seek help from an experienced instructor.
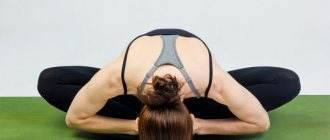
Locust pose – 8 breaths
This asana straightens the shoulders, strengthens the back, buttocks and back of the thighs.
- Lie on your stomach with your forehead on the mat. Feet together, toes pointed.
- Interlace your fingers behind your lower back.
- Stretch your neck, while inhaling, lift your chest and legs.
- If possible, lift your hands from your lower back. Take 8 breaths. On your last exhale, slowly release the position.
Twist lying on your side - 8 inhalations and exhalations on each side
This asana is suitable for stretching the muscles of the chest, shoulders and hips.
- Lie on your stomach, straighten your legs.
- Stretch your arms out to the sides, palms down. Your wrists should be level with your shoulders. Place your right cheek on the mat.
- With your left palm on the floor, roll onto your right shoulder. Bring your bent left leg back and place it on the floor, pointing your knee up. You should feel a stretch in your chest and hips.
- Take 8 inhalations and exhalations and turn onto your stomach.
- Perform the exercise on the other side.
Yoga rules and recommendations for beginners at home
Yoga is a lifestyle. There are a number of recommendations that must be followed when practicing yoga at home.
To improve your health and get your body in shape, you need to:
Start with simple asanas
- exercise regularly at home;
- during classes, do not be distracted by extraneous noise;
- do not force your body.
When practicing yoga, beginners need to follow some rules :
- start with the simplest asanas;
- allocate 15-30 minutes for gymnastics;
- breathe deeply, evenly and calmly (this is very important);
- a quiet and warm place so as not to freeze;
- avoid pain;
- be sure (!) to warm up before training (20-25 minutes): warming up the neck, rotating the arms, body and pelvis, turning the body, bending, jumping, swinging legs, squats, circular movements of the legs and warming up the ankles (to avoid sprains);
- It is better to take a 1-minute break between asanas, completely relax and take a couple of deep breaths to restore your heartbeat.
You need to do asanas slowly, calmly, balancing and maintaining your balance; each time you can increase the time you spend in one of the asanas.
Yoga therapy for the spine. Traction techniques
Traction techniques play a significant role in yoga therapy for spinal diseases (primarily intervertebral hernias). The term “traction” refers to the process of stretching, or the application to the spinal column (or to a separate segment of the musculoskeletal system) of two forces acting in opposite directions. Such forces can be: the force of gravity of the body, the muscular force of the patient himself or an external force (the impact of loads or an assistant). As a result of traction, the pressure in the intervertebral discs decreases, the diameter of the intervertebral foramina through which the nerve roots pass increases, and the muscles and ligaments of the spinal column stretch.
It should be understood that the common term “extension,” so widely accepted today in the yogic community, does not always mean true traction. For example, the so-called “stretching” of the spine in tadasana has nothing to do with traction; alignment in an asana, stretching the crown upward can improve the overall configuration and geometry of the spine, the degree of its physiological bends. However, the weight of the head continues to put pressure on the cervical spine, the shoulder girdle, the neck and head on the thoracic spine, and all of the above together with the chest on the lumbar spine. The spine continues to experience natural stress, there is no mechanical stretching - and therefore this technique is not traction.
True stretching, or traction, has a beneficial effect primarily in cases of intervertebral disc pathology. There are many reports on the reduction of the nucleus pulposus during stretching (J. Matews, 1972, R. Gupta, S. Ramarad, 1978 and others). With an increase in the force stretching the spine (or an increase in the weight of the pulling load), a proportional decrease in intradiscal pressure occurs. This process continues until the weight of the load exceeds 17-20 kg; with a greater load, a reflex generalized tension of the vertebral muscles occurs (Ya.Yu. Popelyansky).
Computed tomographic control showed that in half of those subjected to traction, the hernial protrusion decreased by 2-2.5 times, and the swelling of the root decreased (Akimov G.A., Kovalenko P.A., 1985).
A study comparing two groups of patients with chronic low back pain found that the group receiving exercise, physical therapy, and traction had better results than the second group receiving exercise and physical therapy alone ( Diab AA
., Moustafa IM, 2013).
The effect of traction treatment is worse with a sequestered hernia (Tsivyan Ya.L., 1975). This is quite logical, since the sequestrum, having lost its structural connection with the main nucleus pulposus, can no longer be “pulled” into the intervertebral space when traction is performed.
According to Ya.Yu. Popelyansky, “...radicular pain disappears in many patients immediately with the onset of traction... Under the influence of traction, cervical and lumbar pain often disappear, which is apparently associated with a decrease in the pressure of the hernia on the posterior longitudinal ligament.”
Three mechanisms of action of traction influences can be distinguished. The first is mechanical; the most obvious logically, this option has been studied and confirmed experimentally better than others (see above). Stretching the vertebral segment increases the distance between the vertebral bodies, reduces intradiscal pressure, increases the gradient between the “hernial” and the main part of the intervertebral disc, which promotes retraction of the prolapsed part of the nucleus pulposus; the height of the intervertebral space and the diameter of the intervertebral foramen increase - and this, in turn, reduces the pressure on the nerve root.
The second mechanism - reflex - is based on the fact that stretching acts on the mechanoreceptors of the disc, ligaments, muscles and joints, which largely determines the effect of traction (BD Wyke, 1975). Spinal stretching is not only a mechanical stretching effect, but also an effect on the receptor apparatus of the spine, changing the relationships of various parts of the neuromuscular system, motor zones of the spinal cord and brain, regulation of peripheral blood supply and muscle tone.
The third mechanism involves the impact on the intervertebral joints. The joint capsules have inner layers - meniscoids. The inside of the articular cavity is covered with the so-called chondrosynovial thin and slippery gelatinous membrane. It encloses synovial fluid between its honeycombs, like a sponge (J. Kos, 1968, N.A. Chudnovsky and R.L. Zaitseva, 1986). In polyarthritis, this membrane is the first to be affected, even before the cartilage is damaged. With osteochondrosis in the cavities of the intervertebral joints, displacement of the meniscoid into the joint cavity, as well as its separation, sequestration and pinching of this fragment between the articular cartilages can be observed; this leads to blocking of the joint and disruption of its normal mobility (K. Levit, 1973). With traction effects, the normal position of the meniscoid can be restored, which leads to a temporary reduction in pain or long-term remission (Yung D., Bavermeister H., 1984).
Thus, when performing traction techniques, clinical improvement can be due to: a mechanical stretching effect on the structures of the spine, the implementation of reflex effects on the receptors of muscles and ligaments, as well as due to improved condition (unblocking) of intervertebral joints.
In modern vertebrology, traction is often performed using special devices - traction tables, suspensions, traction is performed in water in special baths, etc. Yoga therapy is aimed at helping a person help himself using a minimum of special means. Therefore, here we will look at those yogic techniques that can be performed by anyone in normal home conditions.
Ardha bhujangasana
(half cobra pose) – traction of the thoracic and lumbar spine (Fig. 1). I.p. – lying on your stomach, arms bent at the elbows, forearms on the floor and parallel to each other. The elbows are located on the floor under the shoulder joints or slightly further towards the pelvis; In this case, there is practically no deflection in the spine, and the entire spinal column forms a gentle arch from the sacrum to the crown (the head does not drop or tilt back, being a continuation of the line of the spine). From this position, we perform a pulling movement with our hands, as if we want to “pull” the floor under us. At the same time, the shoulders smoothly move forward, the spine stretches forward following the shoulders. At the first stage, a dynamic version is performed: the shoulders slowly move forward, the spine stretches and pulls the pelvis and legs, which slowly crawl behind the shoulders. Having dragged the pelvis forward a few centimeters, we move our hands forward and again drag the back of the body along the floor. We repeat the sequence several times; It is better to do this not on a yogic “sticky” mat, but on a relatively slippery floor.
Rice. 1
The static version is performed from the same starting position: “pulling” the floor under us, we move our shoulders forward so that the spine stretches between the shoulders and the pelvis, but we do not develop such force that the pelvis creeps forward; keeping the spine stretched, we remain in this position. The static version can be complemented by soft movements of the shoulders from side to side, while the spine remains stretched (Fig. 2). Fixation in a static version for 1-2 minutes, or several shorter approaches are performed.
In this version of traction, the spine is stretched along the axis with the help of two multidirectional forces - forward movement due to the work of the muscles of the shoulder girdle and the force of gravity of the pelvis and lower extremities.
Rice. 2
Cervical traction while lying on stomach
– affects the cervical spine in isolation (Fig. 3). I.p. – lying on your stomach, hands placed palms down on each other in the throat area, thumbs towards the chest. The elbows are symmetrically extended forward. The chin rests on the ribs of the palms. The head is not tilted upside down; If possible, the top of the head is directed forward, and the neck is parallel to the floor. Sometimes the nose rests on the floor; in this case, the palms should be moved 1-2 cm forward. The fulcrum in this case is the chin; slightly straining the sternocleidomastoid (sternocleidomastoid) muscles of the neck, you need to rest your chin on the ribs of your palms, while relaxing and stretching the back of your neck. Relax your face, breathe freely. Fixation 20-60 seconds.
After the (static) version described above, a dynamic one is performed: while continuing to gently rest your chin on the ribs of your palms, you roll your head from side to side. The back of the neck is relaxed. Repeated rolls for 2-3 minutes.
In this traction, the tensile force is: the force of gravity of the head and the force of the sternocleidomastoid muscles of the neck, on the one hand, and the force of gravity of the chest and the whole body, on the other.
Rice. 3
Cervical traction
can also be performed from a sitting or standing position by pressing the chin onto a fist inserted between the chin and sternum (Ya.Yu. Popelyansky, 1997). It is possible to use a soft polyurethane foam brick instead of a fist (Fig. 4 and 5).
Rice. 4
Rice. 5
Traction of the thoracic and lumbar region in a modification of majariasana
– i.p. standing on your knees and elbows; the elbows rest on the knees (Fig. 6). The spine is straight, the back does not round or bend. The head does not throw back or fall down; the neck and head are a continuation of the line of the spinal column. From this position we perform soft, slow movements, reminiscent of a tug of war - we alternately move the body forward and backward; we stretch the top of the head forward, then the tailbone back; arms and legs are in constant tension, the spine is stretched between the shoulder girdle and pelvis. The movement is performed slowly, almost imperceptibly, with constant self-resistance.
Rice. 6
Dynamic version of adho mukha virasana
. I.p. patient – adho mukha virasana (shashankasana, ardha kurmasana): support on the knees, the front surface of the legs and the back of the feet, the pelvis is located on the heels, the knees are slightly apart, the arms are slightly bent at the elbows, the forehead and forearms are on the floor. If, due to stiffness of the hip and knee joints, the pelvis does not fall on the heels, a bolster or blanket is placed between the buttocks and ankles; if the forehead does not reach the floor, a pillow of appropriate height is also placed. As you inhale, the pelvis rises above the heels (moderately, by 20-30 centimeters), the fingers crawl forward (Fig. 7); as you exhale, the pelvis slowly lowers to its original position, while the fingers “grab” the floor and crawl after the pelvis, creating slight resistance to movement (Fig. 8). In this case, the pelvis is stretched between the shoulders and the pelvis. The sequence is repeated 10-12 times.
Rice. 7
Rice. 8
The effectiveness of some traction techniques can be increased with the help of an assistant (yoga therapist):
Traction with kyphosis of the lumbar region in adho mukha virasana
. I.p. patient – adho mukha virasana (see description in the previous technique).
This traction technique has several stages with a gradual increase in the intensity of the impact. The first stage - the assistant uses the heel of his palm to gently (!) press on the lower part of the sacrum, while the lumbar region becomes kyphotic (Fig. 9). The second stage - the assistant exerts a similar effect, carefully sitting down on the lower part of the patient’s sacrum; at the same time, you should not sit down with your entire body weight, keeping your legs tense and thereby carefully measuring the degree of impact (Fig. 10).
Rice. 9
Rice. 10
The first and second stages mainly carry out kyphosis of the lumbar region. The third stage is traction combined with kyphosis. The patient clasps his hands and places them in the area of the lower third of the assistant's right shin, while the patient's arms should be fully straightened at the elbows. The assistant's right leg is straightened at the knee, the heel is raised above the floor. The left leg is extended forward and bent at the knee. The assistant places the bases of both palms on the lower part of the patient's sacrum. The patient takes a deep breath, then a long, drawn-out exhalation (preferably with the help of ujjayi), while the assistant gently presses his hands on the sacrum, while lowering the right heel down to the floor (Fig. 11 and 12). In this case, the patient’s spine is stretched between two points – the sacrum (fixed by the assistant’s hands) and the shoulder girdle (which is stretched by the movement of the assistant’s right leg).
In this case, traction is combined with kyphosis of the lower back.
Rice. eleven
Rice. 12
If there is a wall bars (or hooks driven into the wall), options for traction effects are also possible:
Adho mukha svanasana in traction version on a belt
– to perform it requires a belt tied to the crossbar of the wall bars at the level of the door handle, or to a hook driven into the wall at the same level. The belt is placed across the pelvis at the level of the inguinal folds, the patient’s heels are located on the floor near the baseboard, or rest against the wall. The legs are straightened at the knees if possible, but it is permissible to bend them slightly. The arms are straightened and brought forward as much as possible; the neck is relaxed. The spine is subject to traction due to body weight (Fig. 13). The position is fixed from 1 to 3 minutes.
Rice. 13
If possible, the assistant can increase traction by grasping the patient's wrists and gently pulling on his arms (Fig. 14); At the same time, the patient receives a setting for complete relaxation.
Rice. 14
Utkatasana in traction version
– here you will need a long belt attached to the top crossbar of the wall bars (or to a hook of the appropriate level). Feet together, legs bent at the hip and knee joints; Straight arms hold onto the belt, so that the arms and body from the hands to the pelvis are extended into one straight line, continuing the line of the belt. The knees are located above the feet or slightly in front. The pelvis “hangs” and pulls the spine down. In addition to this traction effect, a dynamic movement of the pelvis is simultaneously performed on the “hip axis”: the tailbone moves forward (the lumbar kyphosis, Fig. 15), then back and upward (the lumbar lordosis, Fig. 16), the degree of these effects on the lumbar lordosis depends on its severity in a particular practitioner and the current goals of yoga therapy.
In this technique, traction of the lumbar and thoracic regions is achieved due to the gravity of the practitioner’s body. In addition, it is possible to combine stretching with correction of lumbar lordosis.
Rice. 15
Rice. 16
The presence of traction and its degree can be influenced by the activity of the erector spinae muscles and small paravertebral muscles (interspinous, intertransverse, etc.). When these muscle groups are engaged, the vertebrae are brought closer together, fixed relative to each other, and the possibility of stretching the spine decreases (that is, according to some experts, traction becomes less effective). From the above examples, the inclusion of the back muscles can be assumed, for example, primarily in adho mukha svanasana or in utkatasana. Complete relaxation of the back muscles is more achievable in ardha bhujangasana, adho mukha virasana with an assistant. Complete clarity in this case can only be achieved with the help of objective research methods. In any case, when selecting and performing all traction options, you should strive for maximum relaxation of the spinal muscles.
In the examples given, traction of the lumbar spine was most often combined with its kyphosis. Some techniques involve traction of the spine in combination with lordosis of the lower back (baddha-konasana while hanging on a belt). It is assumed that this option is preferable for intervertebral hernias in combination with a decrease in lordosis (“flat lower back”). However, practical experience with the use of traction in combination with lumbar lordosis suggests a greater likelihood of clinical deterioration. In addition, a number of authoritative sources (Dubnov B.L., 1967, Popelyansky Ya.Yu., 1997) indicate the undesirability of performing traction in the position of extension of the spine. Most authors point to the advisability of stretching in the patient’s usual position or in a position of slight kyphosis of the lumbar region (Krasnyansky Yu.I., 1967, Kaptelin A.F., 1972, Buldakova G.E. et al., 1973, etc.).
It is also interesting to choose the mode of traction influence - constant stretching or dynamic, intermittent, with a constant soft change in the force of traction, regular weakening and increasing the force of influence. Some data suggest that the second option (intermittent dynamic exposure) is more preferable. That is, during the duration of the traction effect, the degree of traction should be smoothly cyclically changed, weakening and strengthening it. Changes in traction can be carried out in rhythm with the patient's breathing (increasing it during exhalation and weakening it during inhalation) or in longer cycles. In general, “relatively local, dosed and short-term tractions aimed at a specific part of the spine are most appropriate” (Ya.Yu. Popelyansky).
The force of traction requires careful and careful dosing. In spine clinics, traction is performed using special equipment that allows the tensile force to be measured with an accuracy of up to a kilogram. In yoga therapy, most often there are no such opportunities, so you should start with the mildest influences, gradually increasing the degree of stretching, and here the main criterion will be the patient’s well-being during and after traction. The exposure time should also be increased gradually, from session to session, starting from 30-60 seconds and gradually increasing to 4-5 minutes.
Accuracy and caution are necessary due to the fact that traction can also lead to negative results. Excessive force (for example, hanging on a horizontal bar, as a result of which an excessively large weight is immediately “hung” on the spine) can lead to a reflexive spasm of the paravertebral muscles, increased compression of the spine and pain. Moreover, as practice shows, in a small percentage of cases, such negative reactions can be caused by even minimal traction. The pain sometimes intensifies at the beginning of traction, which may be due to a sharp spastic reaction of the lumbar muscles; however, this does not require immediate abandonment of traction therapy, but a more gradual increase in the load, and, what is very important, preliminary preparation of the spinal muscles (Ya.Yu. Popelyansky); in yoga therapy such preparation will be appropriate, primarily dynamic, practice. Therefore, it is advisable to perform traction effects at the end of the yoga therapy complex.
A positive assessment of the therapeutic effectiveness of various stretching options was given by a large number of authors who report a high percentage of improvements: from 67% to 98% (O. Troisier (1962), P.Ravault, E.Maitrepierre (1960), M.A. Farber ( 1970) etc.). However, in a certain group of patients (4%), traction techniques cause deterioration. Worse and negative results are often obtained with sequestered hernias.
The gradual introduction of traction techniques and a gentle increase in load helps to avoid negative results. And of course, an important aspect here will be taking into account contraindications.
Contraindications
to the use of traction techniques:
1) Vertebral hemangiomas. These benign tumors are a common finding on MRI today, and most often they are asymptomatic. However, in some cases, hemangiomas lead to a number of serious disorders in the functioning of the spine and spinal cord. There are reports that a patient with a hemangioma of the lumbar vertebra developed paraplegia (paralysis of the lower extremities) as a result of traction therapy (Tsivyan Ya.L., 1975)
2) Sequestrated intervertebral hernia (traction can cause further displacement of the sequestrum and worsening symptoms);
3) Structural scoliosis;
4) Compression of the cauda equina;
5) There are complaints that are signals to stop traction (R.Barbor, M.Camb): firstly, increased pain at the first moment of stretching (it is believed that this occurs due to displacement of the sequestrum); secondly, increased pain at the moment of cessation of traction (squeezing out the hernia at the moment of approaching the bodies of adjacent rings); thirdly, the appearance during traction of pain radiating to the leg (displacement of the hernia in the direction of the root).
A general set of hatha yoga exercises to relieve back pain
Hatha yoga is a type of yoga that consists of static exercises aimed at physical strength, health and tranquility. "Ha" means sun, "Tha" means moon.
Exercises for the cervicothoracic spine
Tadasana. This exercise is a good starting point for any yoga routine. Stand up, straighten your lower back. The position of the legs is shoulder width apart. Take a deep breath and exhale. As you inhale, you need to stretch upward, concentrate on the exercise, and as you exhale, return to the starting position. It is enough to do it 5-10 times.
Tadasana exercise
Ardha-Matsyendrasana. When performing this asana, you should not turn around until you feel pain. Breathe calmly and evenly.
Exercise Ardha-Matsyendrasana
Utthita Trikonasana. The left leg should be put forward and the right leg back. You need to raise your right hand up, lower your body down so that the fingers of your right hand touch the floor. The left hand remains up. Turn the body slightly to the left and fix this position. You need to stay in the asana for 8-10 breaths. Breathe calmly and evenly.
Performing the Utthita Trikonasana exercise
Parivatrikonasana. This exercise is similar to the previous one, only performed in a lunge. You need to lunge with your left leg, making sure to maintain a right angle, and your right leg needs to be extended back. You need to reach up with the opposite hand, the body is directed towards the left leg. Don't forget about calm breathing.
Asana Parivatrikonasana
Bhujangasana. Perhaps this asana is one of the easiest. Performed on the stomach, legs straight and moved together. Hands, as if doing push-ups, under the shoulders. You need to raise your body and throw your head back. Breathe calmly and evenly.
Bhujangasana - snake pose
Exercises to work other parts of the spine
Padahastasana. You need to place your feet slightly narrower than shoulder width and bend toward the floor. The back is straight, the legs are straight (mandatory condition). It is not necessary to touch the floor with your palms, since everyone’s level of training is different. With each workout, the stretching will become more perfect. Breathe evenly and calmly. The presence of pain is excluded.
Exercise Padahastasana
Ardha Chakrasana . Stand up straight, feet together. Place your palms together. Raise your arms up and move them, bending backwards. It is worth remaining in the asana for 8-10 inhalations and exhalations. Breathe evenly and calmly. Avoid pain.
Performing Ardha Chakrasana
Child's pose. You need to sit on your heels so that your knees are under your chest. Tilt your body forward, move your arms back. You need to stretch your buttocks towards your heels, and not your whole body forward. This exercise allows you to stretch your back and relieve tension from your spine. Stay in the asana for 8-10 breaths. Breathe evenly and calmly. Avoid pain.
Exercise Child's Pose
Setubandhasana. Perform on the floor with your legs bent. Lift your pelvis and body off the floor. Reach your heels with your hands. Having mastered this asana, you can complicate it a little and clasp your heels with your hands. Hold and stand there for 8-10 breaths. Breathe evenly and calmly. Avoid pain.
Setubandhasana exercise
Exercises for scoliosis
With diseases of the spine such as scoliosis or osteochondrosis, you need to be especially careful; if pain occurs, you must immediately stop exercising.
Marjariasana. Simply put, cat pose. You need to get on all fours, arch your back up, and then gently bend your back, while throwing your head back. Stay for 8-10 breaths. Breathe evenly and calmly. Pain should be avoided.
Marjariasana - Cat Pose
Shalabhasana. Lying on your stomach, take your arms back, clasp them and raise your body. Stay in the asana for 8-10 breaths. Breathe evenly and calmly. Avoid pain.
Performing Shalabhasana pose
Kapotasana. Sit on the floor, put one leg back, the other bent, bend your back, leaning on your palms or fingers. Further, the exercise can be complicated: raise your straight arms up and bend back as much as possible. Stay in this position for 8-10 breaths. Pain should be avoided.
Kapotasana is performed in different variations. Having mastered the basic pigeon pose, you can bend your outstretched leg and reach your head towards your leg.
Kapotasana or pigeon pose
Asanas for spinal hernia and osteochondrosis
Adho Mukha Svanasana (downward facing dog). In a pose on all fours, the legs and arms are straight. Stay in the asana for 8-10 breaths. Breathe evenly and calmly. Avoid pain.
The exercise becomes more difficult if you raise your leg up. This exercise is beneficial for both the back and abdominal muscles. Works the muscles of the legs and upper body.
Adho Mukha Svanasana - Downward Facing Dog Pose
Virabhadrasana. Lunge forward with your leg (leg parallel to the floor, angle is 90 degrees), extend your arms and throw your head up, arch your back. Hold for 8-10 breaths. Breathe evenly and calmly. Avoid pain.
Virabhadrasana pose
Baddha Konasana (butterfly pose). Sit on the floor, bend your legs. Connect your feet in “namaste” and stretch your knees towards the floor. You can sit straight, or you can lean forward or backward, stretching your back. Hold for 8-10 breaths. Avoid pain.
Baddha Konasana (butterfly pose)
Exercises for joints
Ardha Urdhvasana. Stand up straight, pull your heel toward your buttock with your hand, and extend your other hand up. Next, you need to raise your leg even higher and bend your back more. When performed regularly, the arch in the back will increase, and the leg will rise higher. Stay in the asana for 8-10 breaths. Breathe evenly and calmly. Be sure to avoid pain.
Exercise Ardha Urdhvasana
Malasana. You need to squat down and spread your legs, while stretching your back. Gradually bend down. Staying in the asana costs 8-10 inhalations and exhalations. Breathe evenly and calmly. Avoid pain.
Malasana pose
Asanas for a stooped back after 80 years
Pavanamuktasana. Perform on the floor, on your back. Pull your knees towards you and grab them. It’s worth holding for 8-10 breaths. Breathe evenly and calmly. Avoid pain.
Urdva Mukha Savasana. Lying on your stomach, connect your lower limbs, raise your body, bending your elbows. It’s worth holding for 8-10 breaths. Breathe evenly and calmly. Avoid pain.
Pavanamuktasana pose
Performing Urdva Mukha Shavasana
Exercises for pregnant women
Tree pose. Stand up straight, put your feet one next to the other. You need to lift one leg and place your foot to the middle of the thigh of the other leg. Place your hands together and raise them up. Stay in the asana for 8-10 breaths. Breathe calmly and evenly. Avoid pain.
Upavishta konasana. Sitting on the floor, spread your legs to the sides. Reach forward, left and right. This allows you to strengthen the muscles of the pelvis and sides. Hold for 8-10 breaths. Don't forget about deep breathing. Avoid pain.
Upavista konasana for pregnant women
Exercise Tree Pose
Iyengar yoga for back
Iyengar yoga is another type of yoga that closely resembles hatha yoga and was developed by Bellur Krishnachar Iyengar. He wanted everyone to practice yoga, regardless of age, level of flexibility and plasticity, physical fitness and gender.
Iyengar yoga masters say that asanas must be performed in a certain order in order to achieve maximum healing effects.
Virabhadrasana. Stand up straight, lean forward. Raise your straightened left leg back, arms straight forward. It is worth staying in the asana for 8-10 inhalations and exhalations. Breathe evenly and calmly. Avoid pain. The exercise trains the muscles of the arms, neck, and legs. Works the abdominal muscles.
Virabhadrasana pose
Kumbhakasana. Lie on your stomach and rise from this position on straight arms. Legs are straight, you need to stand on your toes. Remaining in this position, take 8-10 breaths. Don't forget about proper breathing. When performing the exercise, the shoulders, back, stomach and legs are involved.
Kumbhakasana exercise
Dharunasana. From a position on your stomach, bend over, bend your legs, and grab your ankles with your hands. Pull yourself towards your feet, arching your back as much as possible.
Performing Dharunasana
Kundalini yoga lessons for the back and spine
Kundalini yoga is the identification and proper use of a person’s internal resources. This type of yoga is aimed at full self-awareness and working with energy channels and cleaning them.
General structure of the lesson:
- Warming up, chanting mantras.
- Kree.
- Relaxation.
- Singing mantras to finish.
Paschimottasana. You need to sit down with your legs straight and together. The toes point straight up. Lean forward, stretch your chest (not your head!) as low as possible towards your feet.
Paschimottasana pose
Prasarita padottanasana. Stand up, straighten, legs wide apart. Lean forward so that your head touches the floor. If you can’t reach your head to the floor, you can bend your elbows, put them together and touch the floor with them.
Performing Prasarita padottanasana exercise
Garudasana. You need to stand in Tadasana, bend your legs slightly, braid one leg over the other so that the toes of one leg hook onto the shin of the other. The back is straight, arms are crossed.
Garudasana pose
Asanas for back treatment
There are a very large number of positions in yoga - asanas. However, only certain ones are suitable for the treatment and prevention of back diseases.
Table. Useful asanas for the back.
| Name | Description |
| Tadasana | This is the so-called stretching asana, it is performed at the very beginning of classes. You need to sit comfortably, raise your arms up and feel how the spine is gradually fully extended. After this, the arms are bent at the elbows and spread so that the shoulder girdle is parallel to the floor level, but the hands are facing upward. In this position, you need to turn your head in both directions and tilt it back. This asana improves neck mobility and has a beneficial effect on the cervical spine. |
| Padahastasana | When performing this asana, you should bend forward, rounding your back. The tilt begins from the neck area, while the chin drops to the chest. Next, the remaining parts of the spine slowly bend. |
| Ardha Matsyendrasana | It can be performed in several versions, including lightweight and classic. A simple option is to stand at a vertical surface at some distance (about a step) from it, take a breath and raise one (right, for example) arm, and then turn your upper body to the right, trying to touch the wall. When returning to the previous position, exhale. Ideally, this asana is performed with the right leg bent and positioned on the thigh of the same leg. In this case, the fingers should touch the buttock on the left. The left leg is bent and crossed over the right knee. Next, you need to turn your body to the left and put your right hand under your left knee. The hand on the left is removed in a bent position behind the back, both hands should be tried to be locked. |
| Trikonasana | With this asana, the hip joints are well worked out. You need to straighten your back, relax and lower your arms, and raise your head. |
| Pariva Trikonasana | To perform this asana, the leg on the right side is bent at the knee so as to form a right angle, and the other is lunged to the right. The toes of the right foot point to the side, the left toes point straight ahead. The body leans towards the bent leg, and the left arm reaches up and to the right at the same time. The second hand is placed on the bent leg. The head definitely goes up. The ideal option is to reach the chest part of the body to the thigh. |
| Parivrtta Trikonasana | You need to stand so that your feet are shoulder-width apart. Afterwards, you need to bend over and place your right hand near your left foot, and keep your fingers towards the heel. The hand on the left rises up, the head turns back. |
| Utthan-Prishthasana | You need to sit on your knees and lower your chest to the floor. The arms are extended forward as much as possible and held straight. |
| Setu Bandhasana | You need to lie down and bend your leg, then raise your pelvis and back area to the shoulder blades. You can rest your hands on your back or try to reach your ankles. Elbows do not move out to the sides. The head must rest against the chest, and the neck lies firmly on the floor. |
Also useful for the back are asanas such as Ardha Chakrasana, Mrinasana, Ushtrasana and many others. However, it is better to find out the exact and most suitable complex from a trainer.
What to do if your back hurts after yoga?
Pain in the muscles for 1-2 days is normal; the body adapts to physical activity. If your back continues to hurt for several days, you can relieve pain using a massage, as well as resorting to a hot aroma bath or warming ointments.
But it is best to consult a specialist: a chiropractor, a surgeon, a neurologist. He will help you understand what happened and get rid of pain.
Book by Aloise Raab “Yoga against poor posture and back pain”
This book is suitable for those who have long wanted to learn yoga, but never got around to it. The book describes in detail various asanas that have a positive effect on the back and spine. Its difference lies in the addition of the Crocodile asana. The impact of each exercise on the spine and various parts of the back is described in detail in the lessons.
Followers of Aloyse Raab say that “Yoga for poor posture and back pain” will help cure poor posture and back pain, making your back straight, beautiful and healthy.
Features of yoga for the back
Yoga methodology for beginners, as well as special therapeutic and health complexes for the back and spine are aimed at:
- increasing the strength of many different muscles of the neck, shoulders, back and chest, which form a muscular corset that supports the spinal column in the correct position;
- natural traction of the spine, which strengthens the paravertebral tendons and stretches the muscles to straighten the back and give it flexibility, which can increase a person’s height and overcome mild stages of spinal diseases;
- relaxation of the nervous system, which relieves pain and fatigue of the back, and corrects posture.
Yoga classes are a necessary prevention of diseases both with a sedentary lifestyle and with a passion for sports - running and strength training must be accompanied by a special stretching complex aimed at protecting the spinal column from injury and excessive stress.
If, with a healthy, and therefore sufficiently flexible spine, independent training can be a good preventative measure, then in the presence of injuries and illnesses, one should begin mastering asanas only as directed and under the supervision of specialists.
Pilates or yoga – which is better for your back?
Pilates is one of the types of fitness that is aimed at strengthening muscles, improving posture, coordination and balance, and increasing flexibility.
Yoga is a religion and philosophy that requires a more serious approach than Pilates. Yoga consists of 8 levels that help you to know yourself, develop internal energy, harmony, and work with the chakras.
Yoga is an excellent assistant in the fight for a healthy back, flexibility of the body and clarity of mind, which will help keep the body in good shape, achieve mental balance and harmony with oneself.
Pilates and yoga have, perhaps, only one similarity - proper breathing techniques. Pilates should be chosen by those who want to strengthen their abdominal muscles and improve their back health, and yoga - by those who want to improve their back health and get to know their inner self.
The best yoga asanas for a sore back
Attending a yoga class or retreat is a great way to challenge yourself, but you can also practice at home with a program specifically designed to relieve back pain.
Downward Facing Dog (Adho Mukha Svanasana)
This is one of the most famous yoga poses.
This asana is designed to strengthen the entire back and help prevent pain from occurring. It lengthens the spine and neck while stimulating stretching of the back muscles. By allowing the head to relax, this pose reduces tension in the neck and allows the spine to open up.
This asana relieves lower back pain and is suitable for safe practice during pregnancy.
Cat and Cow (Marjaiasana / Bitilasana)
This is another, no less popular pose. The Cat-Cow sequence is well known for its ability to relieve back pain.
The Cat Pose is believed to work the muscles and thereby relieve tension in the neck and upper back. This fact makes these two asanas an excellent choice for those who sit at the computer all day.
The gentle back and forth motion of the pose increases the flexibility of the spine, so those recovering from injury or dealing with age-related spinal problems should consider adding this pose to their routine.
Mountain (Tadasana)
This classic yoga pose is a great way to improve your posture.
Poor posture is a contributing factor to back pain, but this famous asana was tailor-made for our modern society.
When performing Tadasana, you should stand up straight, breathe evenly and try to align your neck and spine.
This easy pose can be done during the workday to take a break from working at the computer.
Child's Pose (Balasana)
This pose brings peace and stretches the back, calming the mind and helping to reduce lower back and neck pain.
Do Balasana when you need a break or a strong stretch.
It is also suitable for pregnant women.
King of Pigeons Pose (Eka Pada Rajakapotasana)
Pigeon pose is good for stretching the muscles of the pelvis, hips and lower back.
Flexibility in the pelvis and hips helps maintain good posture and can reduce the discomfort associated with sciatica.
To perform this asana comfortably, you may need a pillow or yoga block.
Inverted Triangle (Parivrtta Trikonasana)
No sequence of yoga asanas for back pain would be complete without twists – exercises for the spine.
Not only do twists help improve your balance and posture, but they can also help reduce back pain.
While performing this pose, pay attention to the legs: they should contribute to stability, not fixation of the knees.
Seated Forward Bend (Paschimottanasana)
Performing this simple back stretch pose requires you to sit up straight and gently reach toward your toes, thereby stretching your back and hamstrings.
This asana is suitable for everyone because you control the strength of the stretch.
If you can't reach your toes, simply wrap the strap around your feet and hold on.
Stretch Pose (Uttanasana)
This relaxing asana stretches the back, pelvic muscles and hips.
Like the previous pose, Utatnasana can be easily modified to suit your skill level.
For a deeper stretch, you can lift your heels off the floor. On the contrary, to reduce the intensity, bend your knees slightly.
Fish (Matsyasana)
This pose is often used at the end of a yoga class to prepare the body and mind for Savasana.
Pisces pose is often practiced using a yoga block. It stretches the throat, hips, ribs and chest while strengthening the upper spine, directly reducing stress on the spine and neck.
This pose also provides a stretch to your abdominal muscles, so you can use it after an intense workout. Remember that your abs and lower back are connected, so weak abdominal muscles can lead to back pain.
Eagle (Garudasana)
This is another asana that helps improve your balance. This challenging pose gently stretches the upper back and shoulders, relieving the risk of sciatica. To maintain balance, focus entirely on your core muscles.
Camel (Ustrasana)
Camel pose stretches the entire front of the body and increases the flexibility of the spine. This backbend is used to get rid of the consequences of a sedentary lifestyle. If you sit behind the wheel of a car or in front of a computer screen all day, this pose can relieve tension in your neck and shoulders. Camel Pose can provide a good stretch, but it is not suitable if you suffer from migraines. It is permissible to perform this asana during pregnancy or if you have a lower back injury, but be careful not to pinch or strain your lower back.
Grasshopper (Salabhasana)
One of the best ways to treat lower back pain is to prevent it altogether, and to prevent back pain, you not only need to reduce stress and (maybe) make lifestyle changes, but also have strong abdominal and lower back muscles.
Locust Pose is a calming asana that stretches the entire spine while strengthening the core, back, glutes, and hamstrings. It also provides a good massage for the internal organs. If you perform the asana carefully enough, you can use it to relieve lower back pain and sciatica.
This position is contraindicated for pregnant women.
Inverted Body Pose (Viparita Karani)
This pose is good for older adults because it doesn't require much strength or flexibility while having a lot of payoff.
This relaxing pose releases tension in the back and pelvic muscles, providing a stretch for the hamstrings and lower back. To enhance the benefits of the asana, place a pillow under your hips to raise them slightly off the floor.